To maintain accurate financial tracking, revenue logging, and cost analysis, time entries in Rocketlane need to be mapped to specific project budgets.
This article explains how to configure time-tracking restrictions, log hours against the appropriate budget, and group time entries to review tracked time by budget.
In this article
Time Tracking with Budgets
Time entries need to be associated with budgets for accurate revenue and cost tracking.
Configure time tracking restrictions
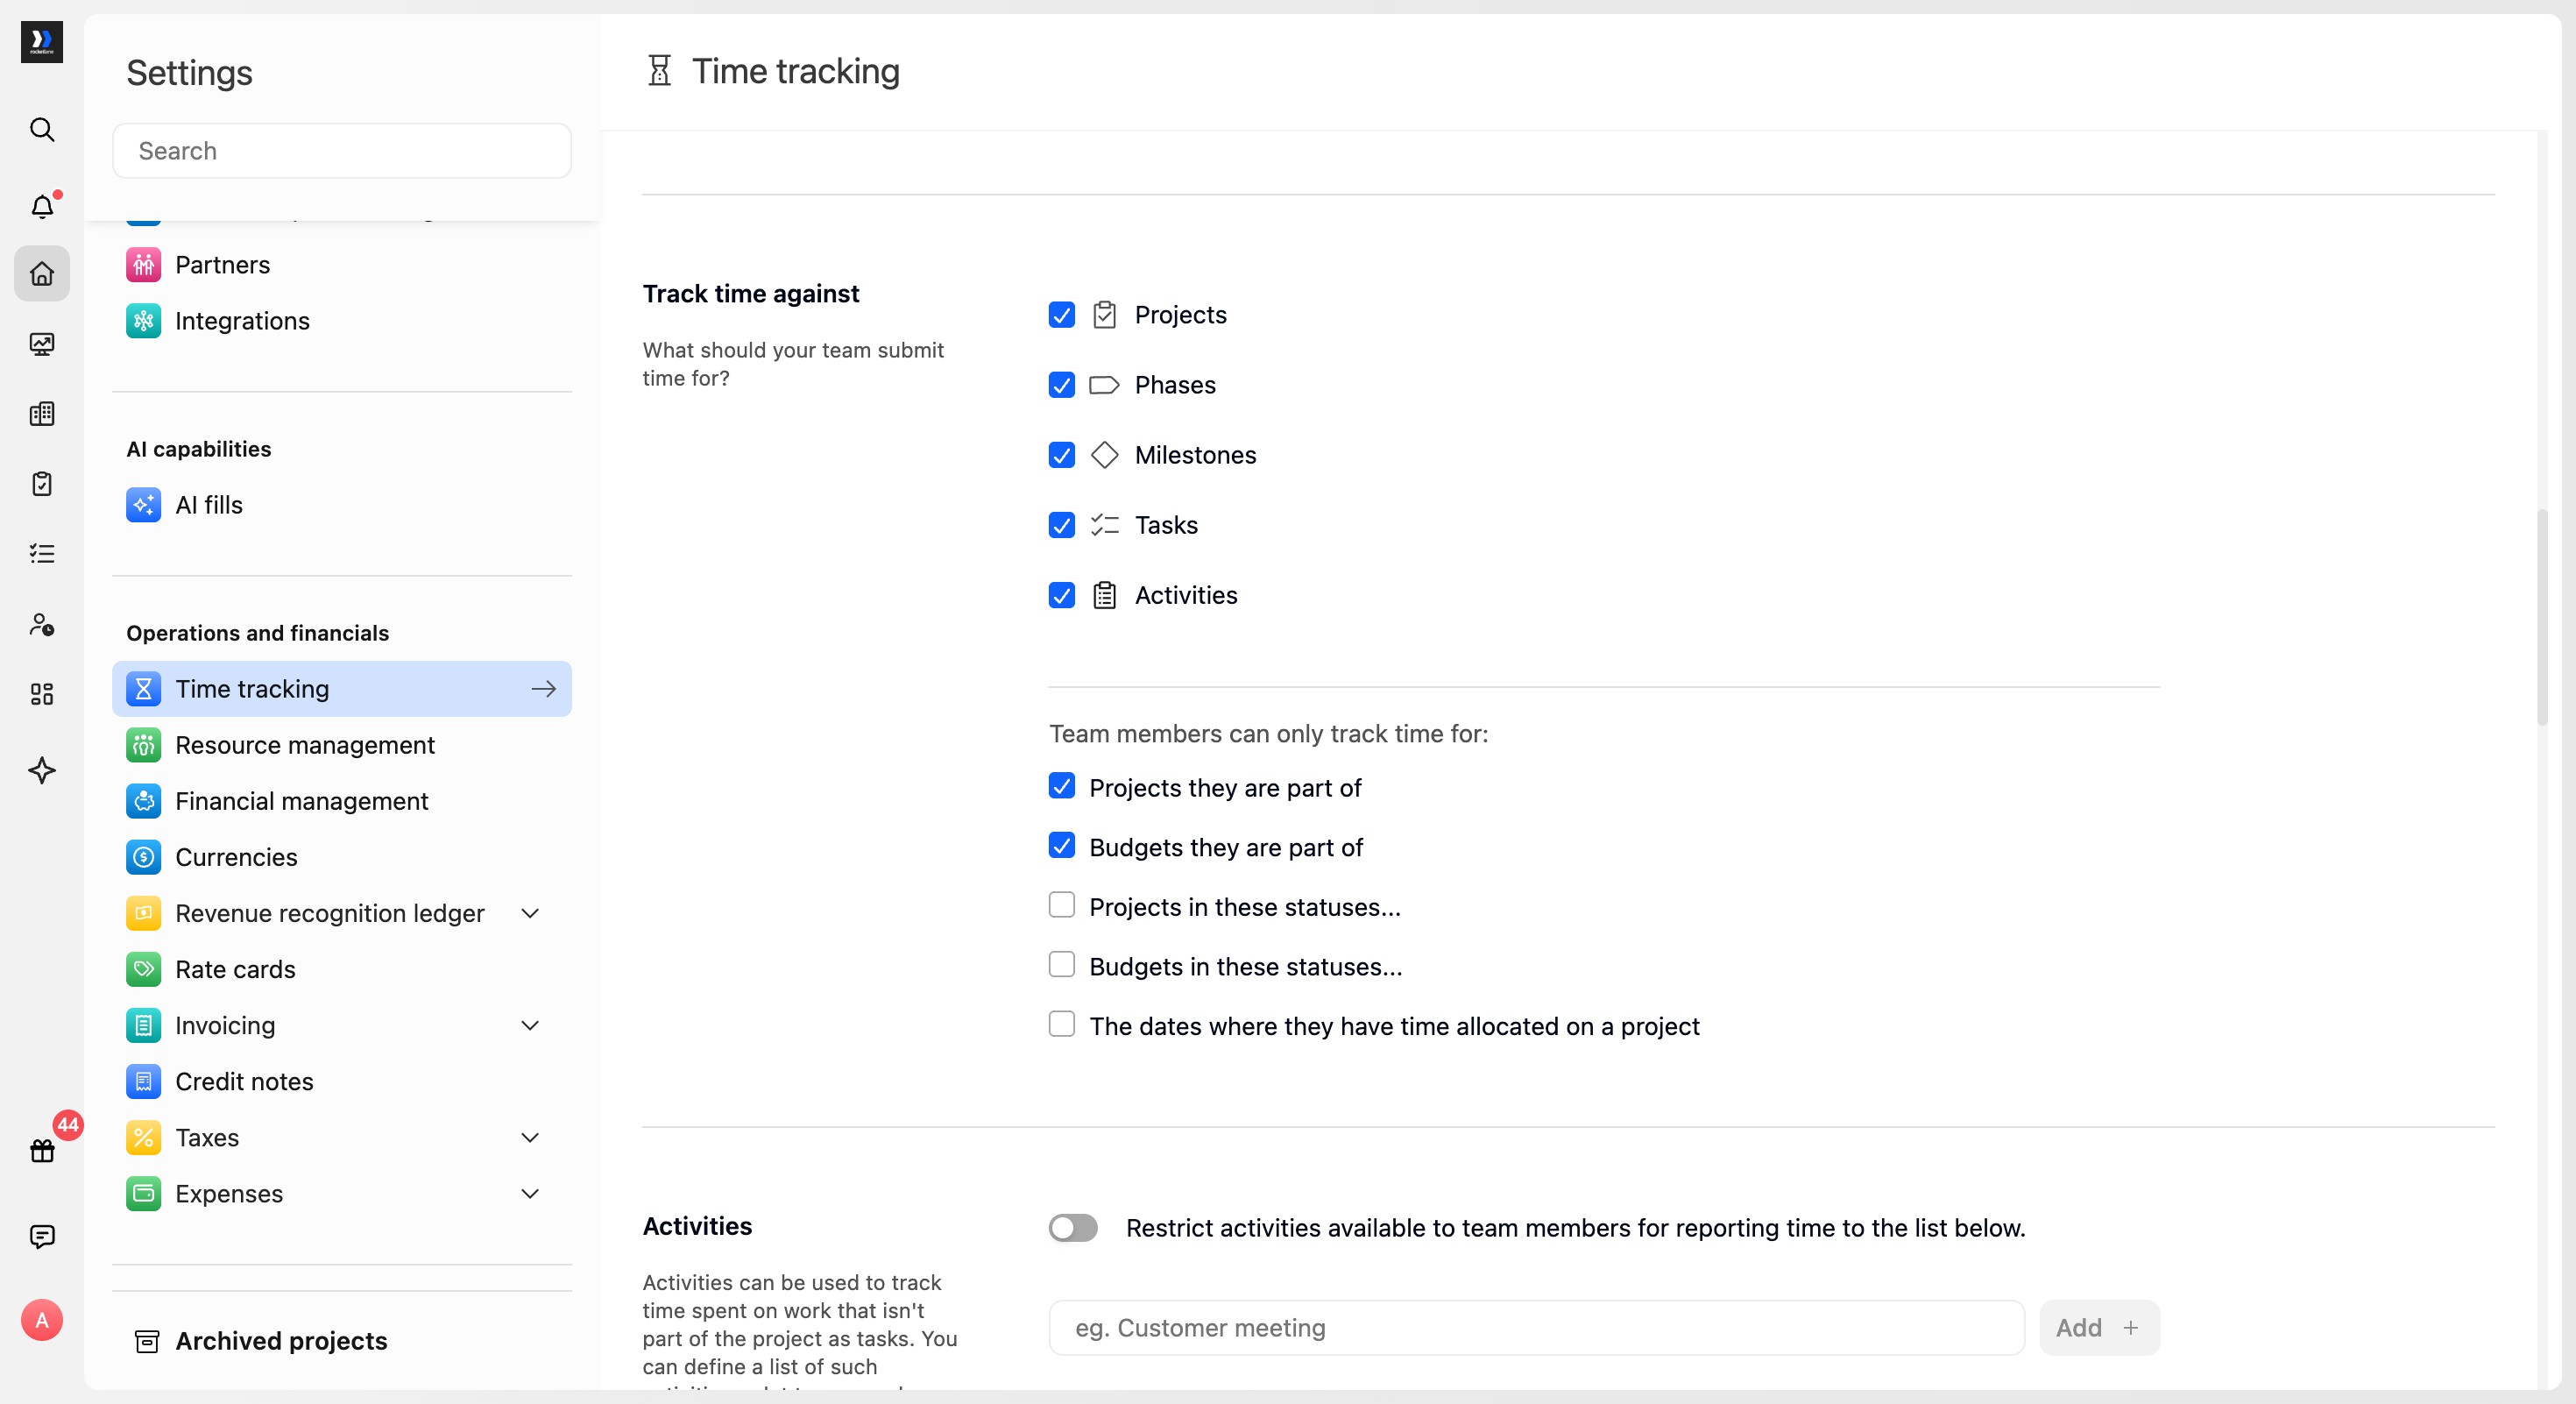
Admins can restrict the projects and budgets that team members can select while logging time.
- Click your profile icon in the bottom-left corner.
- Select Settings.
- Under Operations and financials, select Time tracking.
- Under Team members can only track time for, select Projects they are part of and Budgets they are part of.
This restricts time-entry choices based on project and budget membership.
Create time entries
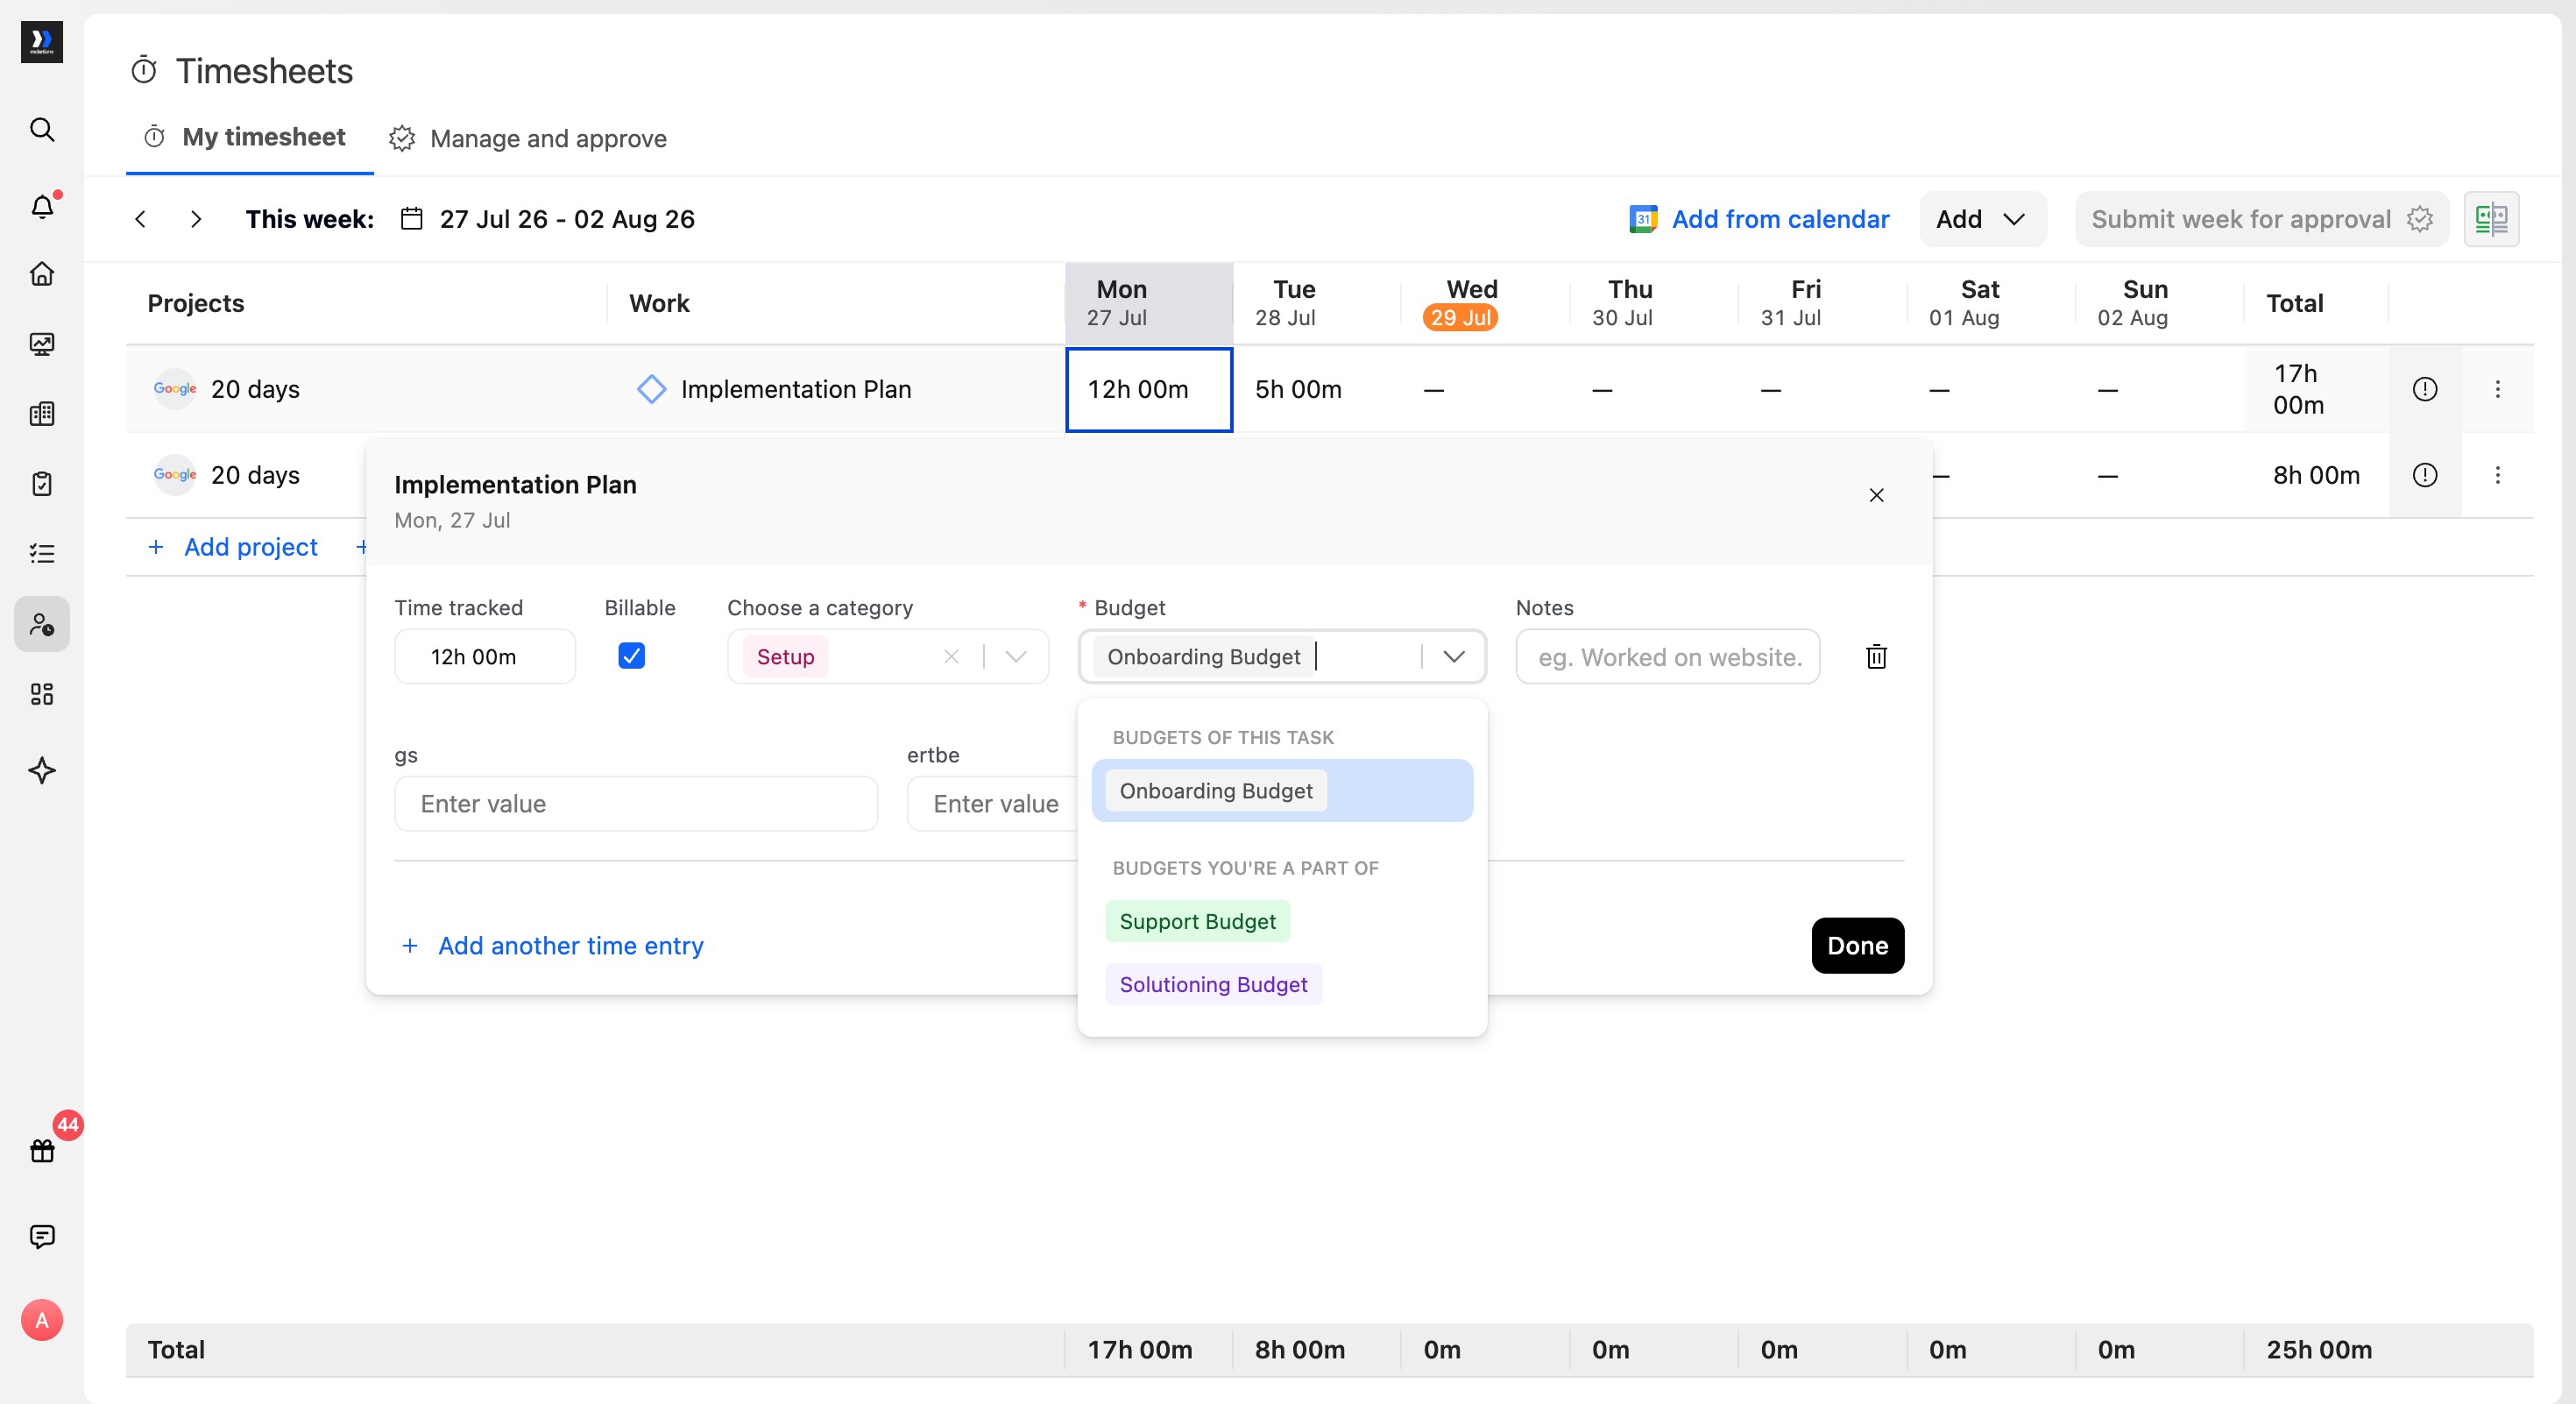
Team members can select the relevant budget while creating a time entry from Timesheets.
- Open Timesheets.
- Select a day’s cell for the relevant task.
- In the time-entry modal, enter the tracked hours and choose a category, if applicable.
- Open the Budget dropdown.
- Select the appropriate budget from the available options.
- Click Done to save the time entry.
- When the week is complete, click Submit week for approval in the top-right corner of Timesheets.
Budget options are grouped under:
- Budgets of this task
- Budgets you’re a part of
A budget may be prefilled when:
- A default project budget exists and no task-level budget overrides it.
- The task or phase has only one budget assigned.
Grouping time entries by budget
When a project has multiple budgets, reviewing time only by project or team member may not show how hours are distributed across different workstreams.
List View lets you group time entries by budget and combine Budget with other fields. For example, you can group entries by Project > Budget > Team member to see how time is distributed across each budget and who logged it.
You can apply up to three grouping levels when Multiple Project Budgets is enabled.
Group time entries by budget
- Open one of the following List Views:
- Account-wide: Go to Timesheets > Manage and approve > List view.
- Project-specific: Open the project and go to Financials > Tracked time.
- Select Group by at the top of the list.
- Choose the first grouping level, such as Project.
- Add Budget as the second grouping level.
- If required, add a third grouping level, such as Team member.
With Project > Budget > Team member selected, time entries are grouped first by project, then by budget within each project, and finally by the team member who logged the time.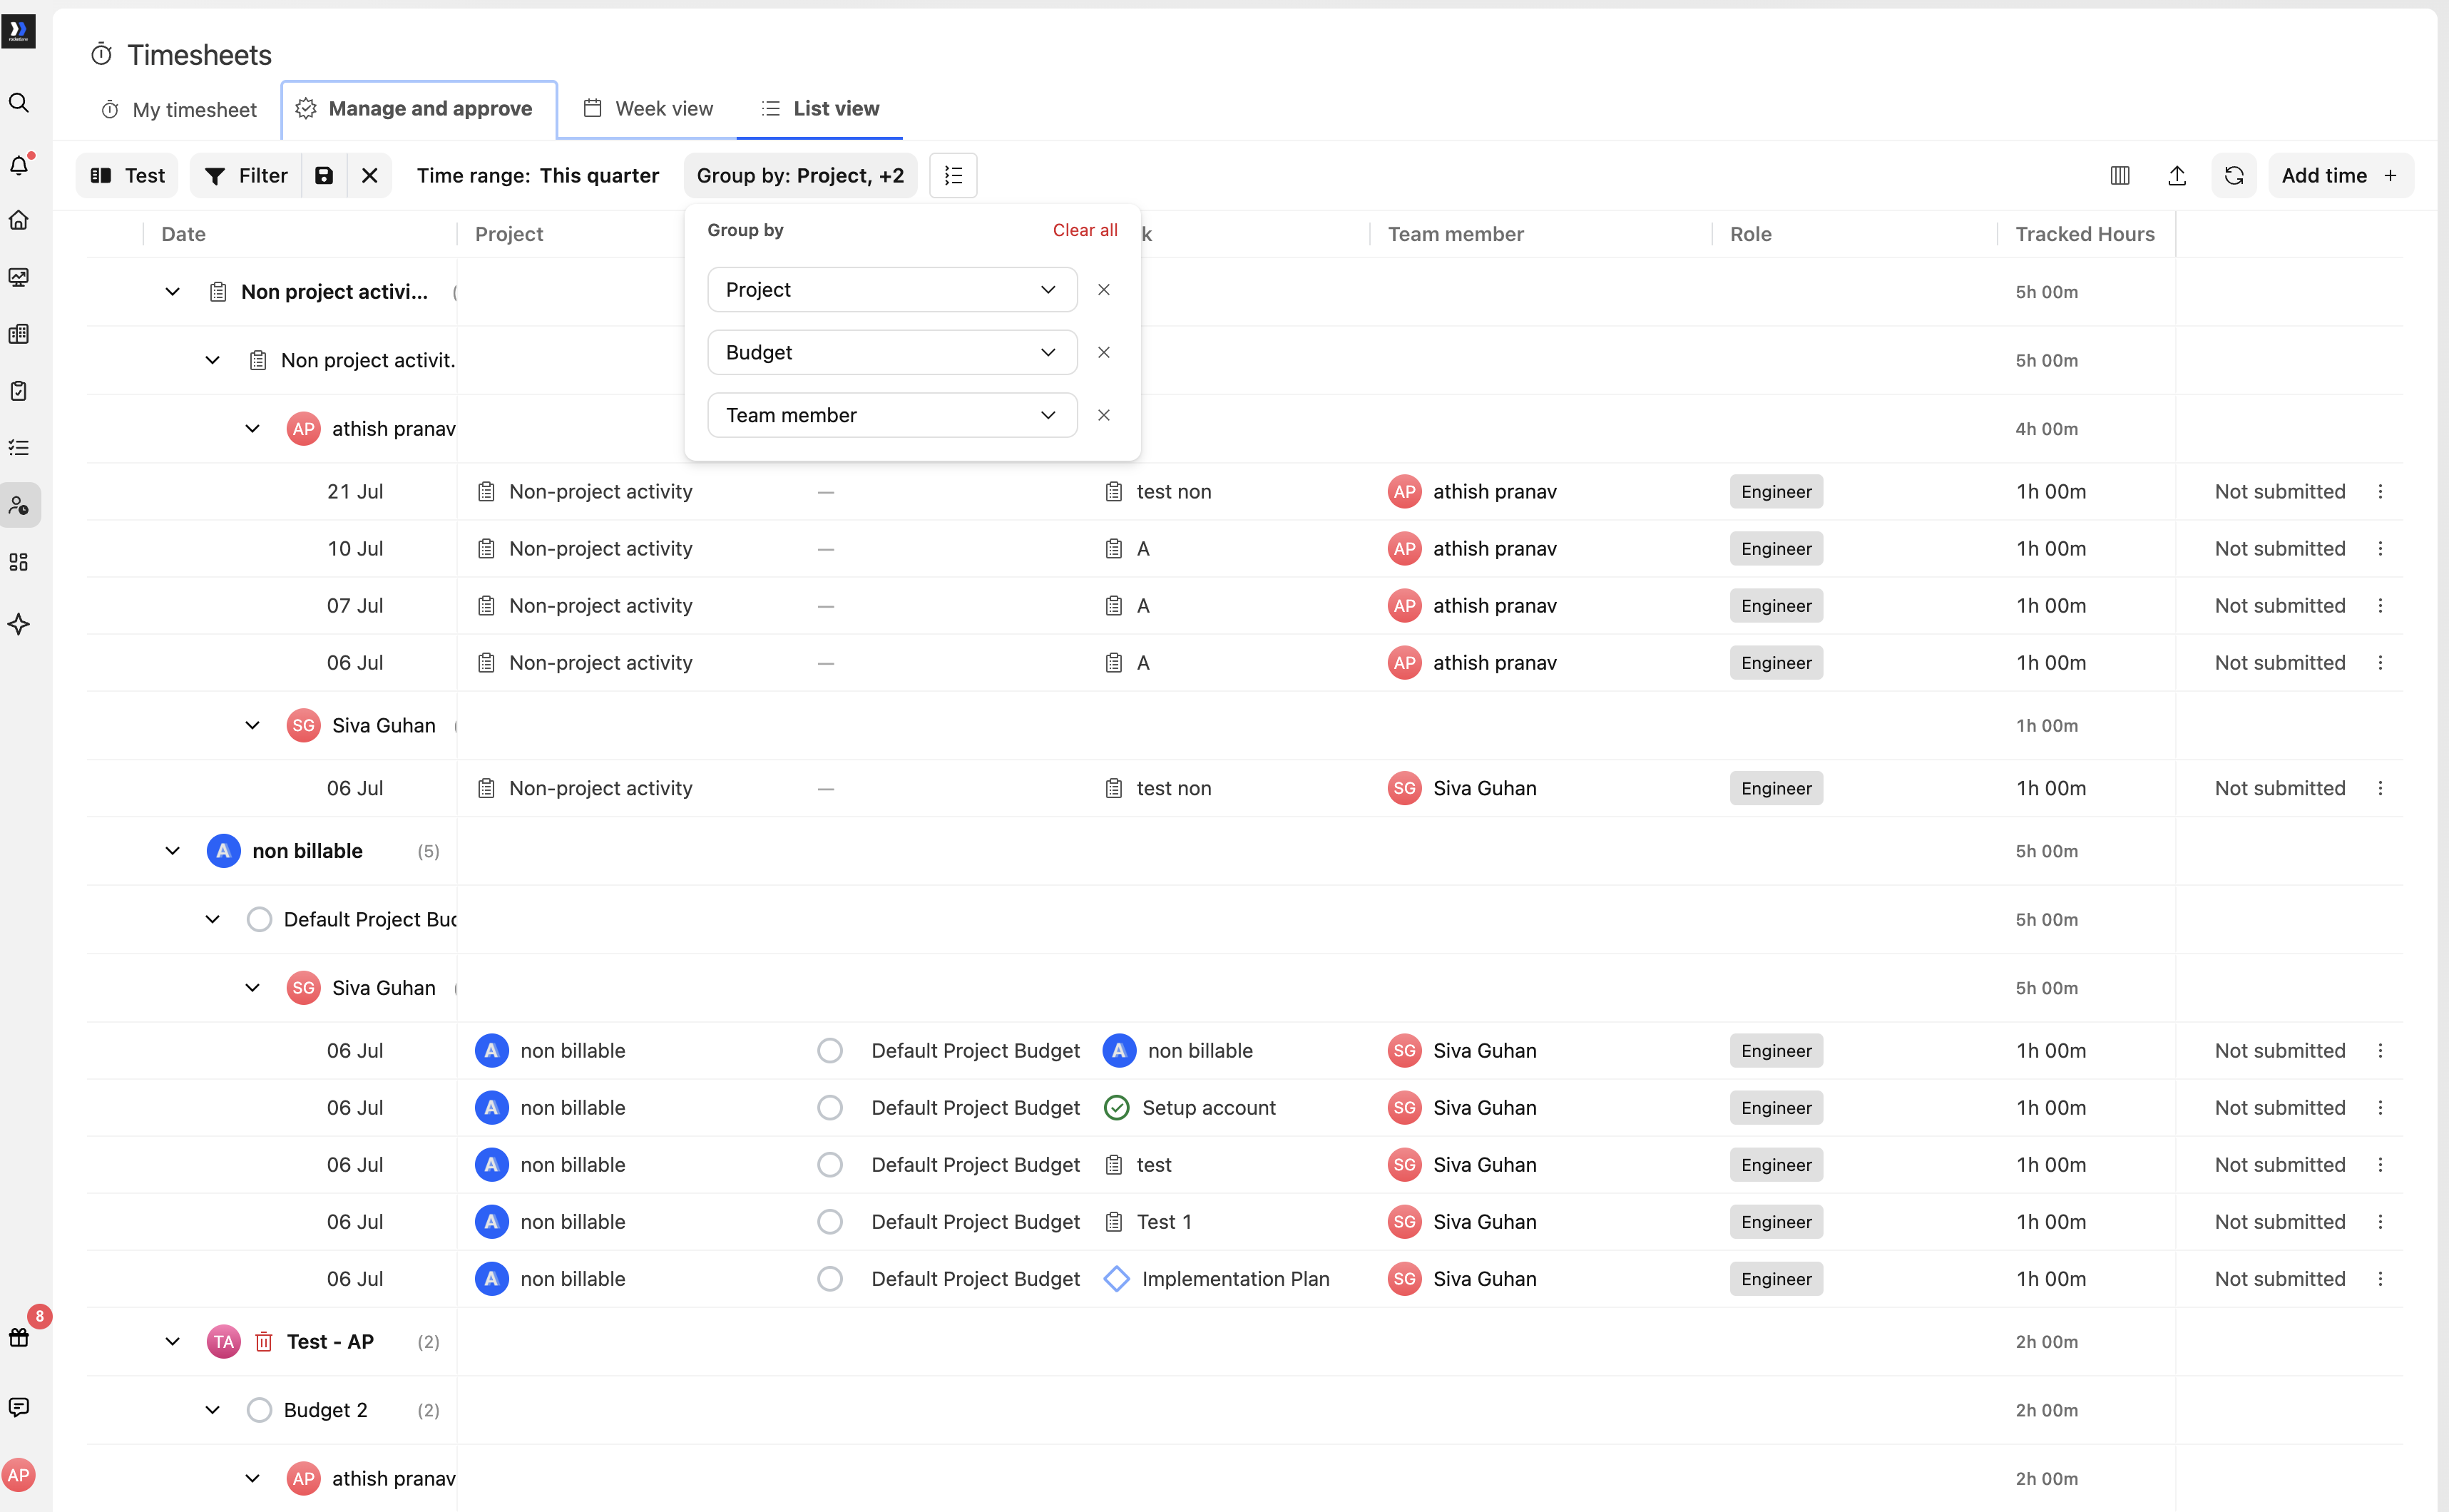
Available grouping fields
Depending on the List View and grouping level, you can group entries by:
- Team member
- Task
- Phase
- Project
- Role
- Status
- Category
- Budget
Save your grouping
Rocketlane remembers your grouping selection in the same browser on the same device.
If you open List View from another browser or device, the grouping returns to its default configuration. Save the configuration as a named view when it needs to be:
- Available across browsers or devices
- Reused later
- Shared with other team members
A saved view retains its grouping configuration regardless of the browser or device used to open it.