In this article
When you enable multi-budgets, resource management becomes much more granular. Instead of allocating team members only at the overall project level, you can view, assign, and manage resource allocations for individual budgets directly within the project.
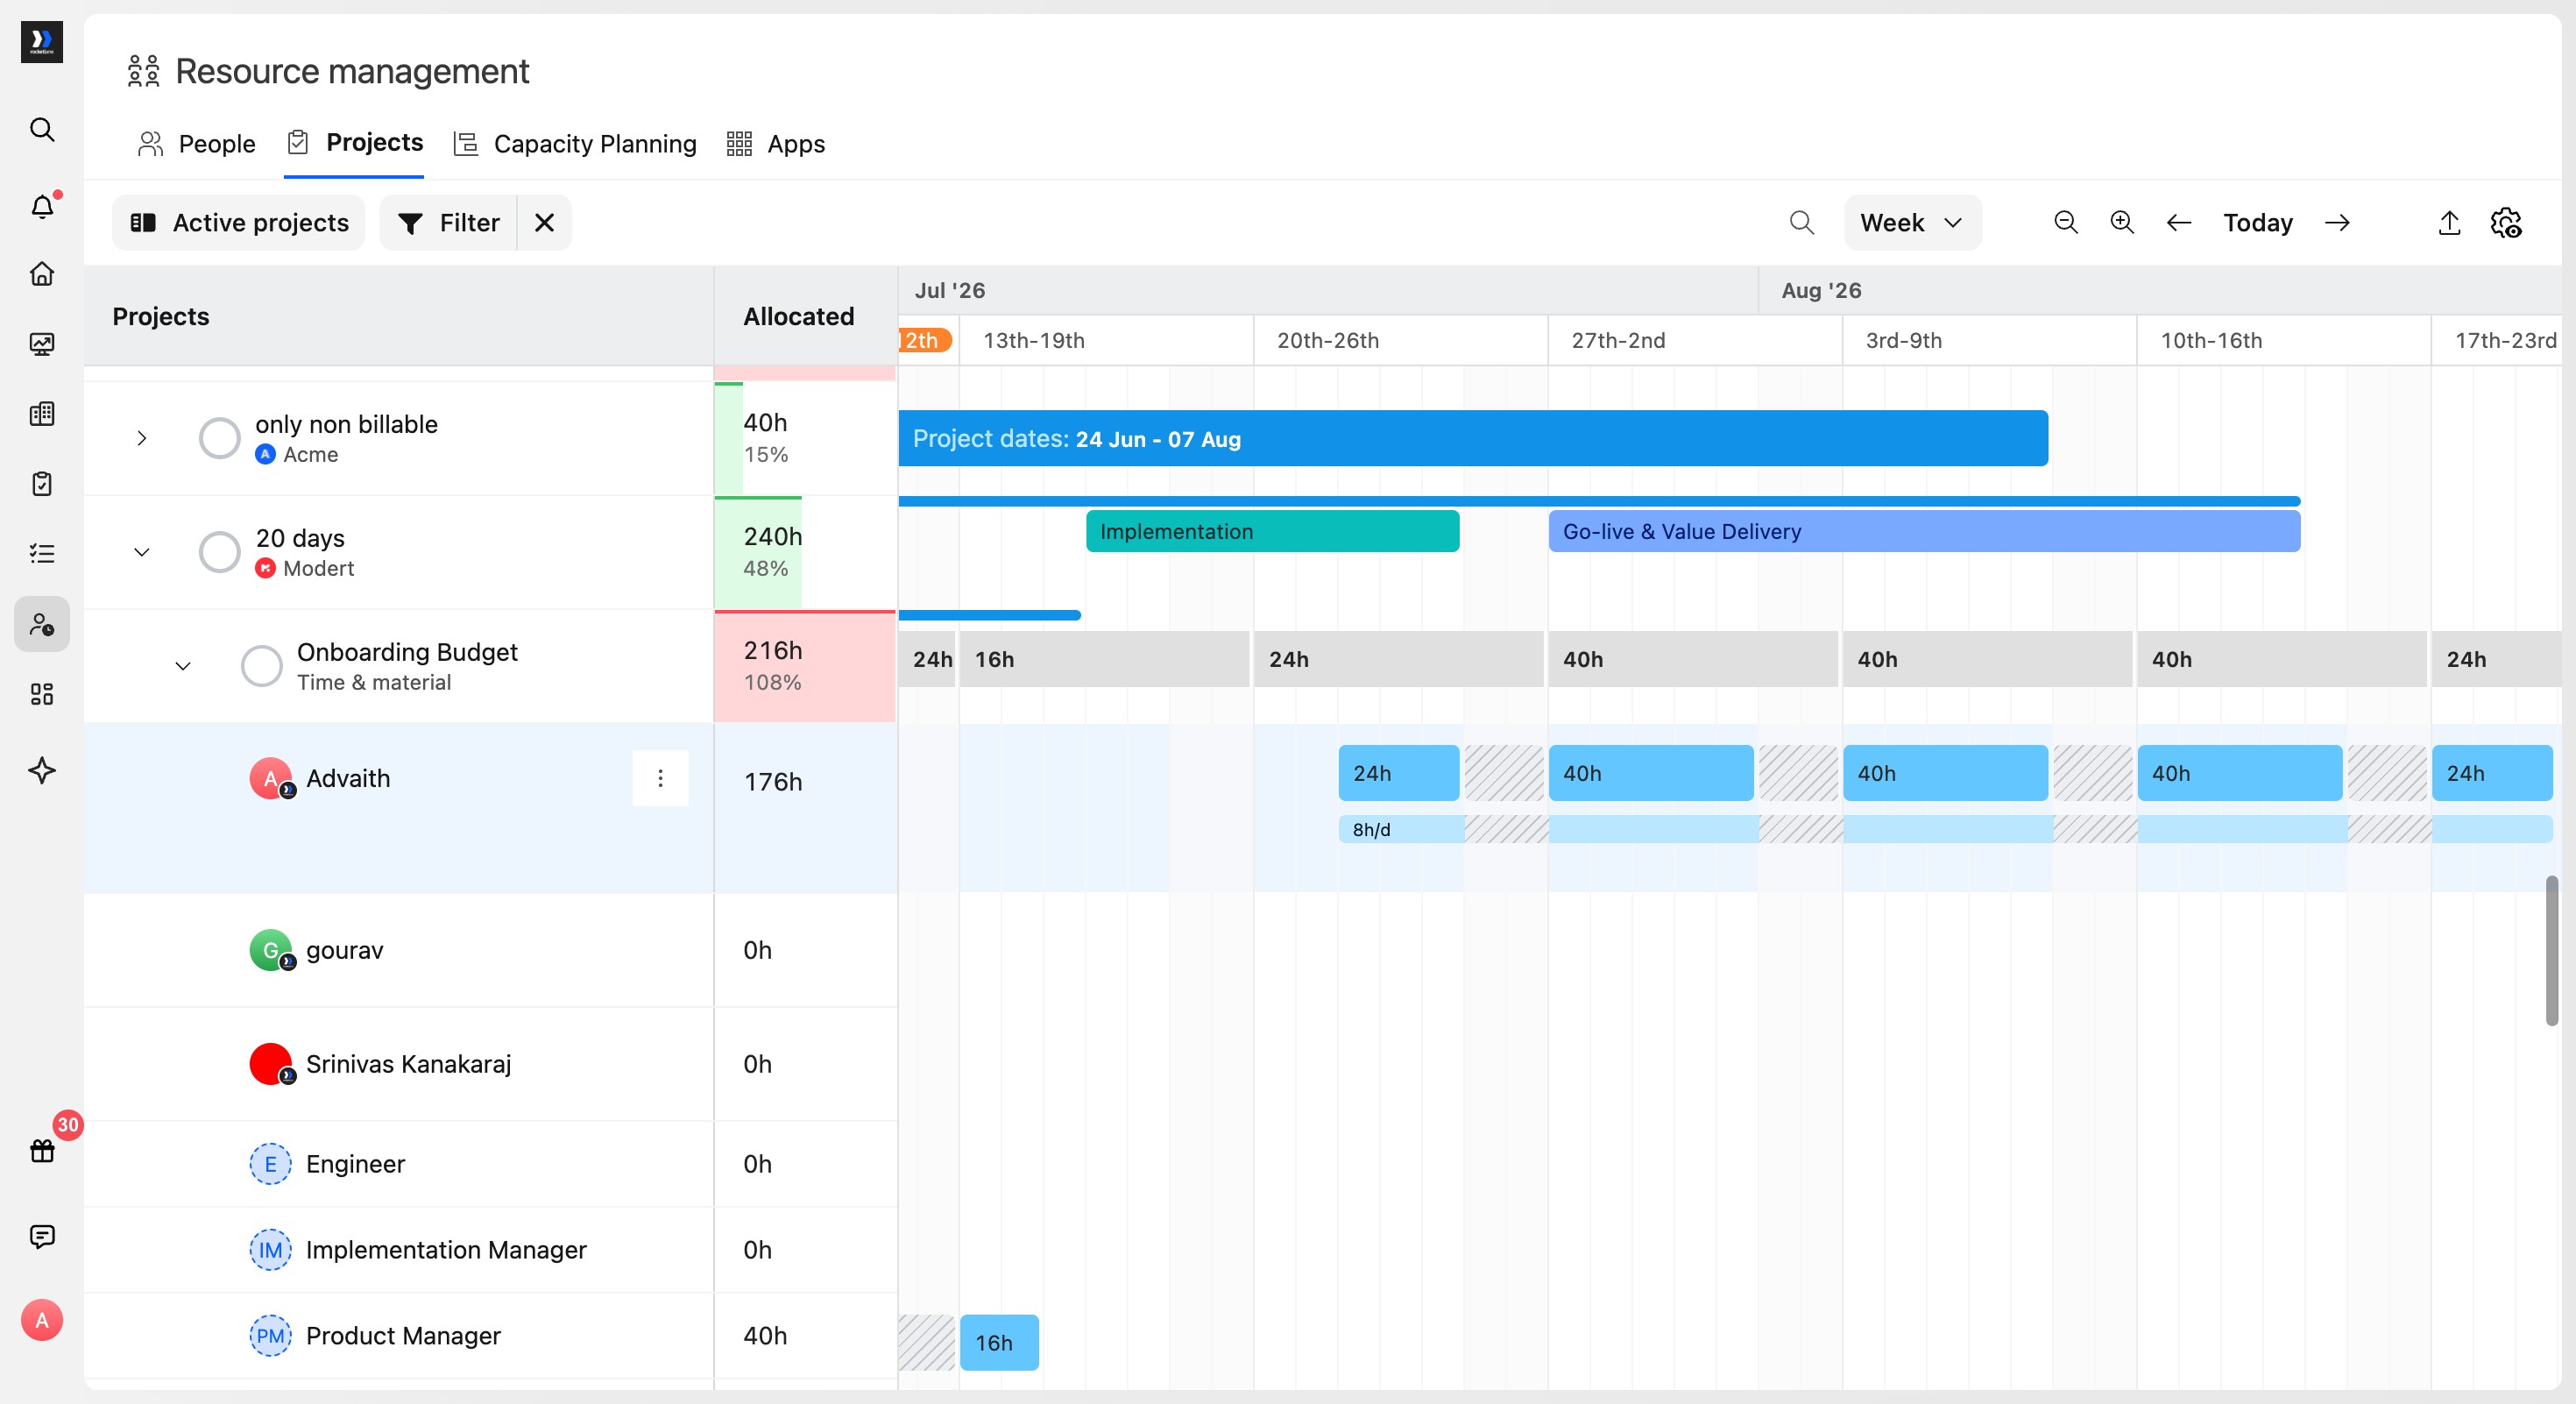
In Resource Management, budgets appear directly under the project. The project row expands to show budgets, and under each budget, the team members who belong to that budget are listed. Allocations are made per budget, then aggregated at both the budget and project levels.
Managing budget allocations from the Projects tab
In Resource Management > Projects, expand a project to view its budgets. Expand a budget to see the team members assigned to that budget.
- Click Add team members under the budget that should receive the allocation.
- Select the team member or role to add to that budget.
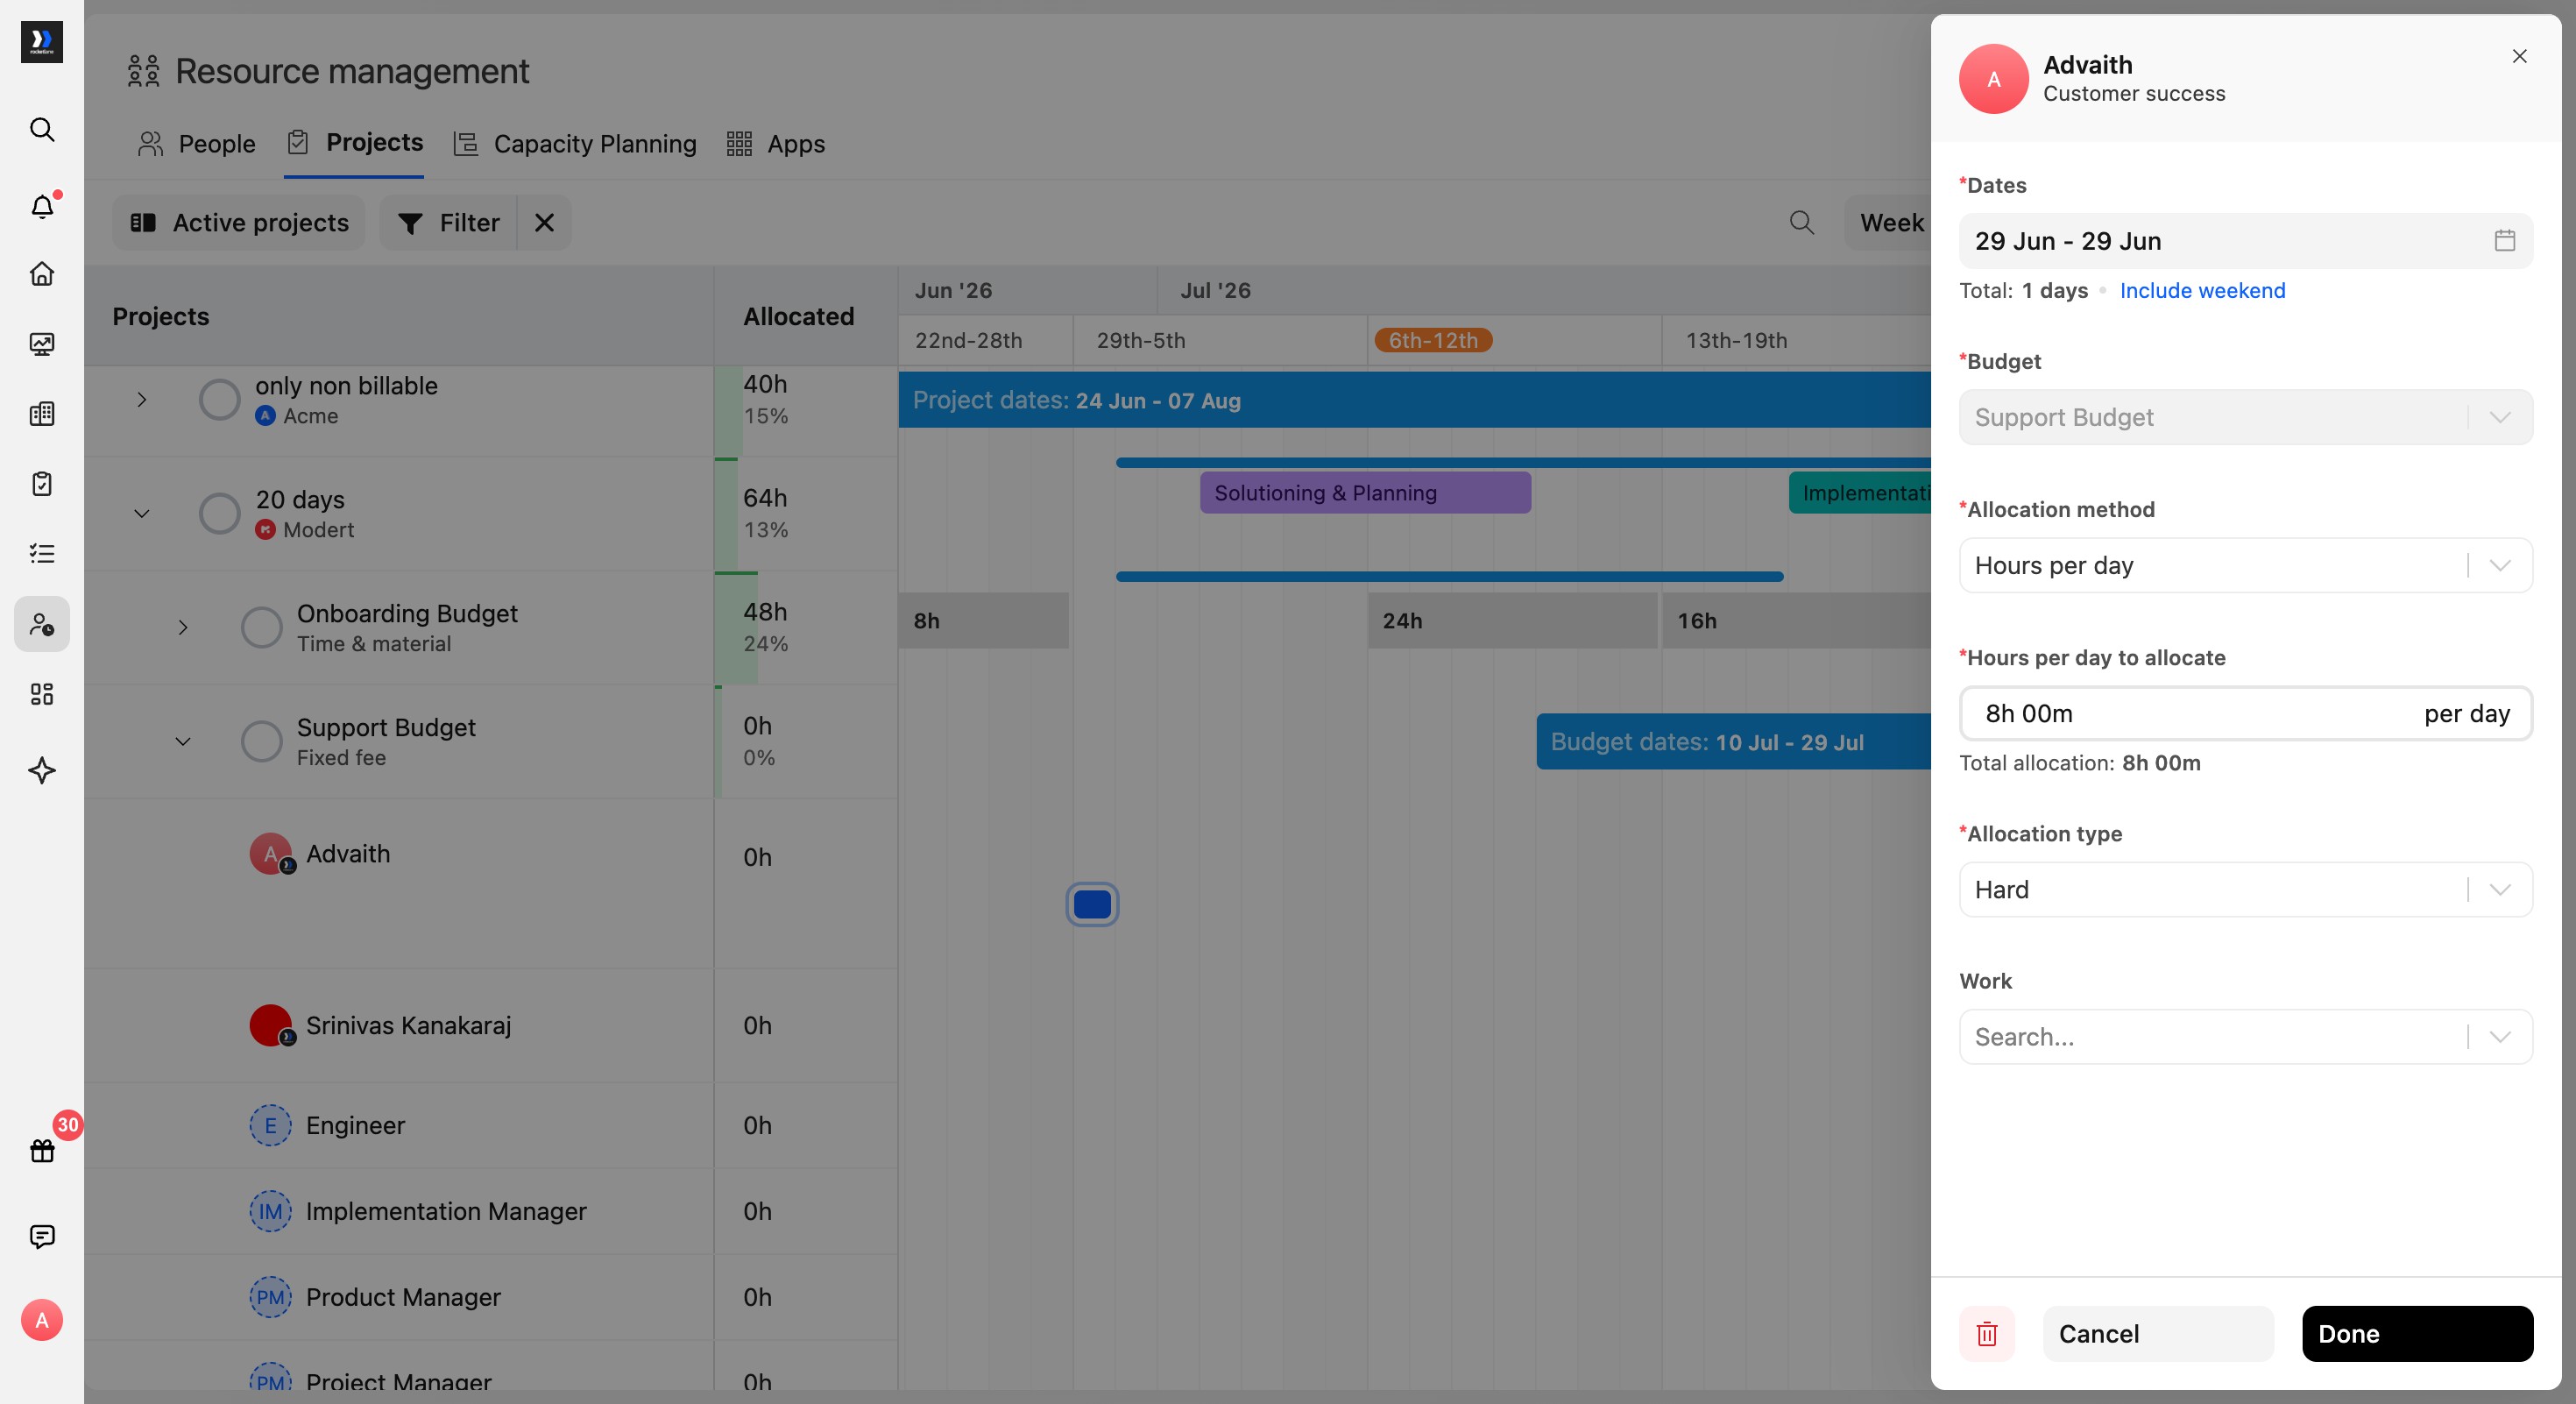
- Click the + placeholder on the budget's scheduler row to create an allocation.
- In the allocation drawer, set the dates, confirm the Budget, choose the allocation method, enter the hours, select the allocation type, and choose the work item in the Work selector.
- Click Done to save the allocation. The selected budget determines which budget the planned hours consume.
After the allocation is saved, the timeline displays allocations under the relevant budget and aggregates planned hours at both the budget and project levels.
Managing budget allocations from the People tab
Adding a budget from the People tab
- Open Resource Management from the sidebar.
- In the People view, expand the relevant team member row to show their assigned projects.
- Expand the relevant project row to show budget and allocation details.
- Click Add budget under the expanded project row.
- Select the budget from the dropdown (for example Onboarding Budget or Solutioning Budget).
- Click Done to add the selected budget to the project row.
Allocating hours to a budget
- Click the + placeholder on the scheduler timeline row for the budget.
- Review the allocation details in the allocation modal.
- Click Done to save the allocation.
To set custom allocation dates, click the date range control in the allocation modal, select the start and end dates in the date picker, click Done in the date picker, then click Done in the allocation modal to save.
Creating resource requests
- Open Resource Management or the project's resource view.
- Create a resource request (new team member or additional hours).
- Select the project.
- Select the budget the request belongs to.
- Fill in the remaining details and submit.
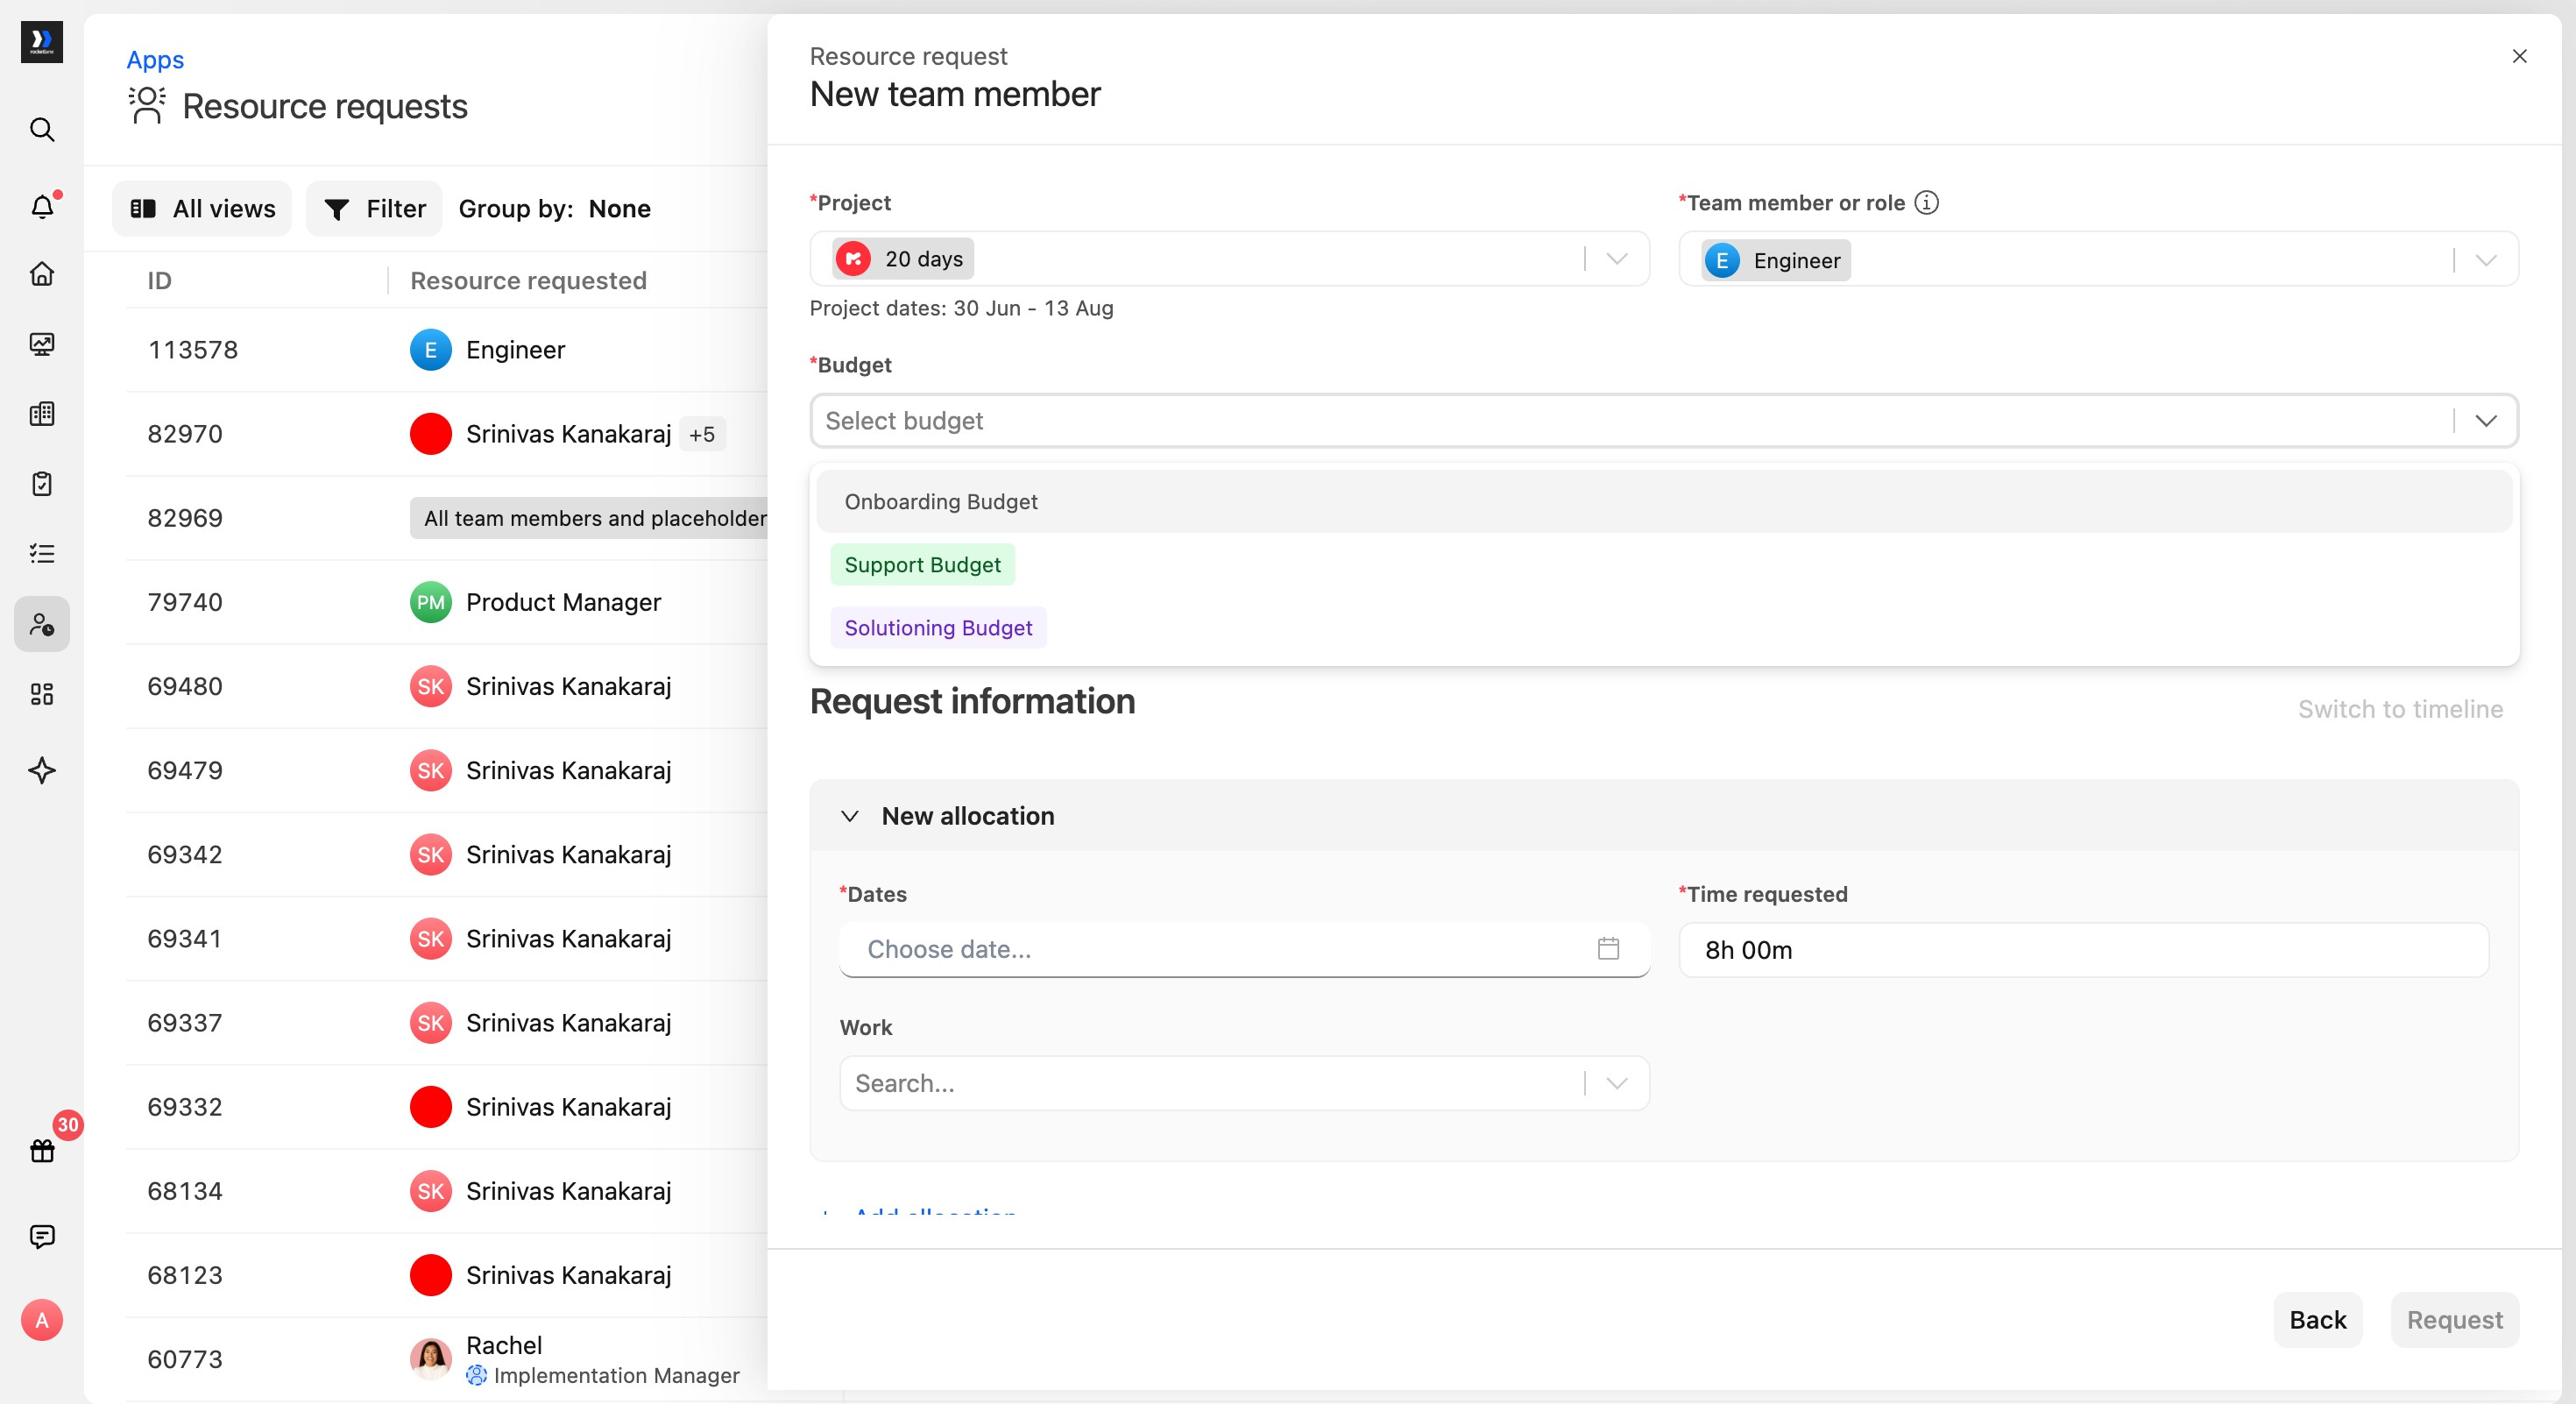
New team member requests
Select the project and team member or role, then select the budget from the project's available budgets before entering the request details.
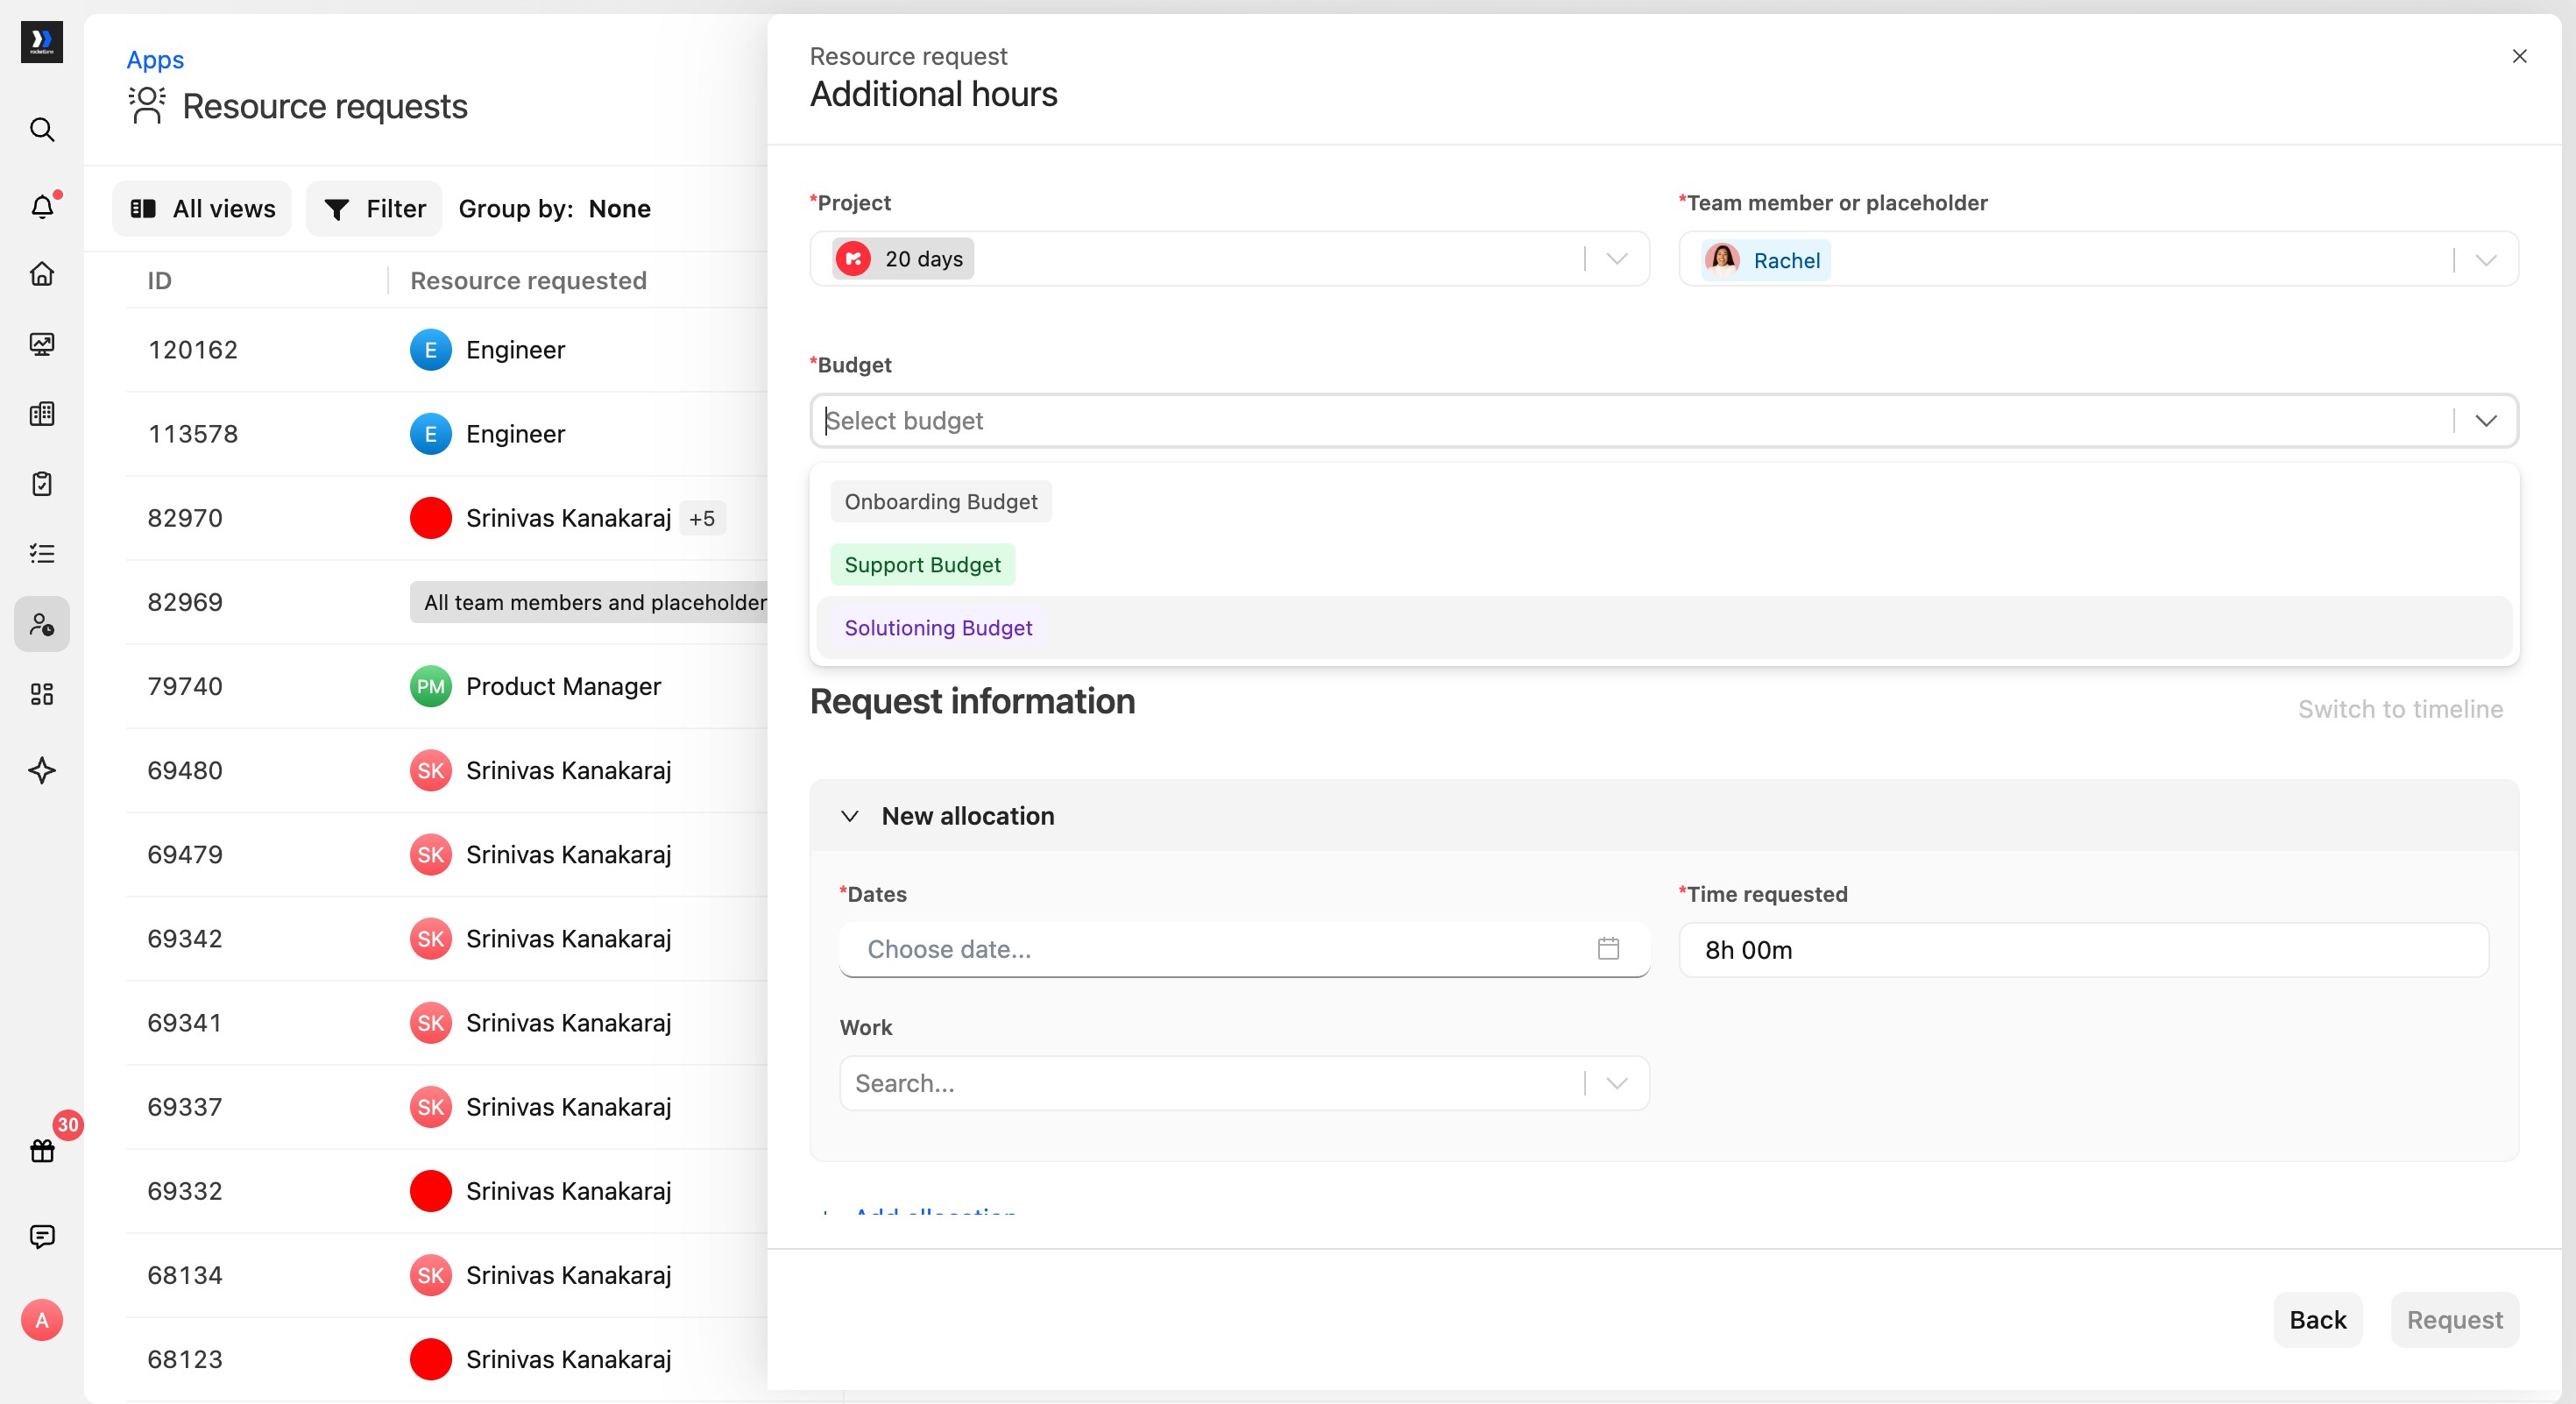
Additional hours requests
Select the project and team member or placeholder, then select the budget before entering the requested date and hours.
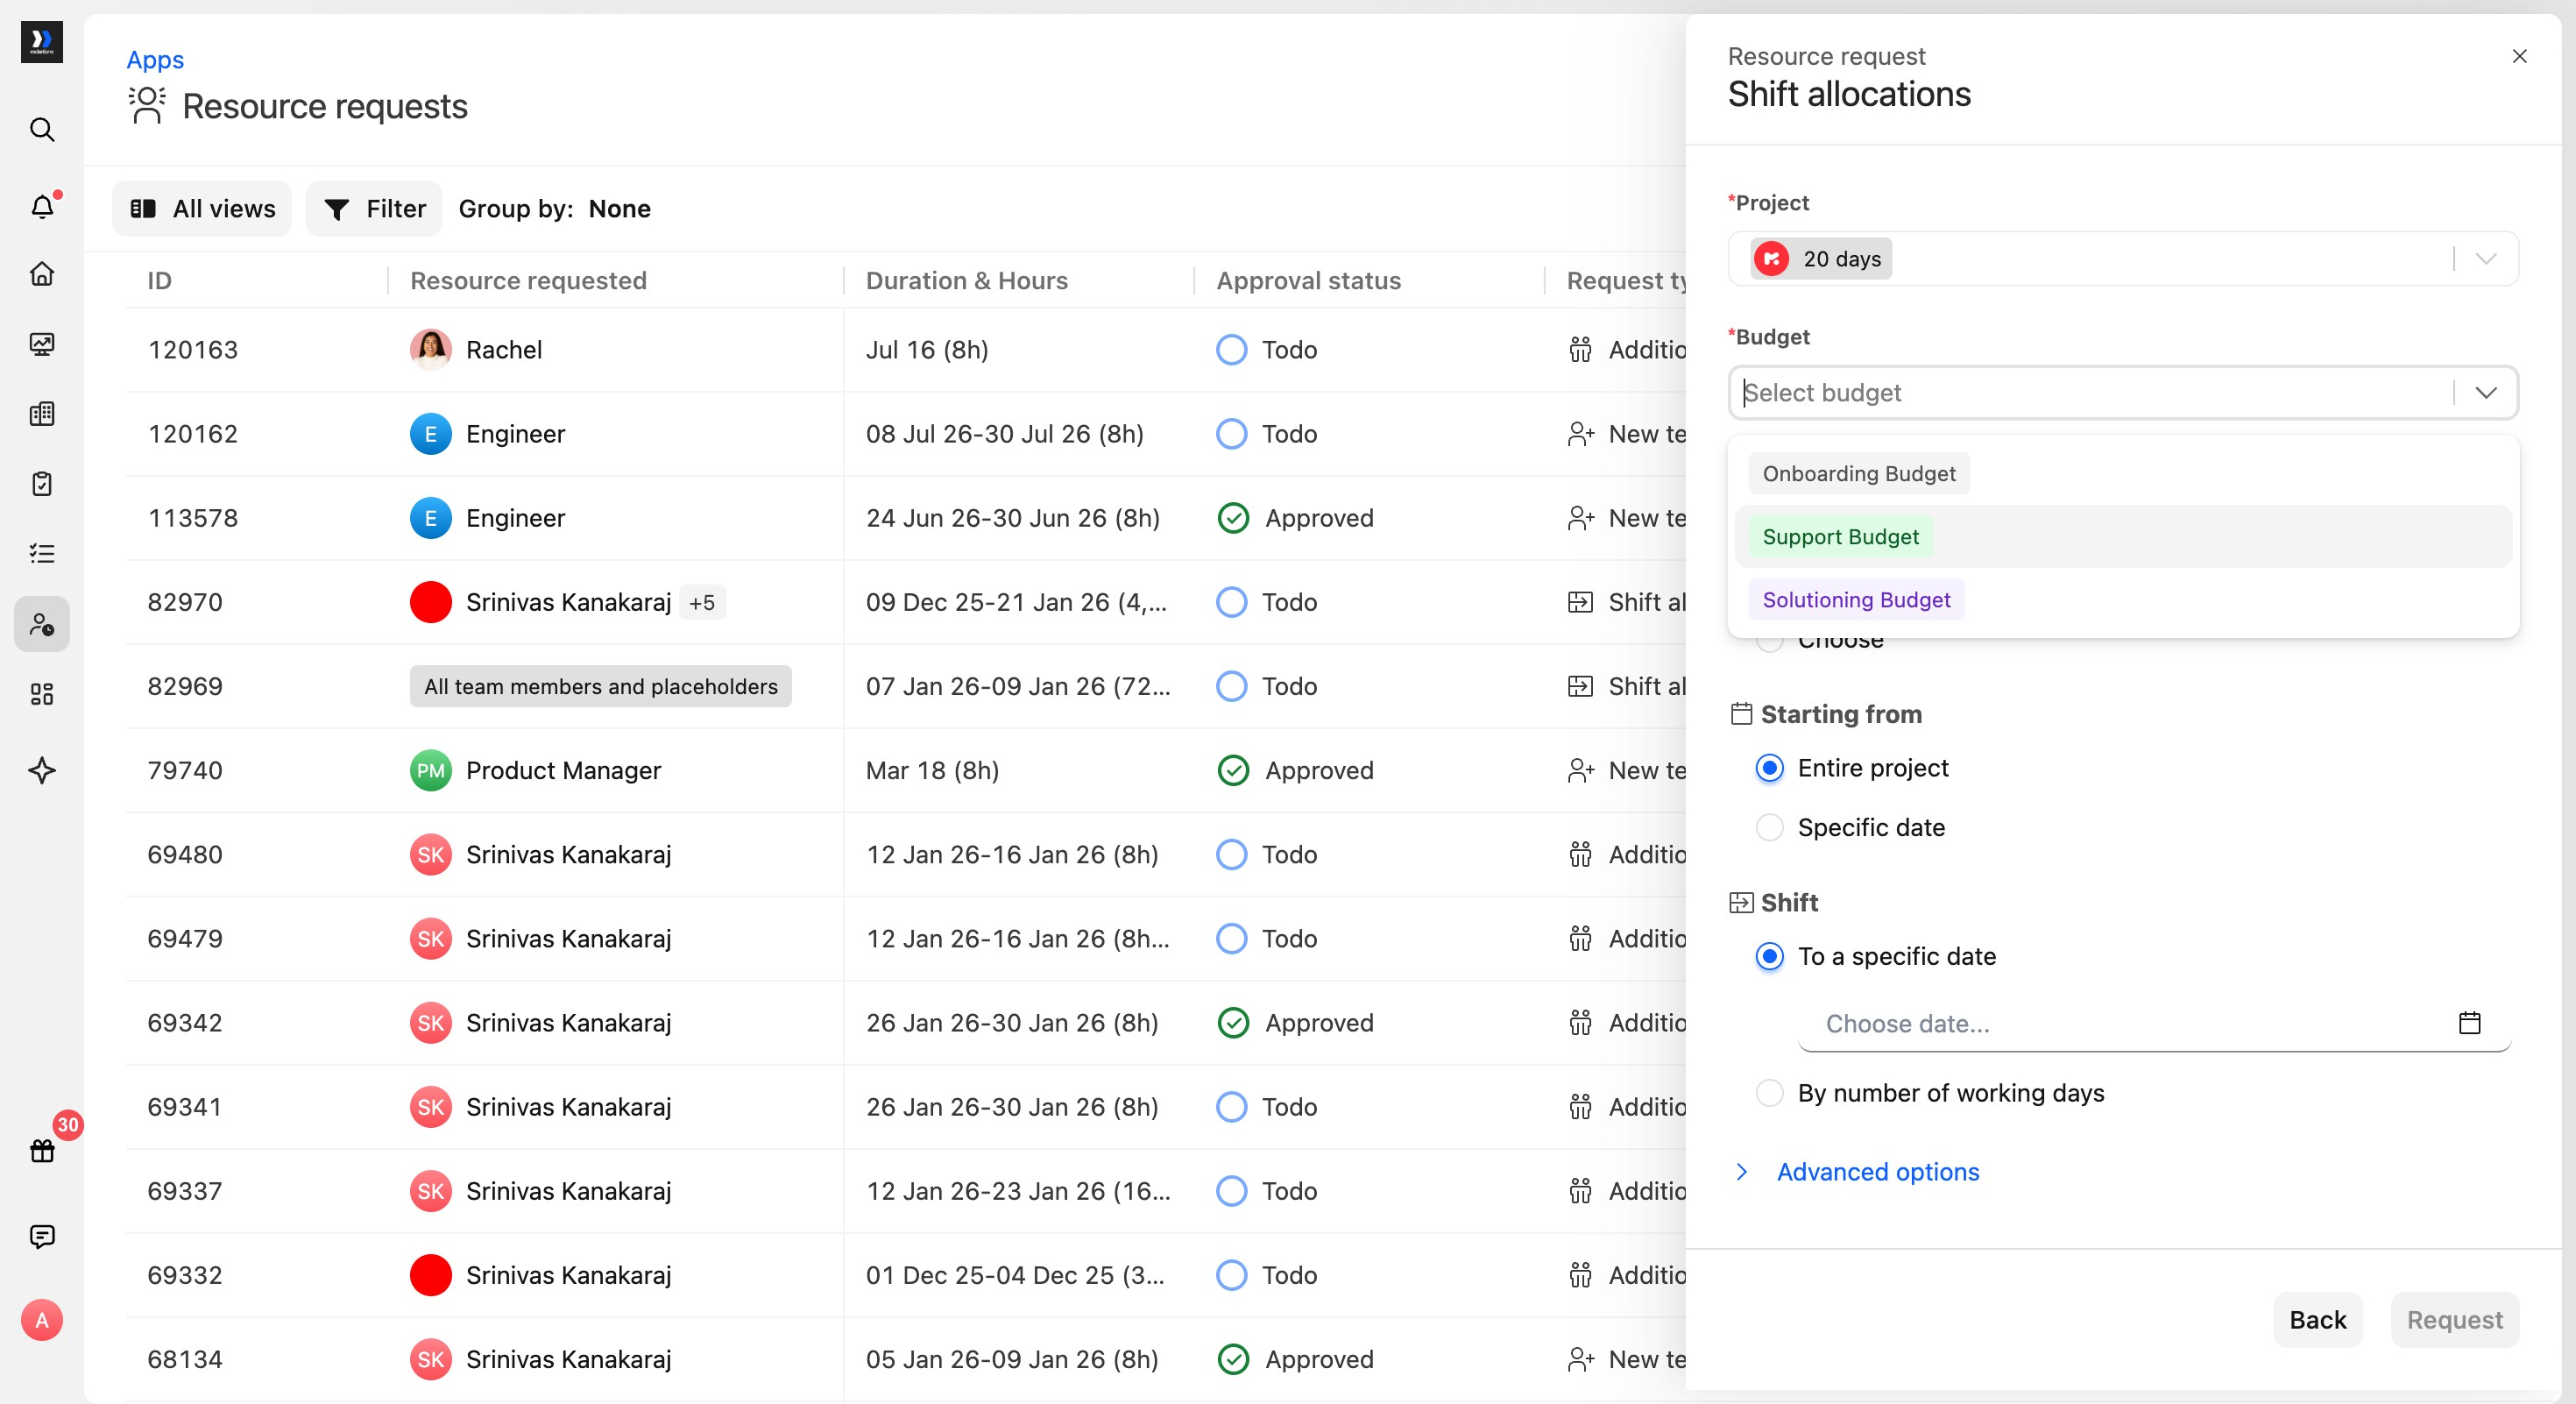
Shift allocations requests
Select the project and the budget whose allocations should be shifted before choosing the shift date or shift options.
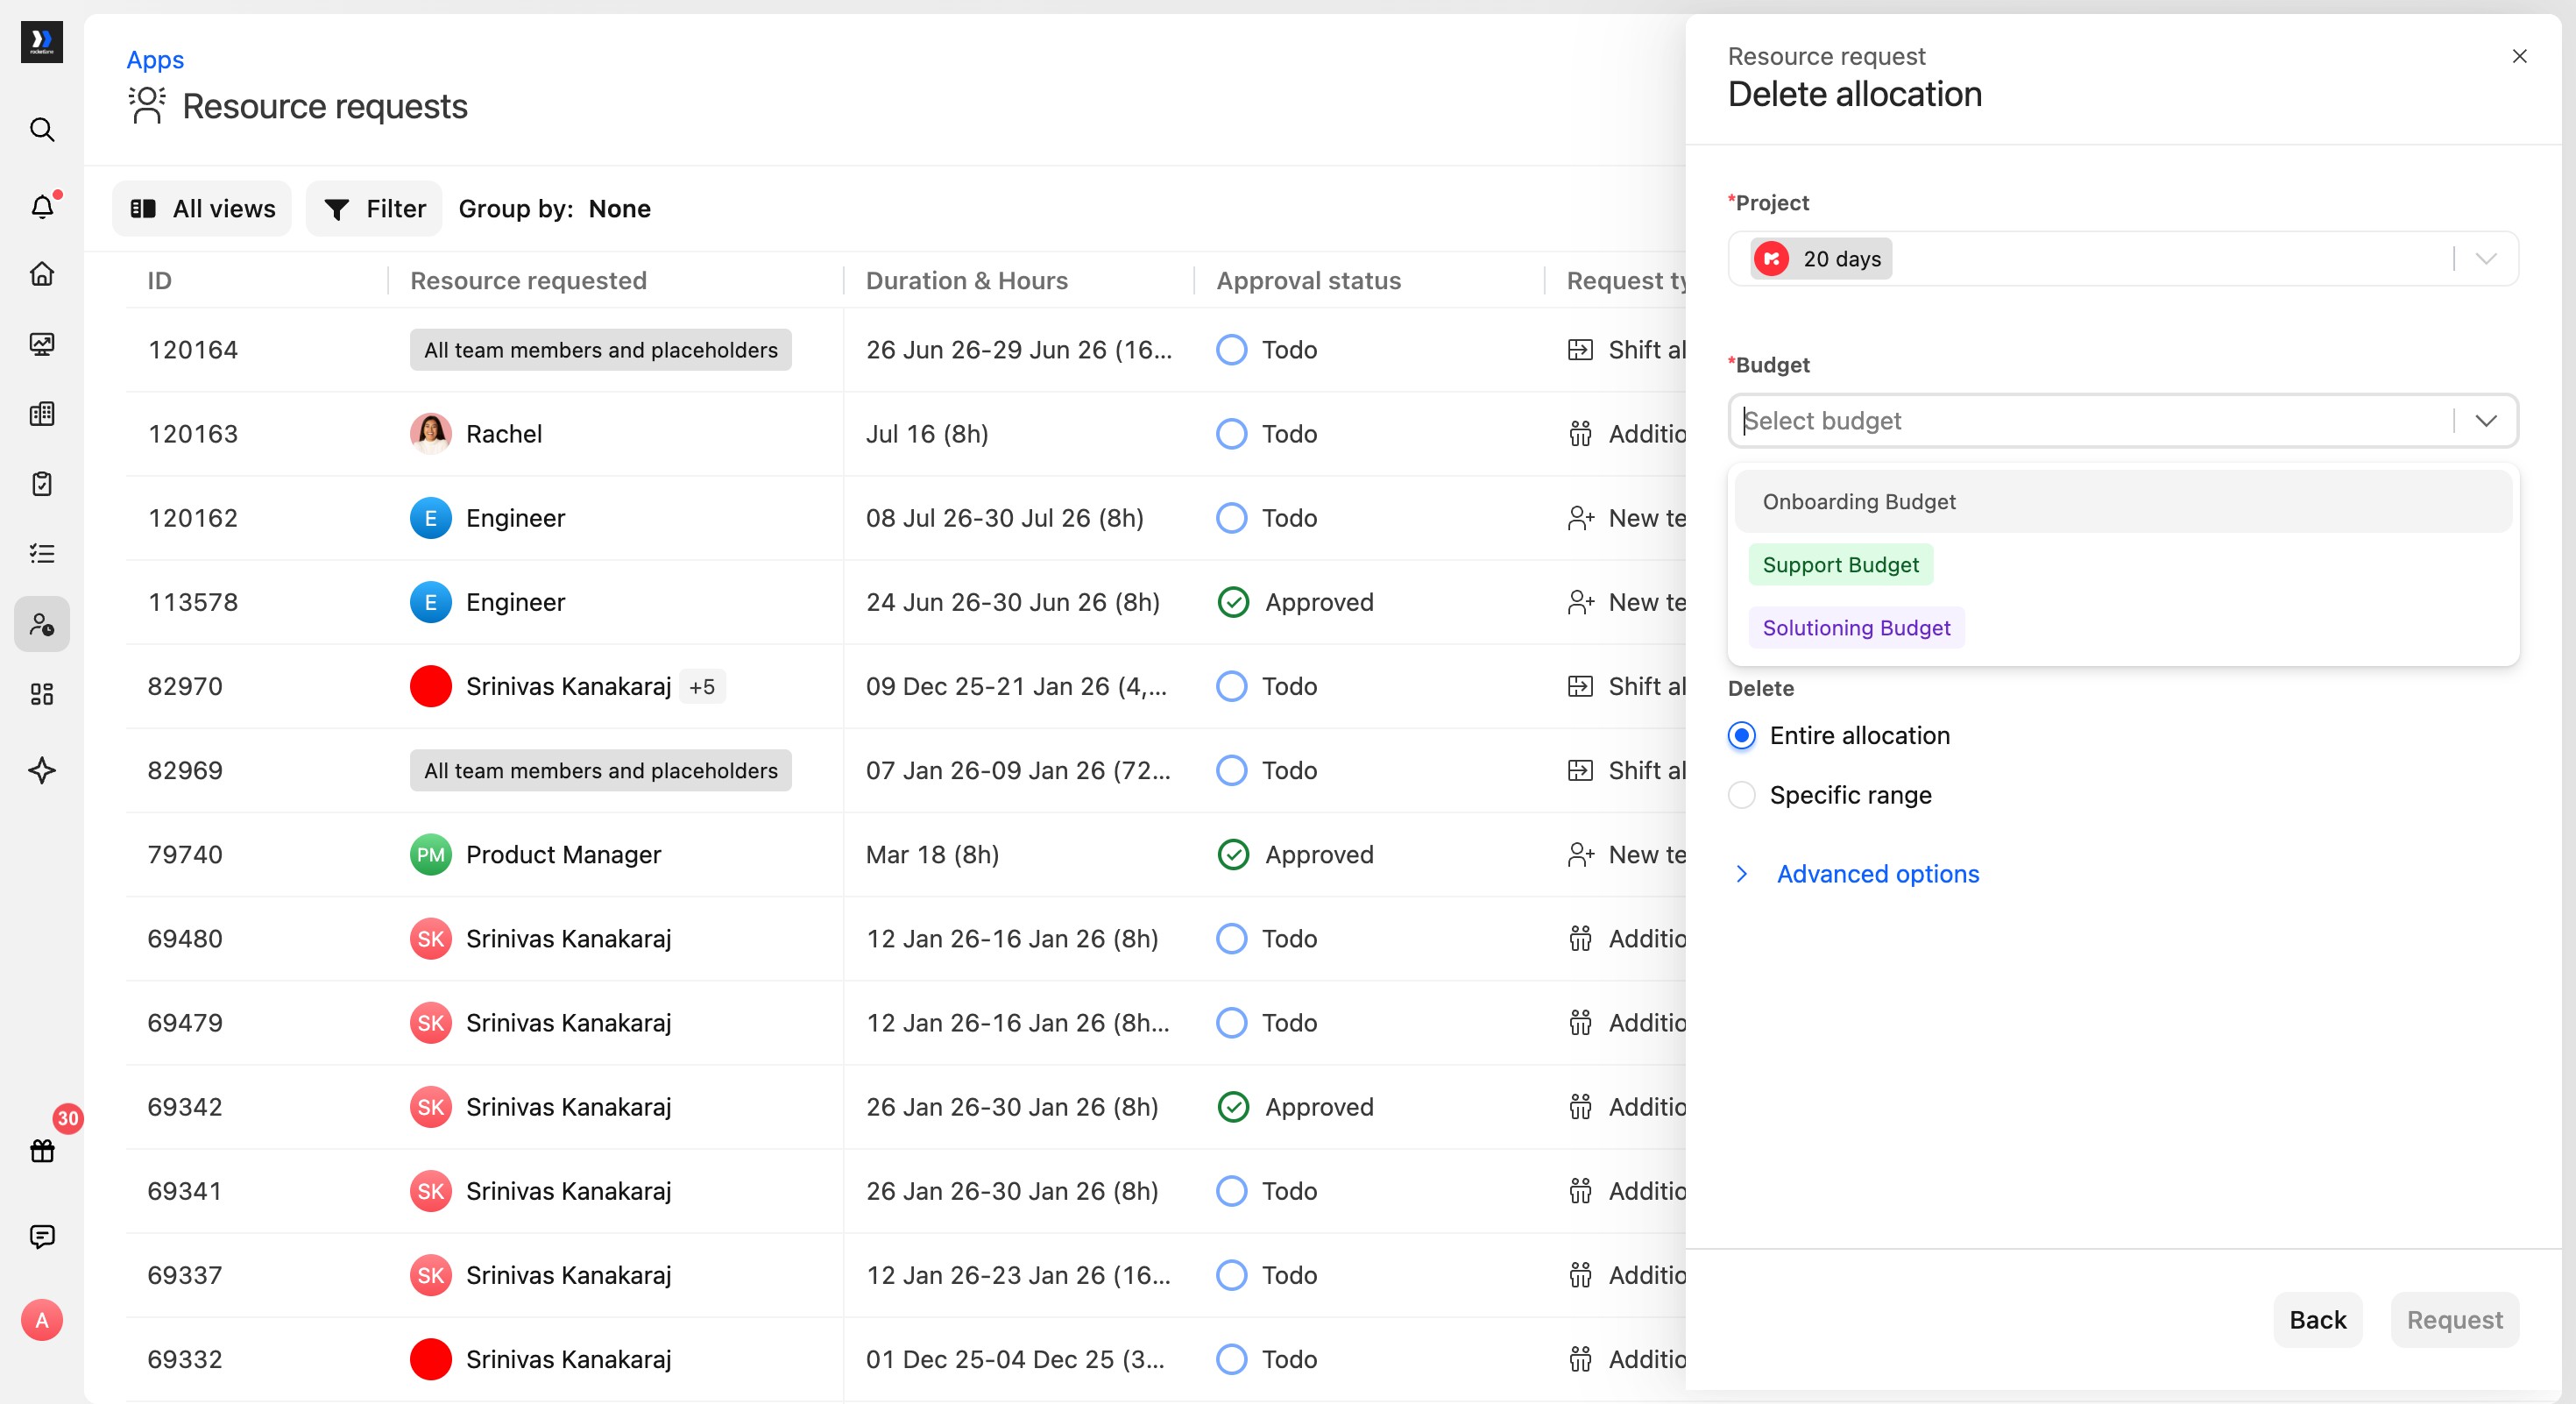
Delete allocation requests
Select the project and budget, then choose whether to delete the entire allocation or a specific range.