The Tracked Time tab gives project managers and approvers a project-level view of time entries. It helps teams review, edit, approve, reject, move, group, filter, and export time entries from one table.
This is useful when you need to manage time throughout the project lifecycle instead of only reviewing weekly timesheets. The existing timesheet experience continues to work as before. The Tracked Time tab is an additional way to manage time entries in context.
In this article
- Time entries as a table
- The Financials tab
- Table view of time entries
- Bulk actions
- Move time entries between projects
- Grouping and filtering
- Add time as a project owner
- Native time entry audit fields
- Submission and approval workflow
- Configure time entry notifications
- Timesheet approver hierarchy
- Role-based access control
- Control time entry dates by allocation type
- Override bill and cost rates on time entries
- FAQ
Time entries as a table
All time entries are available in a single editable table, making it easier for approvers to review, modify, or act on entries without navigating between multiple screens.
Where to find it:
- Open a project and click the Financials tab. A Tracked Time sub-tab appears.
- If you do not see it, you may not have the required permissions or the tab may be hidden. To enable it, click the tab icon on the right side of the screen and turn on time tracking.
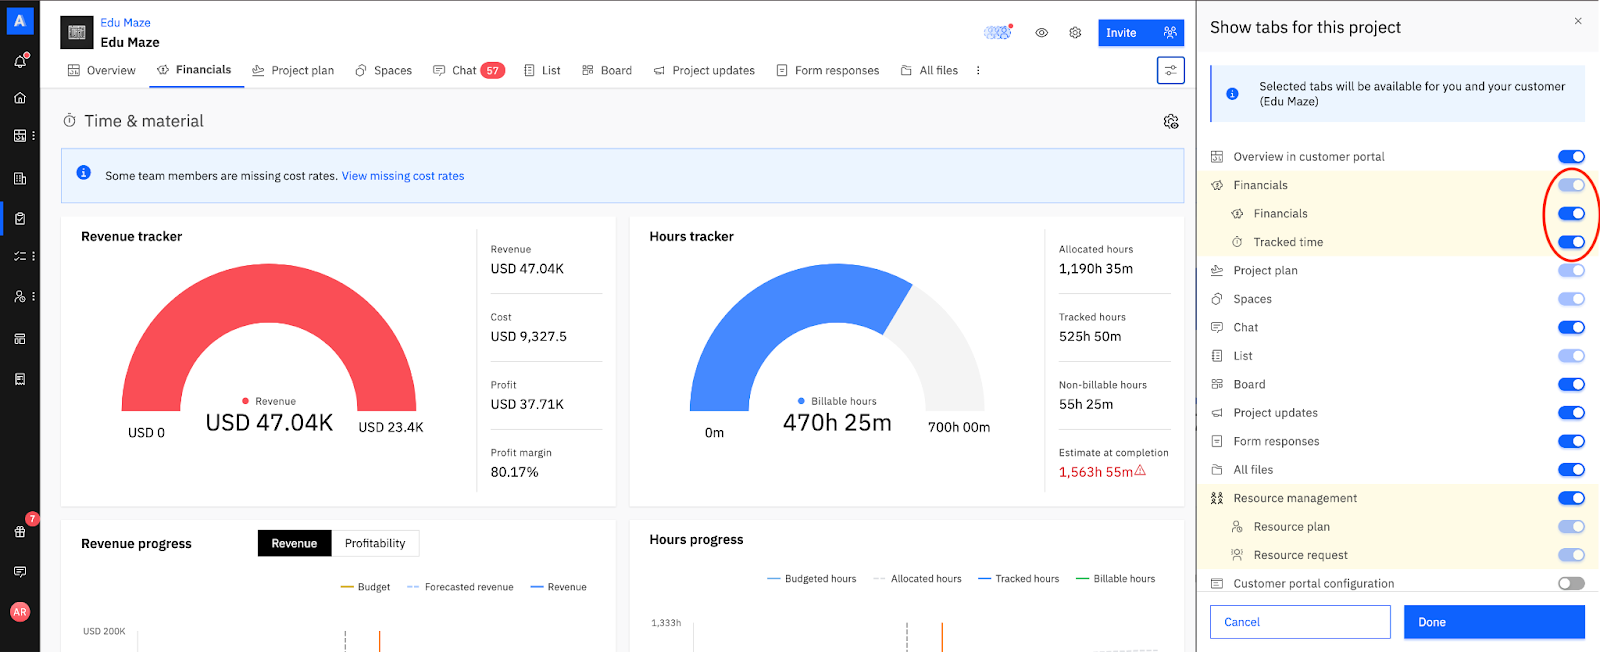
The Financials tab
Clicking the Financials tab reveals two sub-tabs: Dashboard and Tracked Time. The Dashboard displays financial metrics related to the project, while the Tracked Time tab provides a detailed view of all time entries associated with the project.
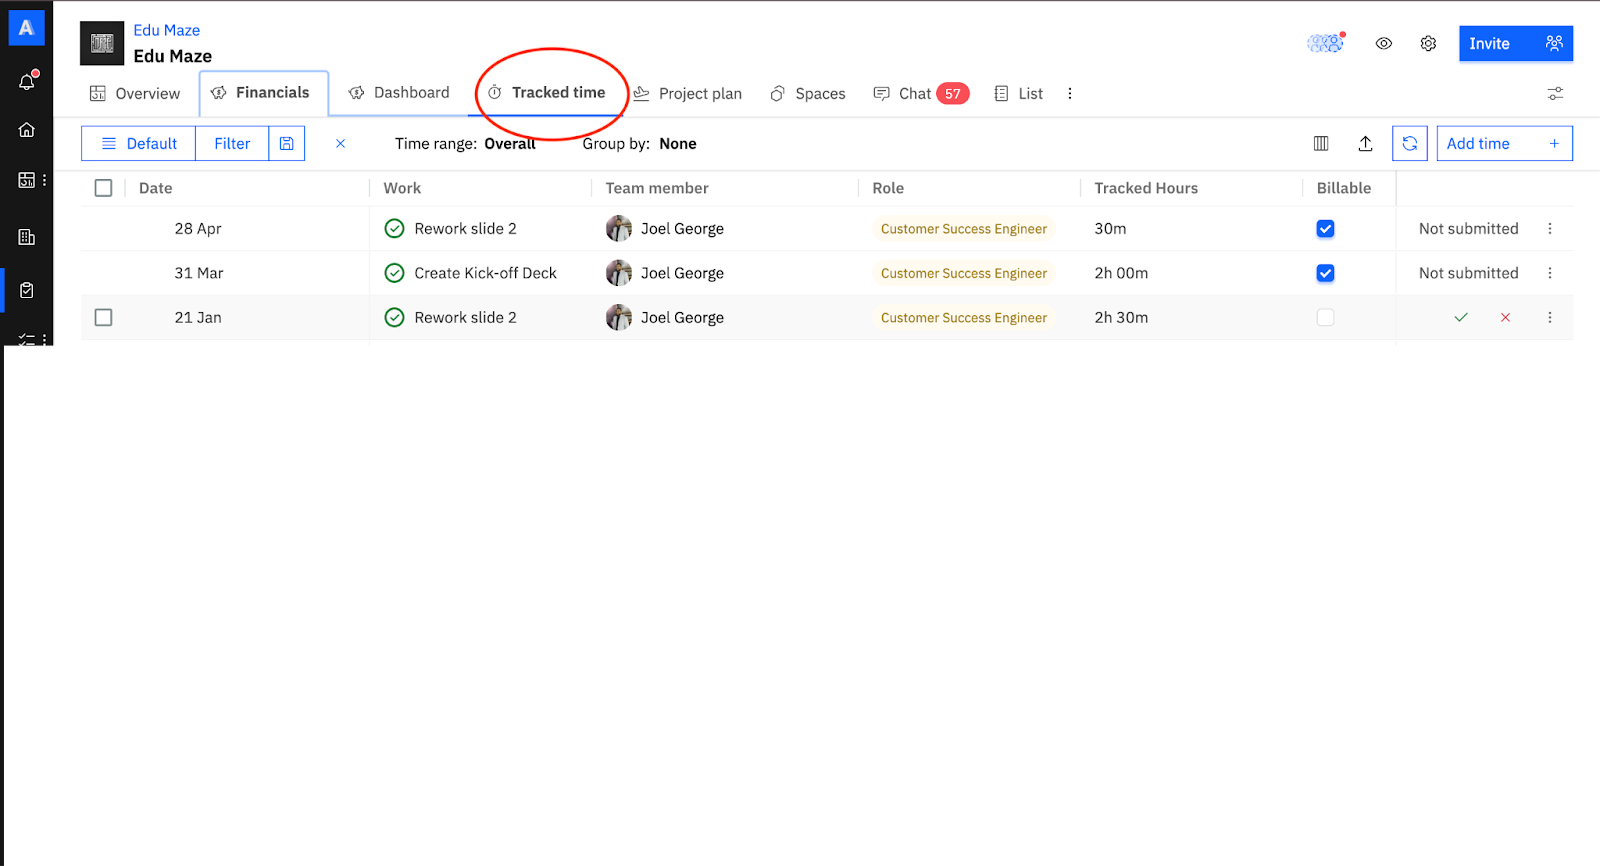
Table view of time entries
Each row represents a single time entry and shows details such as:
- Project, task, and team member
- Hours tracked
- Billable status
- Category
- Approval status

From the table, you can:
- Directly edit fields such as work item, role, billable status, and notes.
- Approve or reject time entries inline.
- Submit time entries that have not been submitted yet.
- Save and share custom views, such as Pending Approval or Billable only.
- Group time entries by project, team member, role, task, or status.
- Export a filtered list of time entries based on the entries currently visible in the table.
Bulk actions
From the table, approvers can:
- Approve or reject time entries in bulk.
- Move entries to a different project, including mapping them to new tasks and roles.
- Delete entries in bulk.
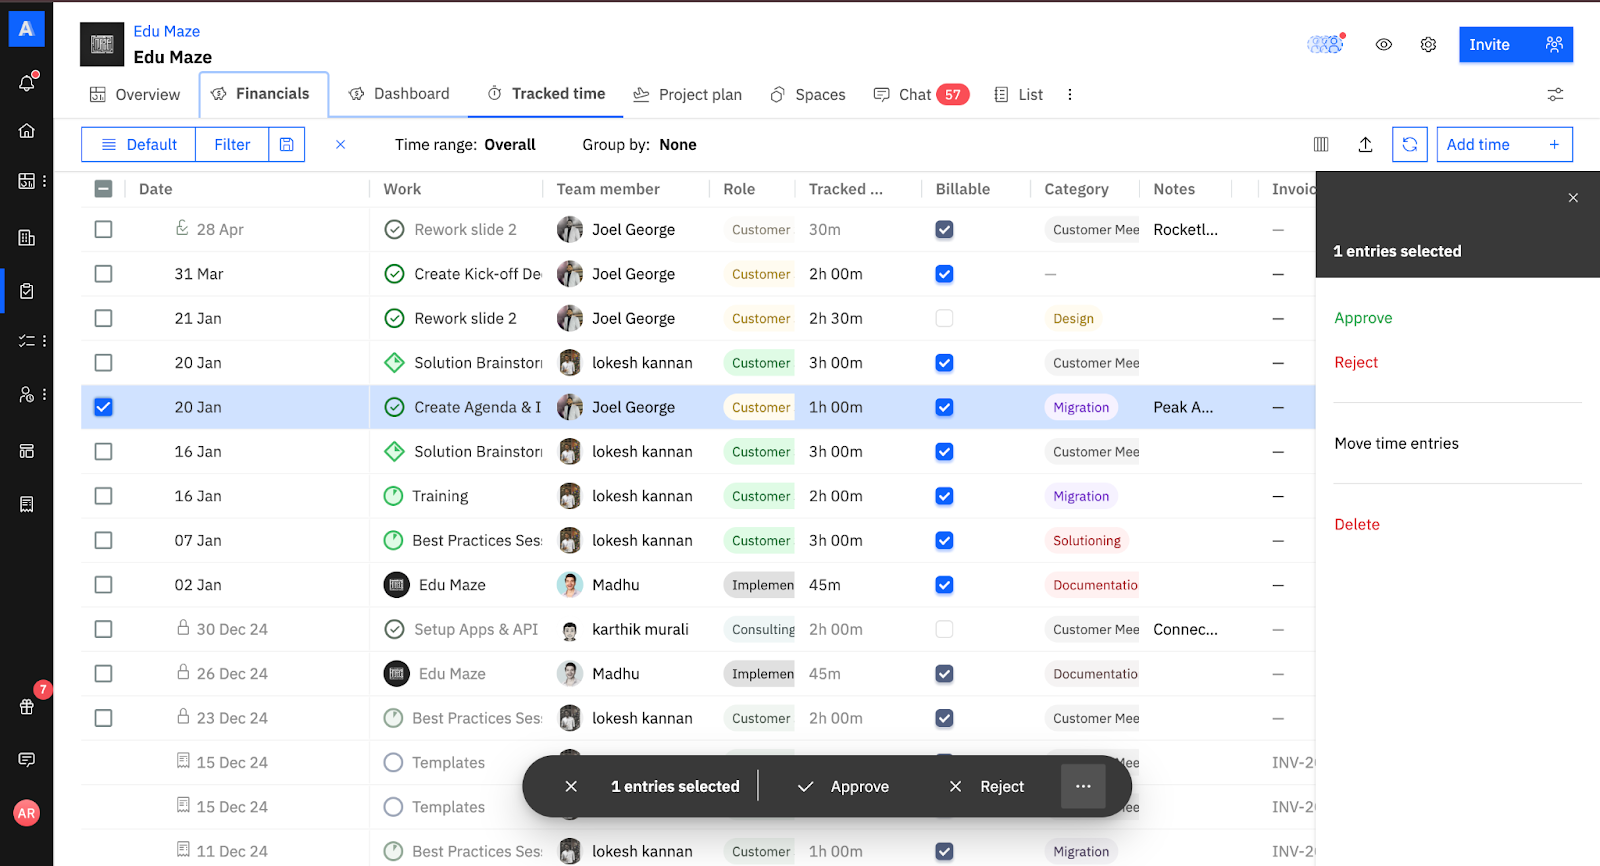
Move time entries between projects
Use Move Time Entries to shift hours from one project to another. This is useful for change orders, administrative reclassification, and invoicing across separate projects.
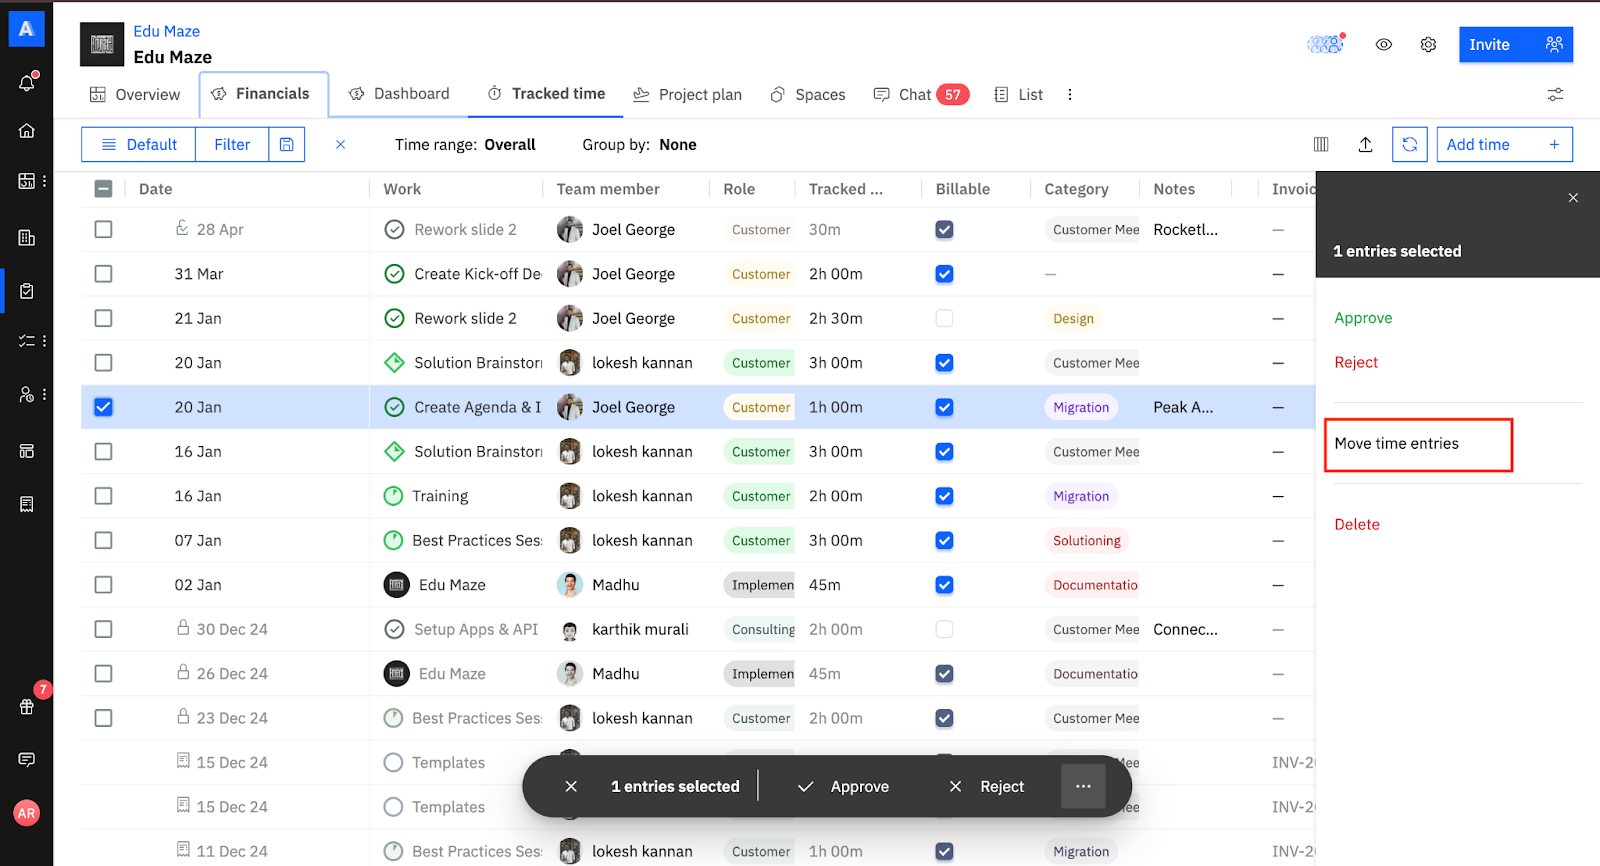
- Select the entries you want to move.
- Click the ... menu and choose Move Time Entries.
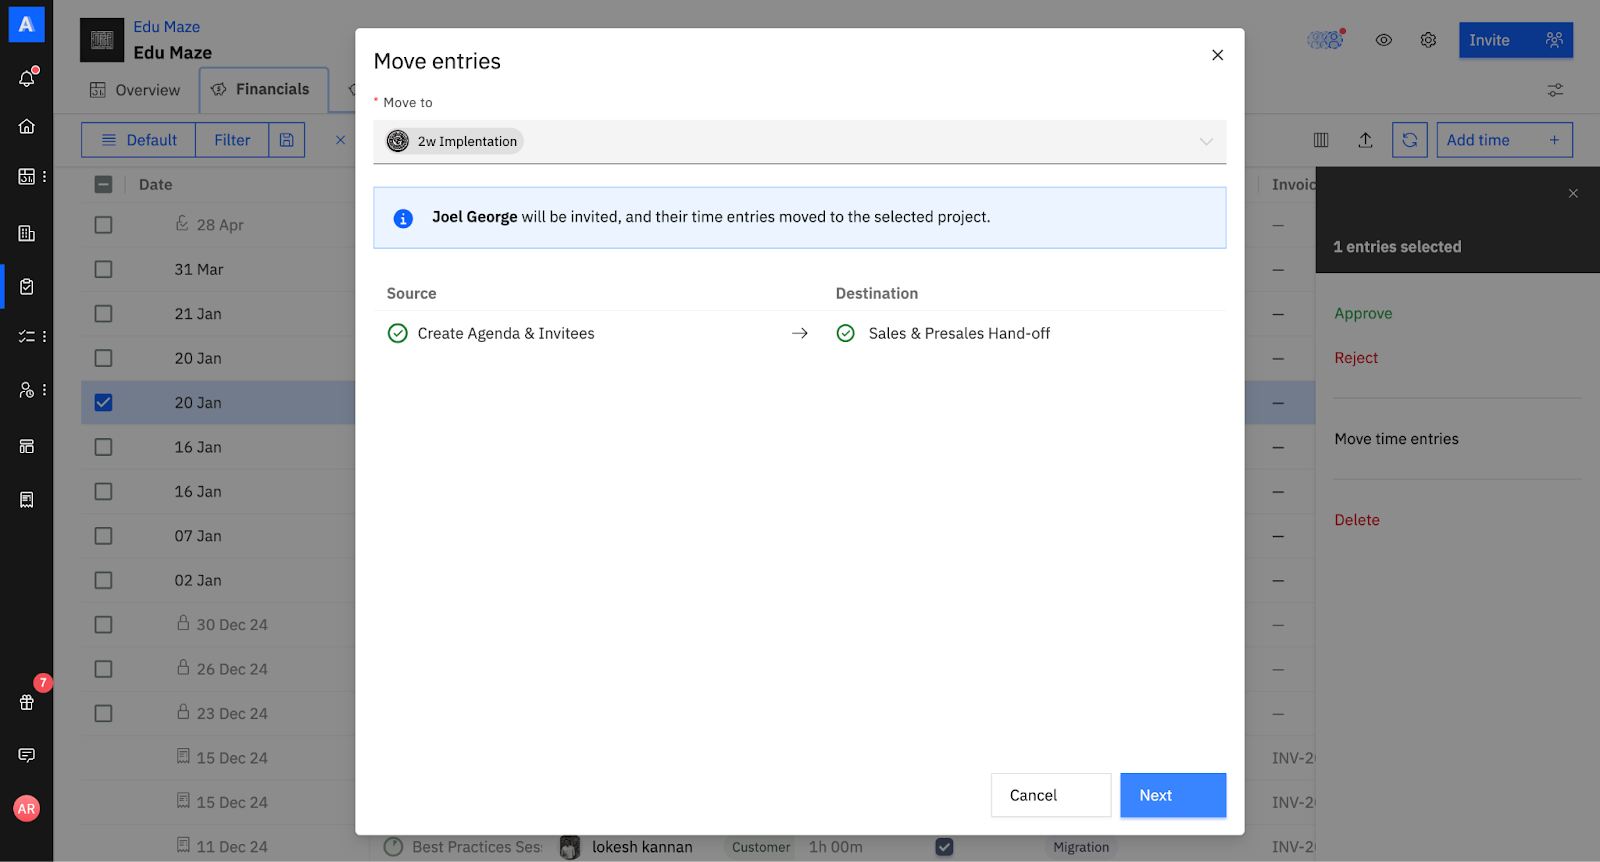
- In the pop-up, select the target project. You can move entries only to projects where you have permission to invite people.
- Map the entries to work items, such as project, phase, or task, in the destination project. You can move time tracked on any work item type to any work item type.
Grouping and filtering
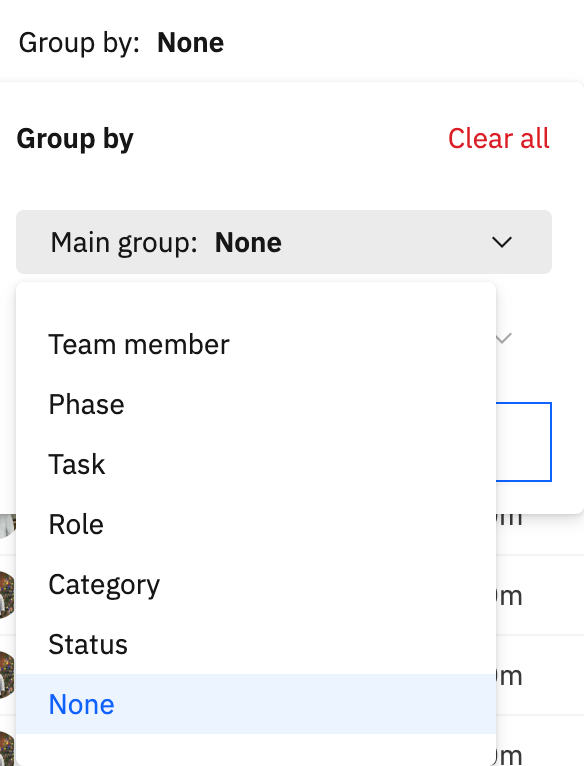
Group time entries by any of the following:
- Project
- Team member
- Status
- Role
- Phase
- Task
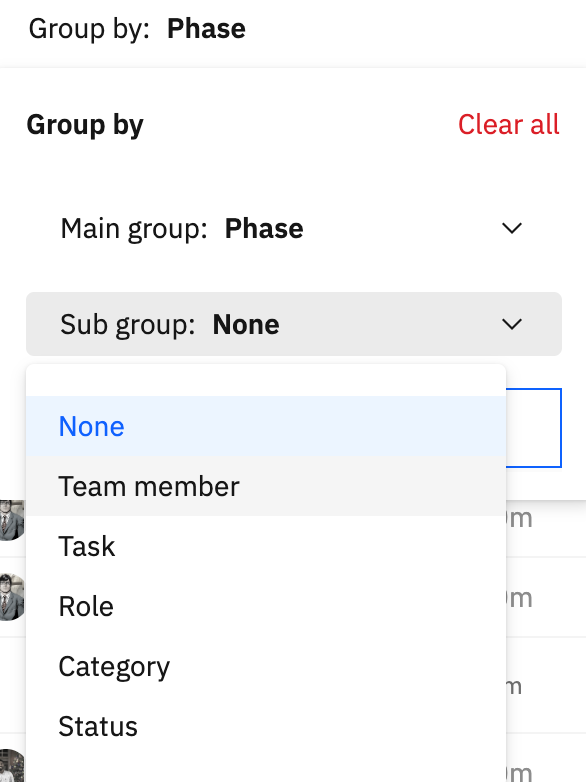
After grouping by one parameter, you can apply a sub-group by a second parameter.
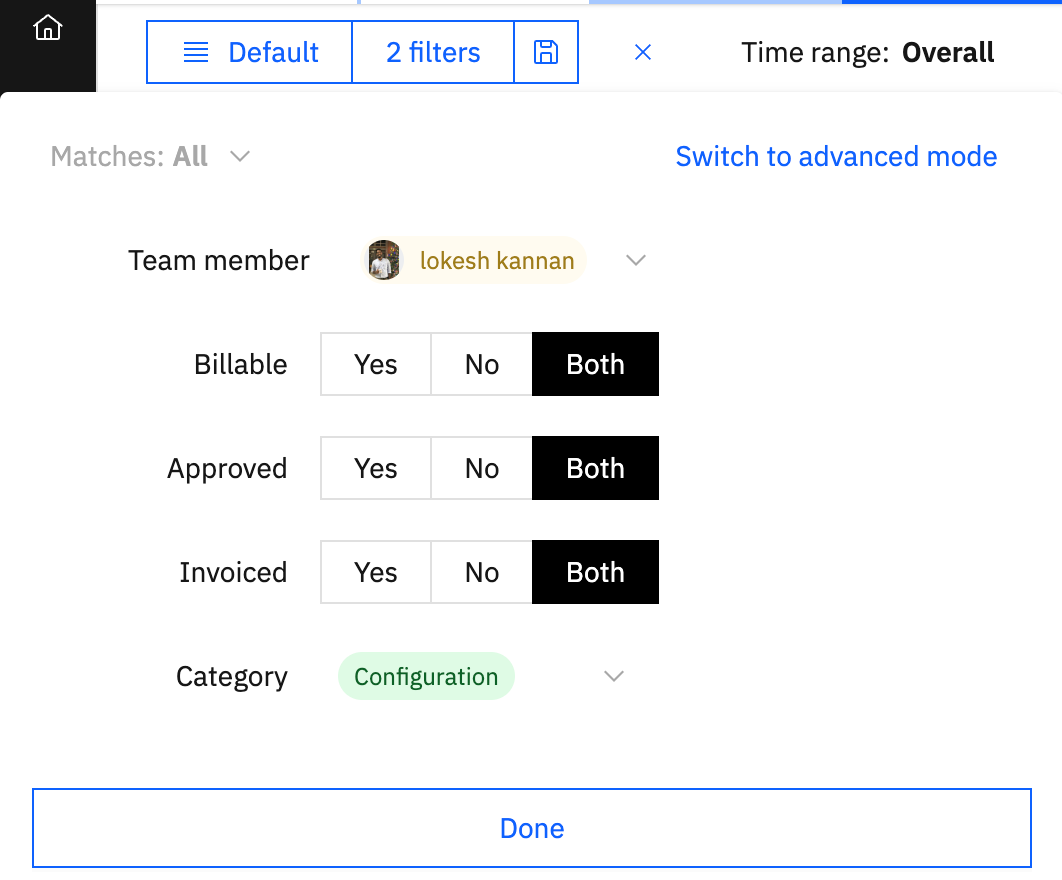
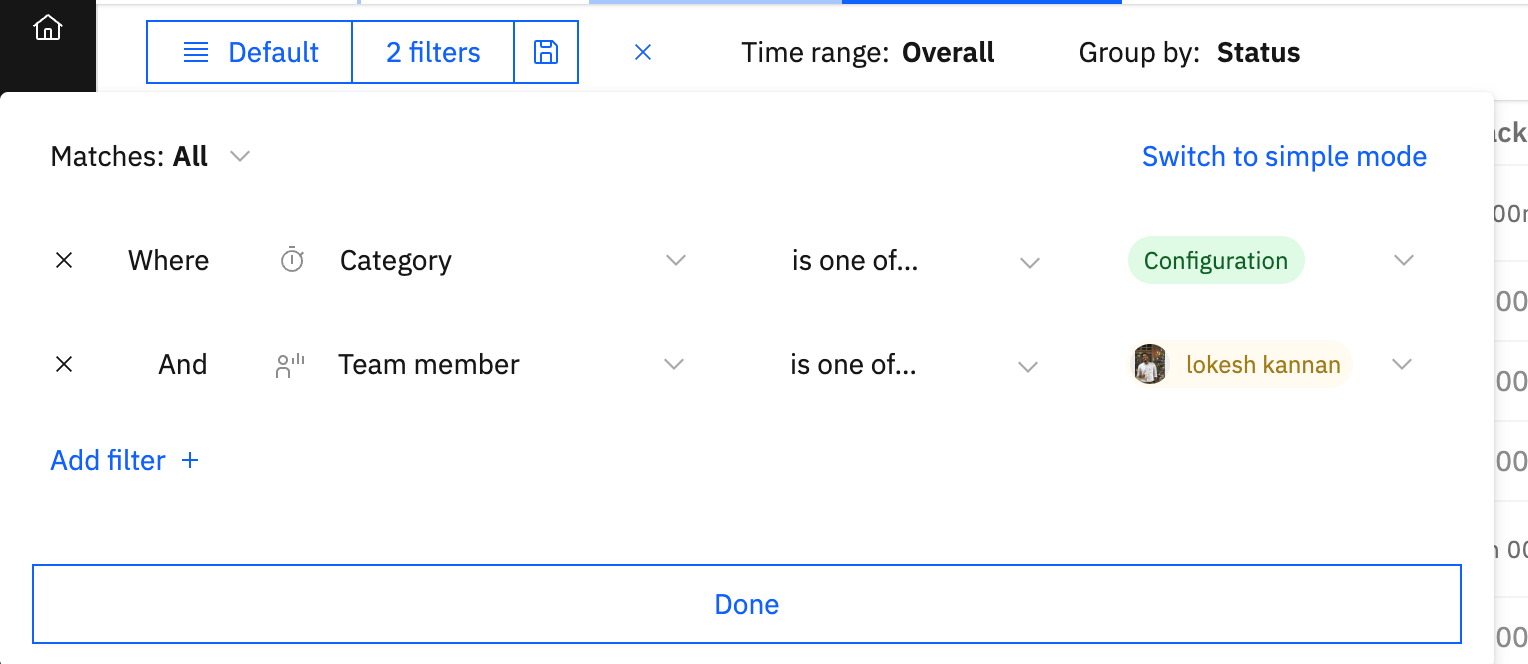
Filter entries using simple filters, such as submission status, billability, and category, or advanced filters based on time entry fields and user fields.
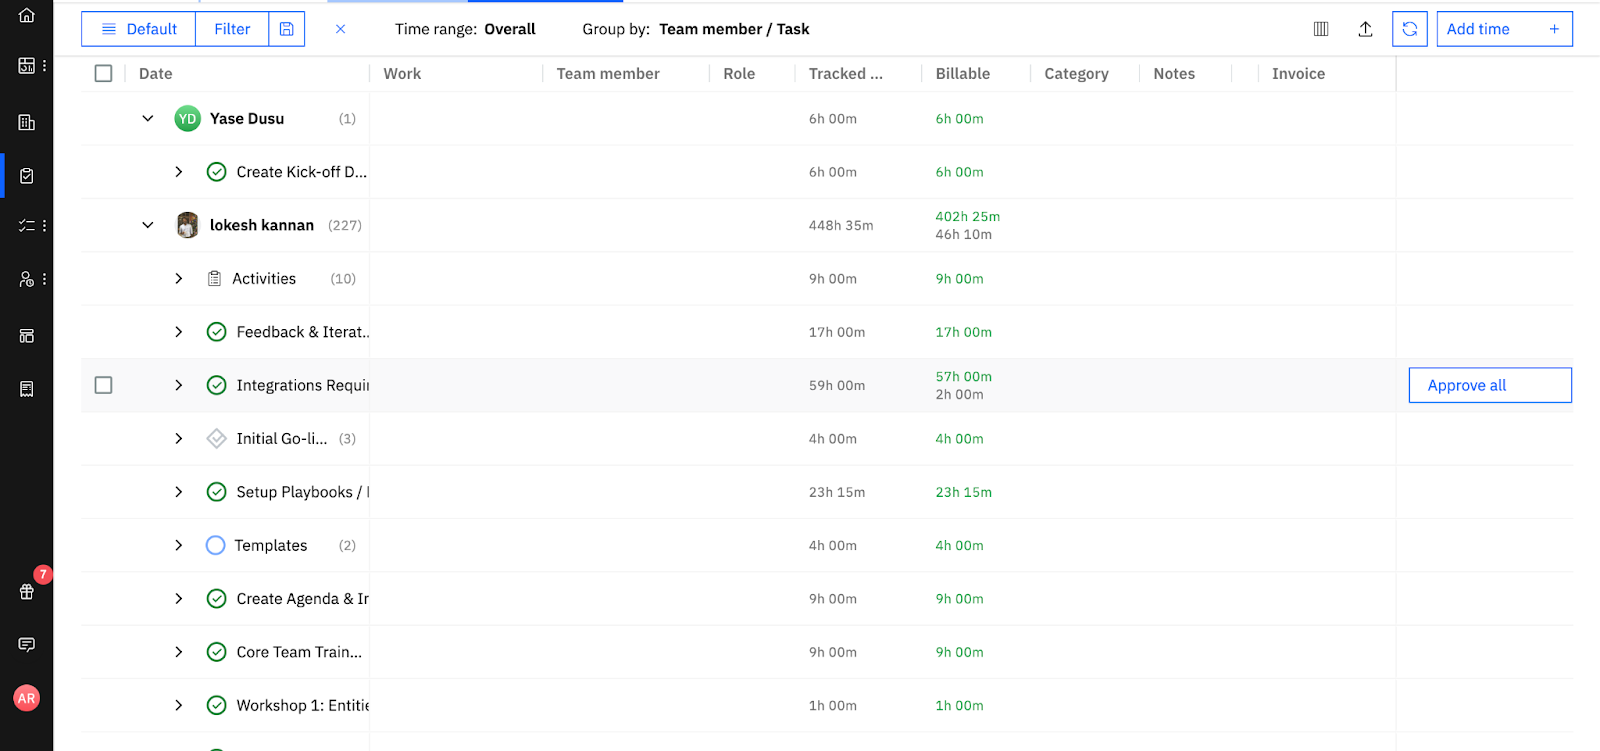
For grouped entries, you can view summarized information at the group row level, including total tracked time and the billable/non-billable split.
Add time as a project owner
Under Tracked Time, click Add Time. Project owners and admins can log time for themselves, other users, and partner users.

- Select the team member.
- Choose the task for which time is being tracked.
- Enter the date and number of hours worked.
- If the task is billable, select the Billable checkbox.
- Select a category and add notes.
- Click Save to log the entry.

Native time entry audit fields
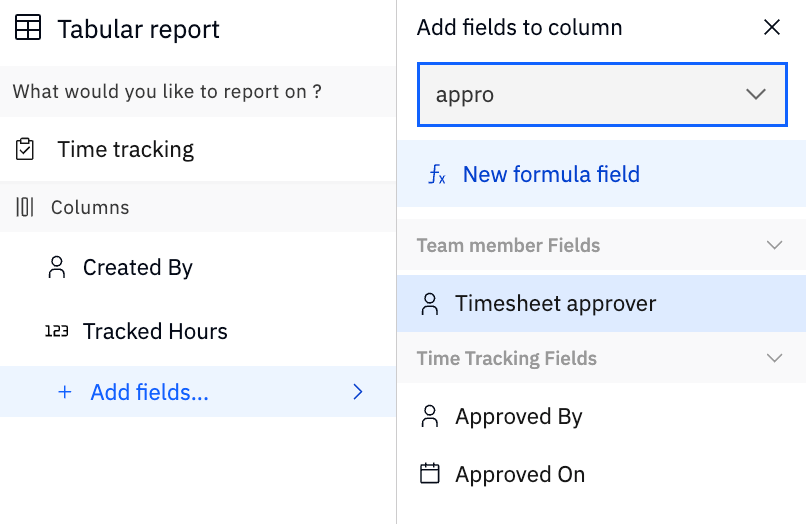
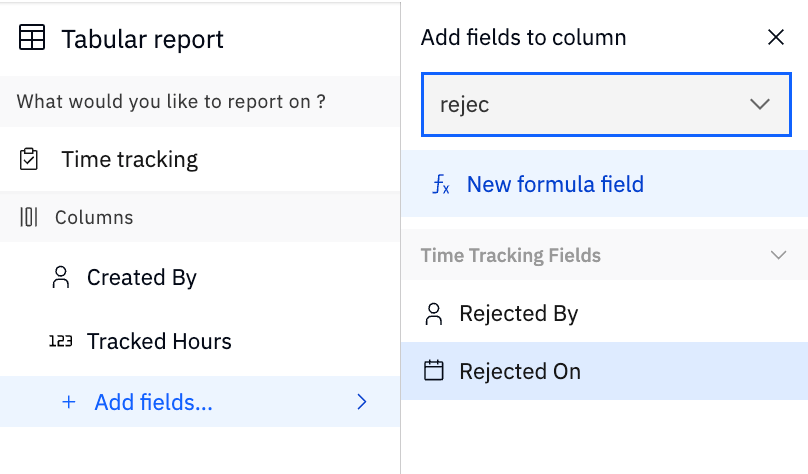
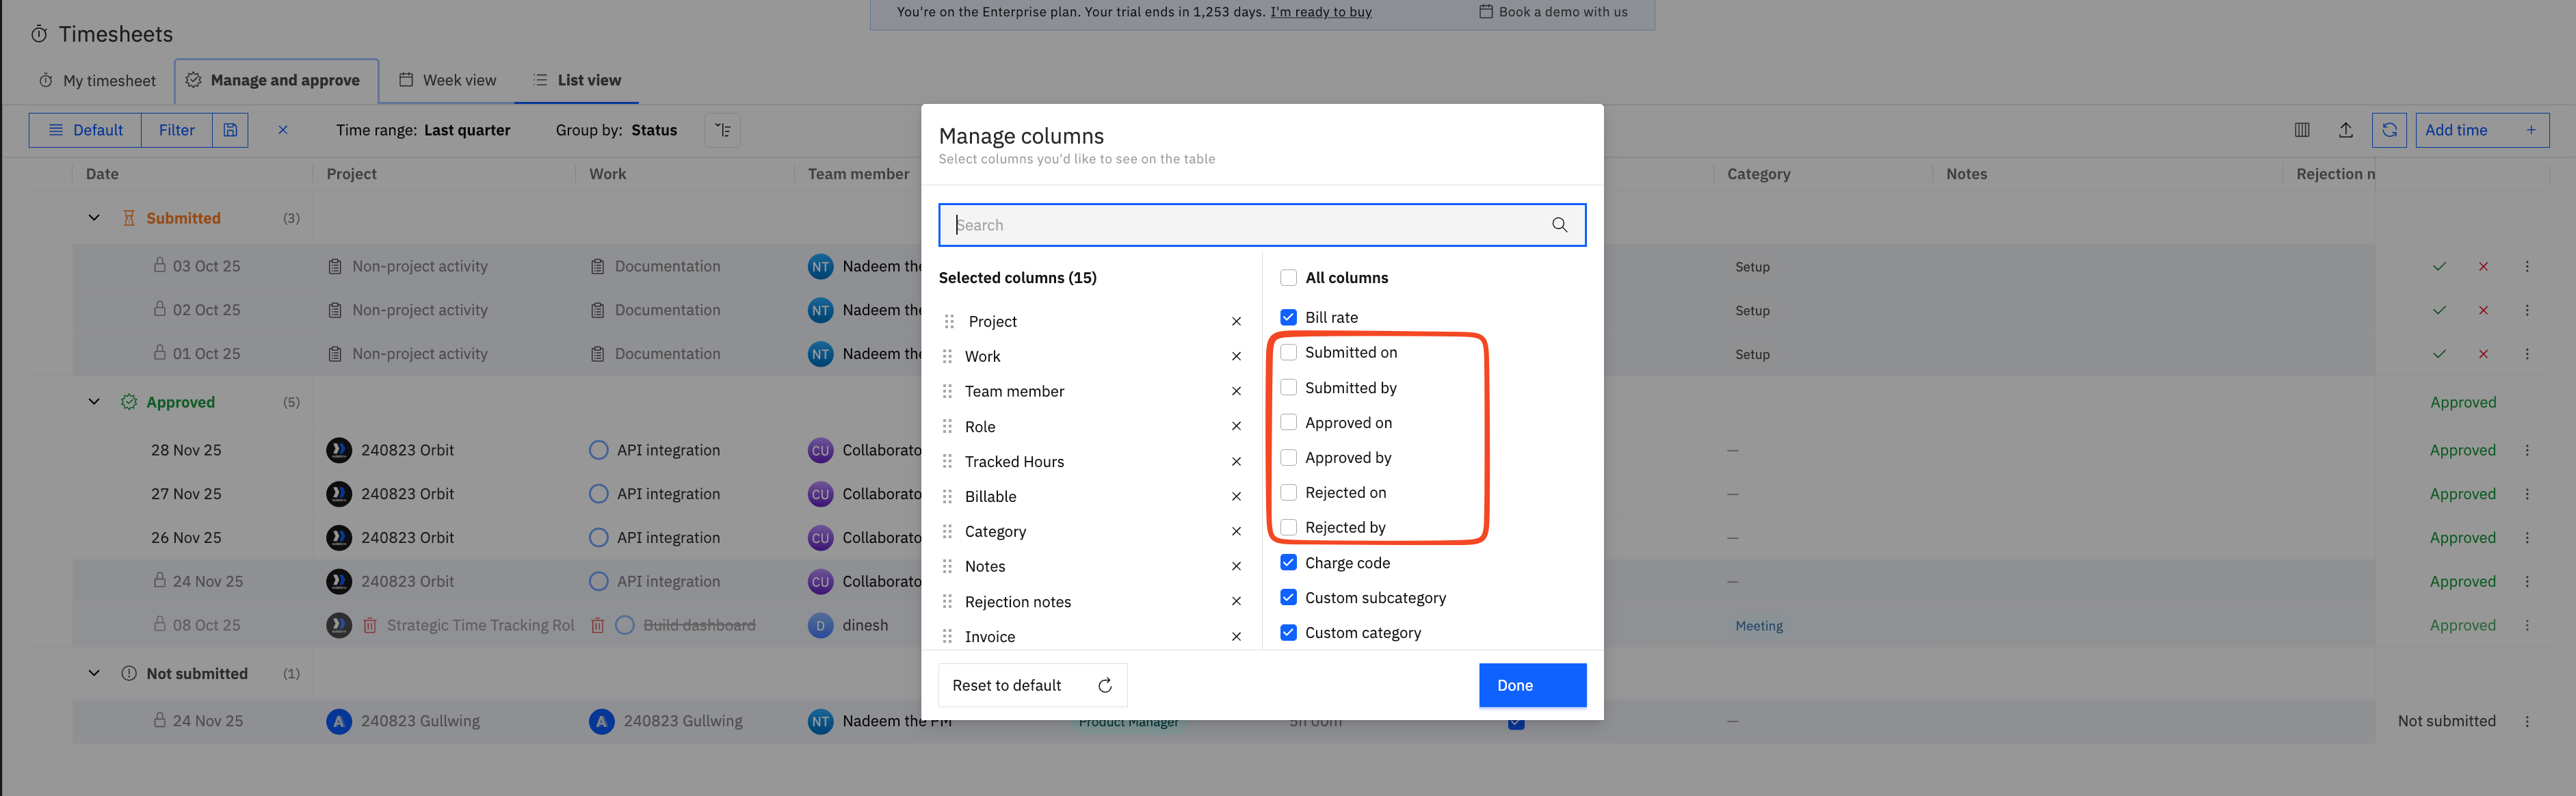
Native audit fields improve traceability and ensure audit data always reflects the current state of each entry. The following fields are maintained automatically:
Where these fields are available
- Time tab, available but disabled by default
- Exports
- Custom reports
Submission and approval workflow
Partial submission and approval
- Submitters can submit a week’s timesheet only after they meet the configured minimum hours. However, approvers can override this and approve individual time entries even if the full timesheet has not been submitted.
- Approvers with appropriate permissions can submit time on another user’s behalf.
- Approvers can approve entries that have not yet been submitted.
- Once a timesheet is approved, entries become locked and cannot be modified unless the approver or admin has explicit permission to edit locked entries.

Configure time entry notifications
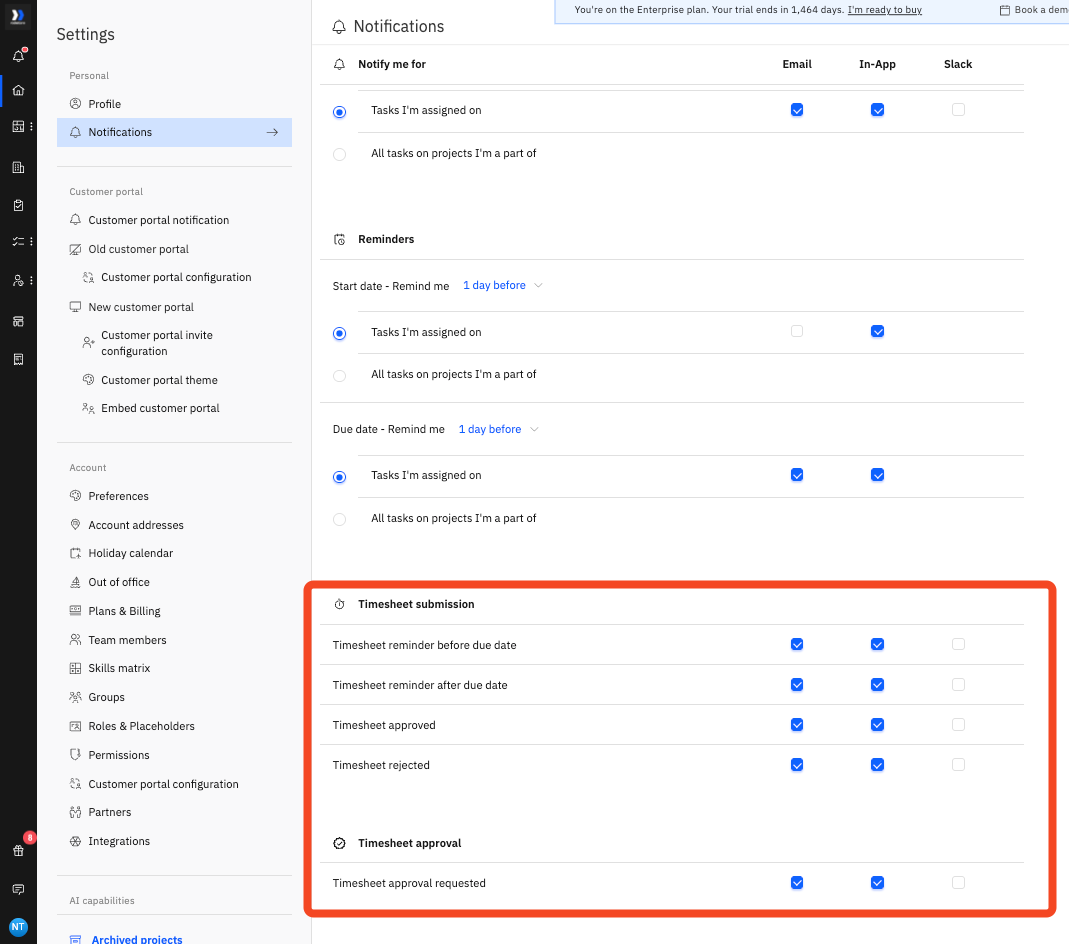
Users can customize their time entry notifications. By default, all email and in-app alerts are enabled, but users can disable any notification they no longer need.
Timesheet submission notifications:
- Reminder before due date, as configured in Time Tracking settings
- Reminder after due date, as configured in Time Tracking settings
- Timesheet approved
- Timesheet rejected
Timesheet approval notifications:
- Timesheet approval requested, which notifies approvers when a timesheet is submitted for their review.
Timesheet approver hierarchy
Rocketlane offers an optional Approver Hierarchy for organizations that need more flexible oversight in the approval chain. This setting is disabled by default and can be enabled at the organization level.

When enabled, higher-level approvers in the reporting chain can view and approve timesheets even if they are not the directly assigned approver. A user’s manager, their manager’s manager, and others in the upstream reporting hierarchy can gain approval access within the defined hierarchy.
How it works:
- Expands the default approver model to include upstream approvers.
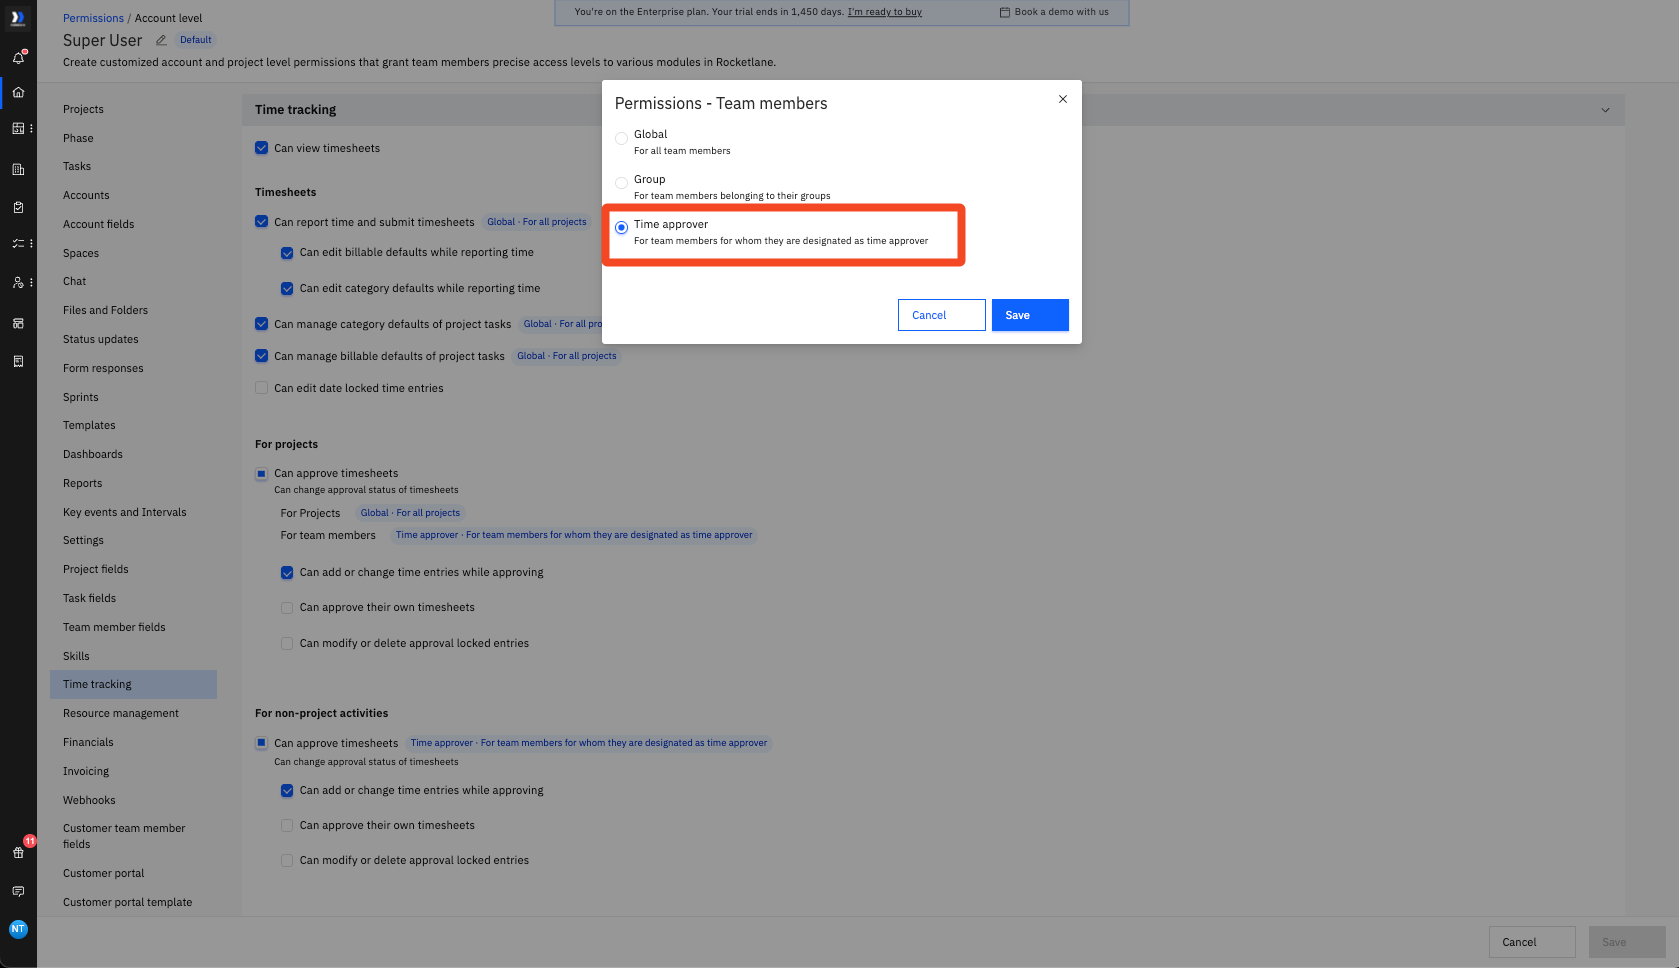
- Applies only to users with the Can approve timesheets permission under the Time approver RBAC scope.
- Users with this permission can see timesheet entries for approval across their reporting hierarchy.
- Currently supported in Timesheet List View and Week View. Reports support is coming soon.
Role-based access control
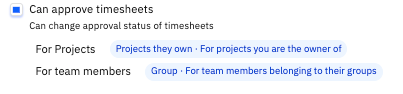
Users with the Approve time permission can access the Tracked Time tab. The entries they see and the actions they can take are determined by their RBAC scope.
Enterprise accounts:
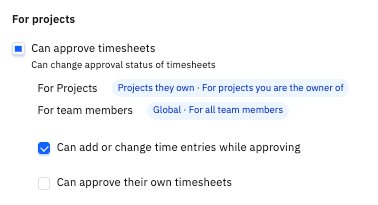
The entries a user sees depend on their configured scope. For example, an approver scoped to projects they own and a specific group will only see time entries from people in that group within those projects.
Non-enterprise accounts:
- Admins can see the Tracked Time tab for all projects and all people.
- Project owners can see the Tracked Time tab for projects they own and for all participants of those projects.
- Collaborators cannot access this tab because they do not have the Approve time permission.
Control time entry dates by allocation type
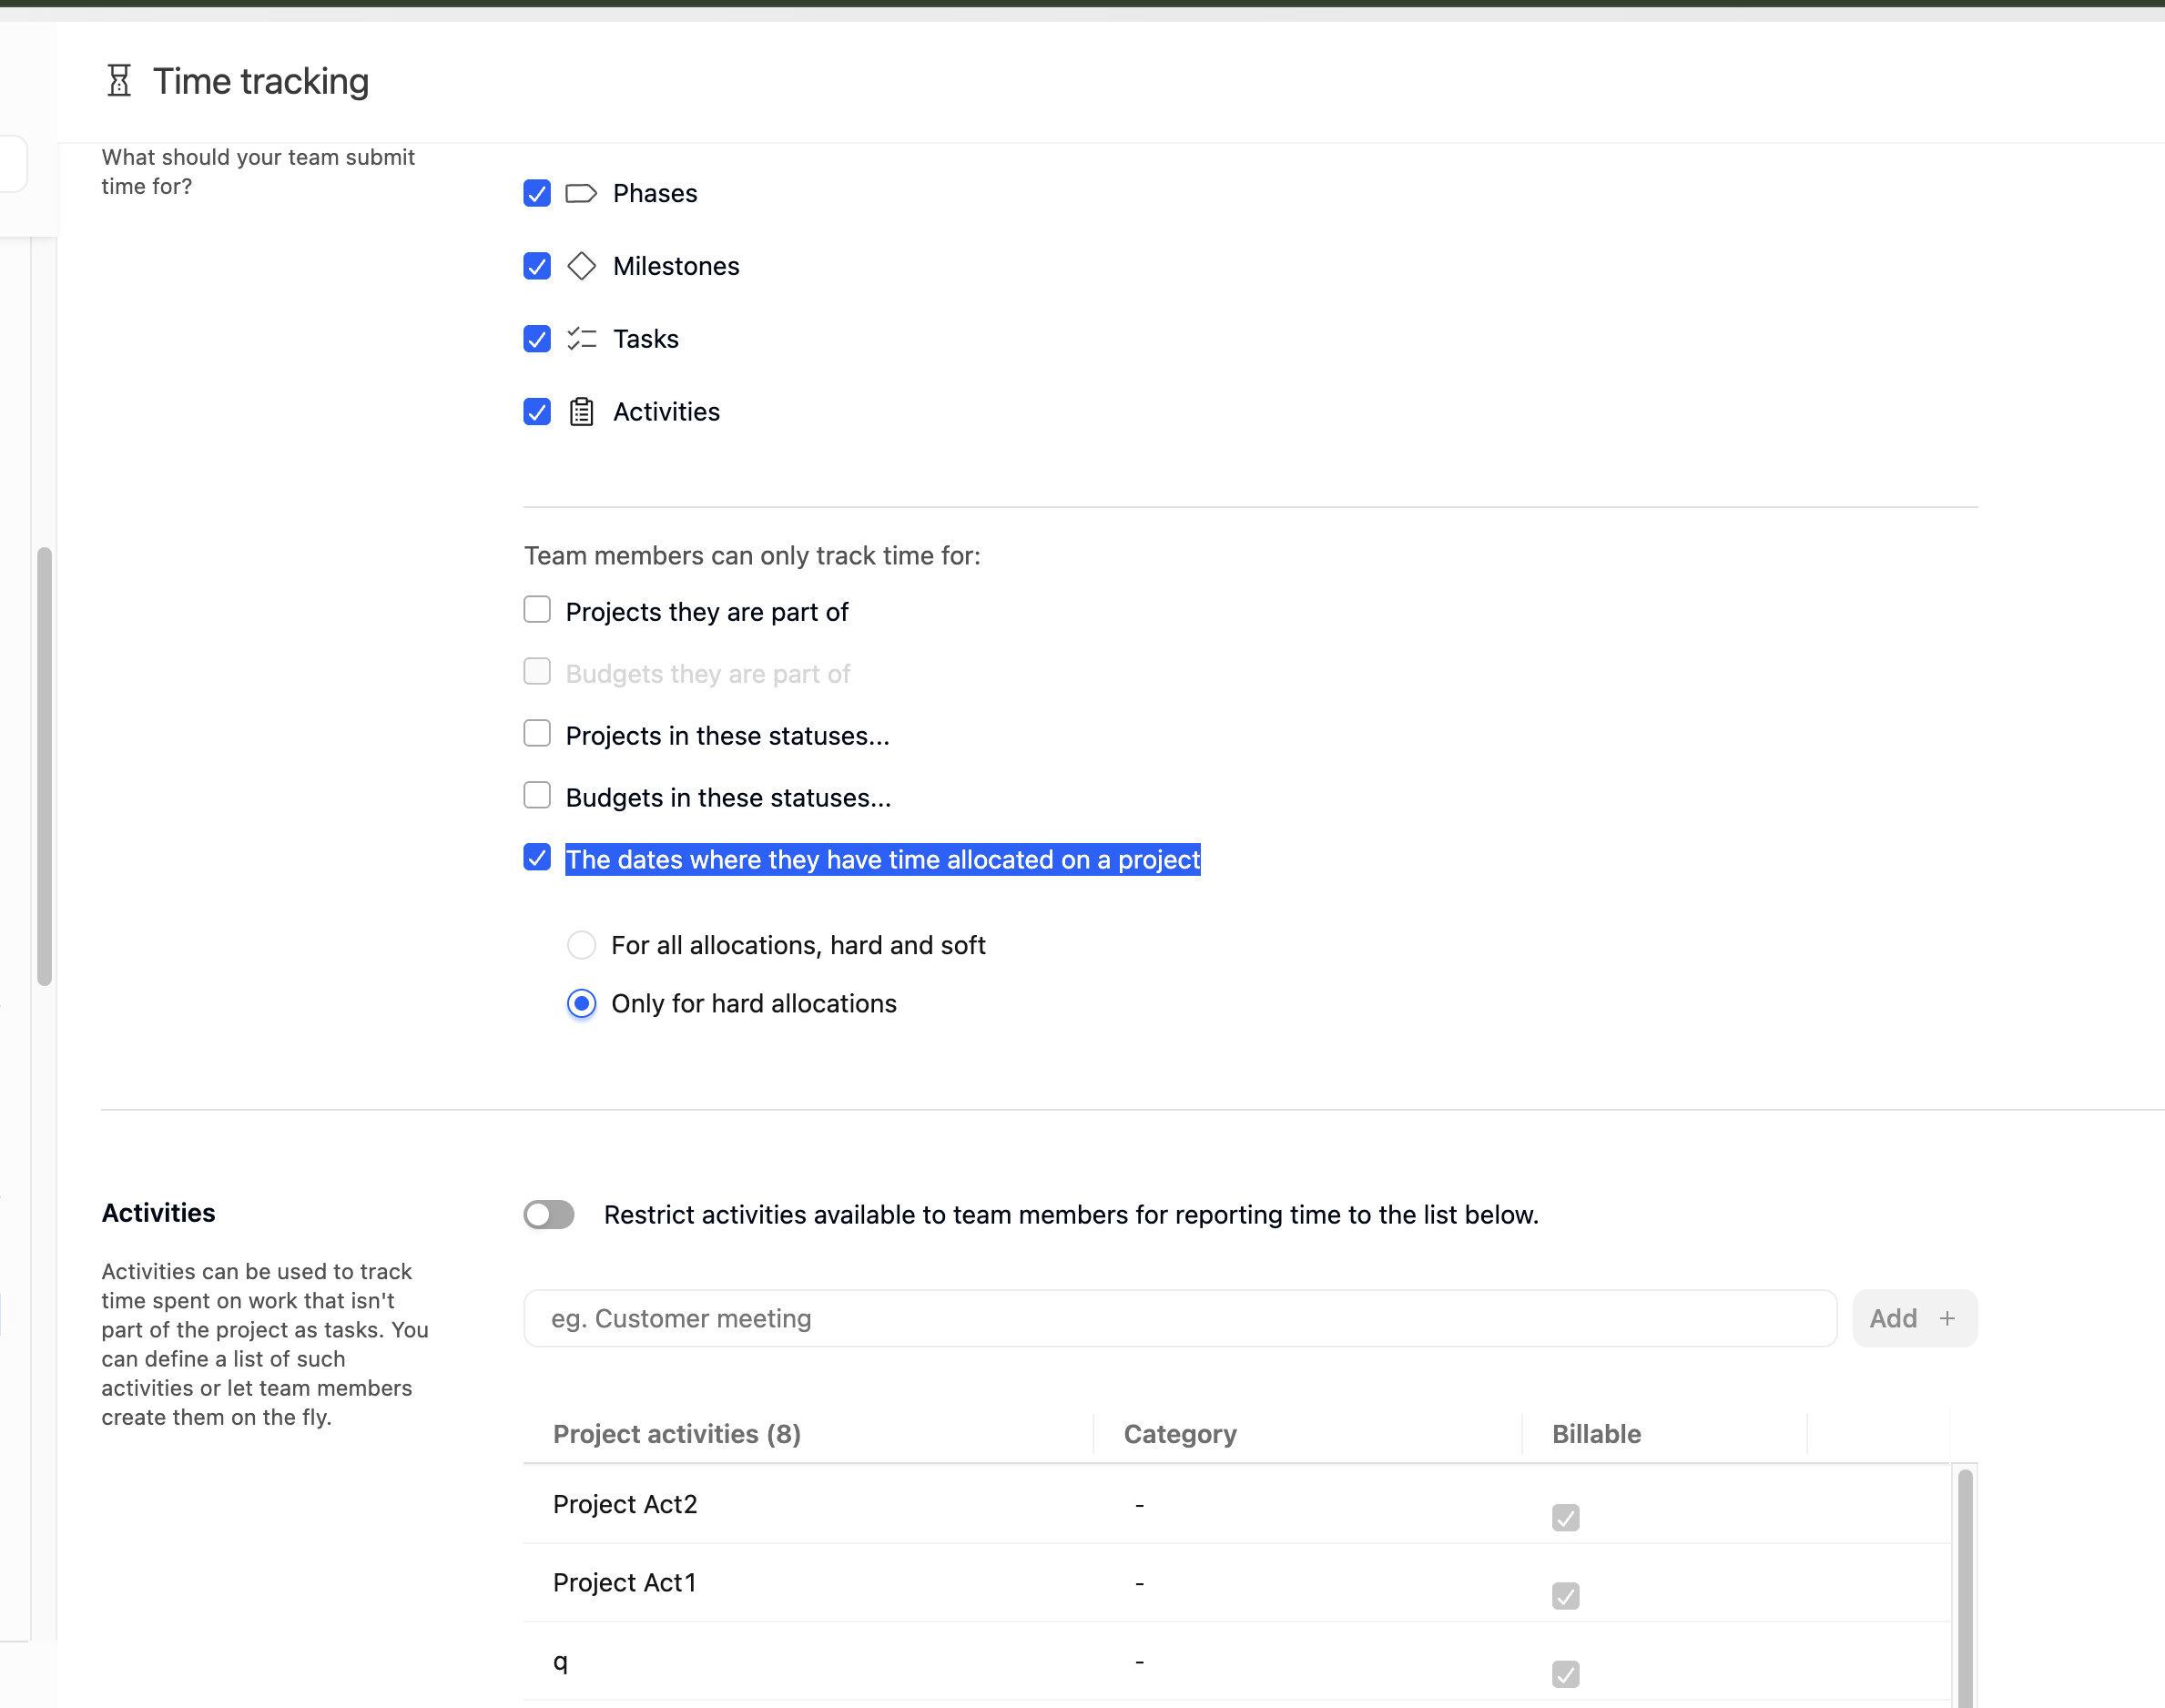
Under Settings > Time Tracking, when The dates where they have time allocated on a project is enabled, admins can choose which allocation types allow team members to log time:
- For all allocations, hard and soft: Team members can log time on any date with either a hard or soft allocation.
- Only for hard allocations: Team members can log time only on dates with a hard allocation.
Override bill and cost rates on time entries
Time entries usually use the bill and cost rates determined by the project’s financial configuration. When a specific entry requires a different rate, users with the appropriate permissions can override its rates without changing the rates applied to other entries.
Rate overrides are available from:
- Project Financials > Time Tracked
- Timesheets > List view
You can update an individual time entry or select multiple entries and update their rates in bulk.
Rate override options
Override a rate on an individual time entry
- Go to Project Financials > Time Tracked > List view.
- Find the time entry you want to update.
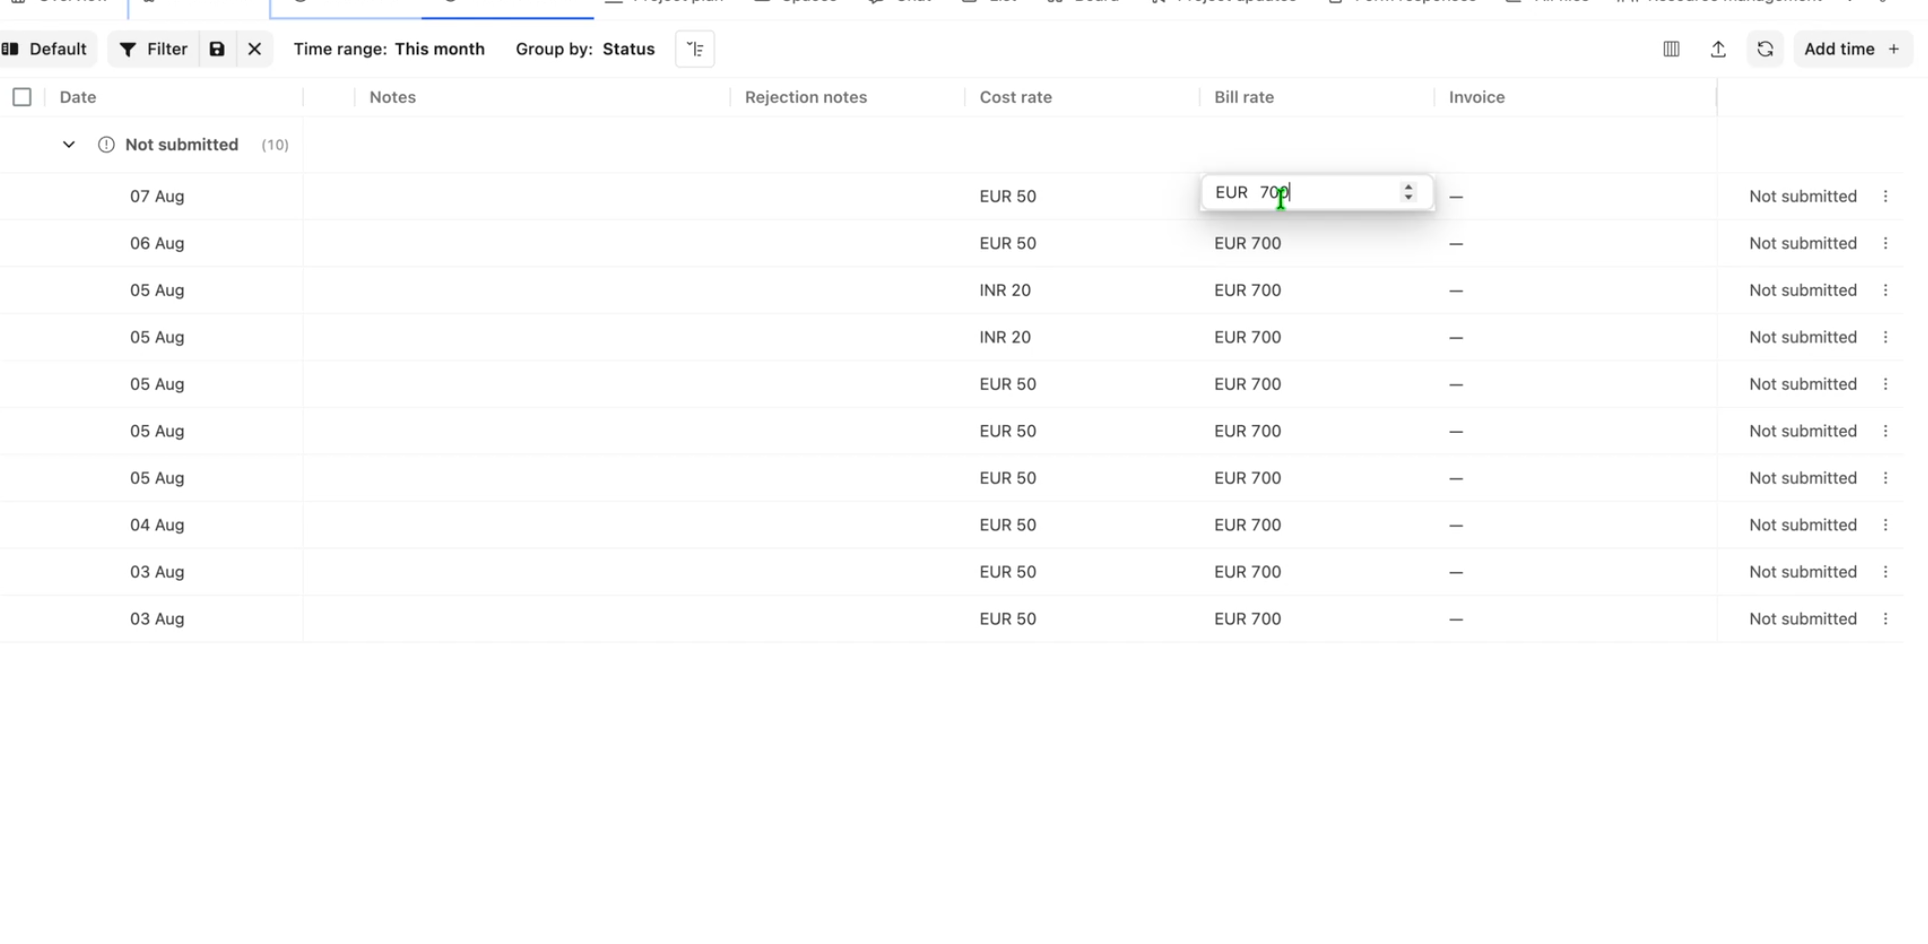
- Edit the Bill rate or Cost rate, depending on your permissions.
- When changing a cost rate, select the required currency if necessary.
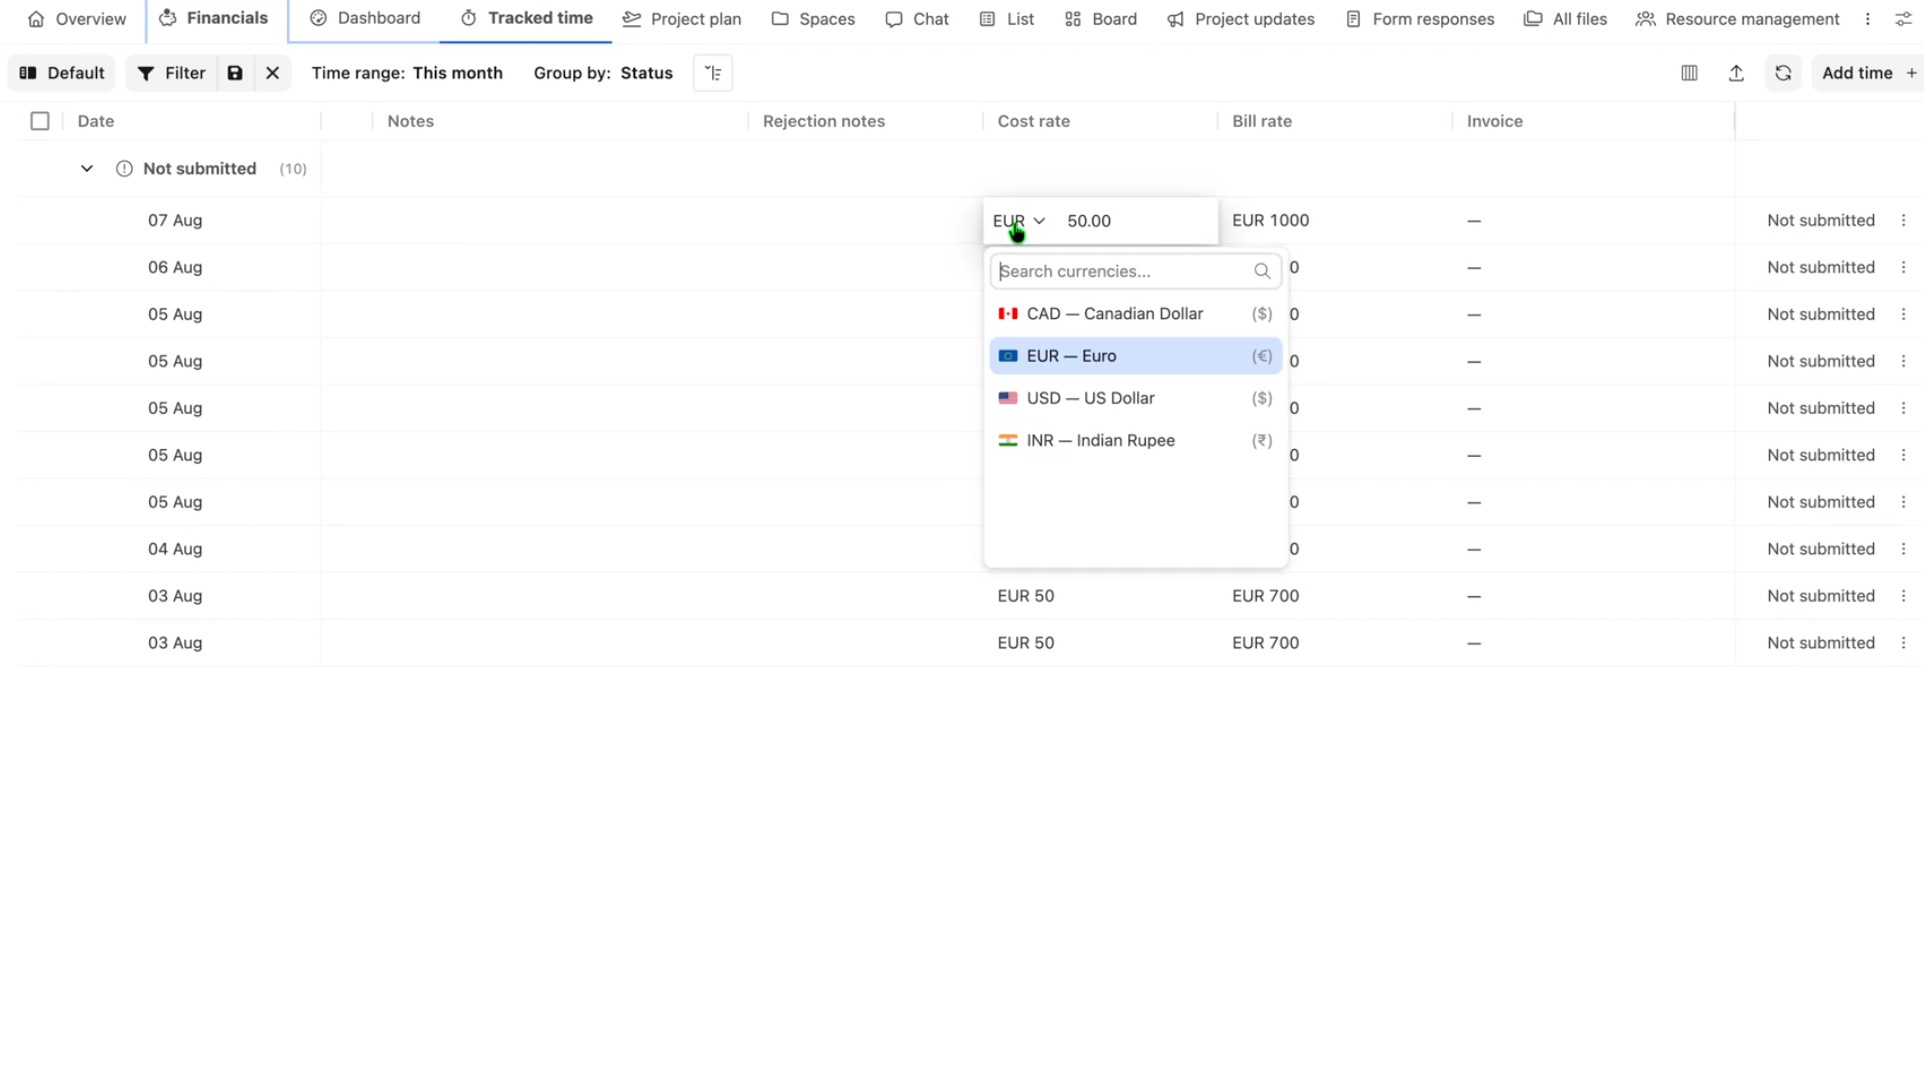
- Save the changes.
Override rates in bulk
- Open the time-entry list and select the entries you want to update.
- Use the bulk update option.
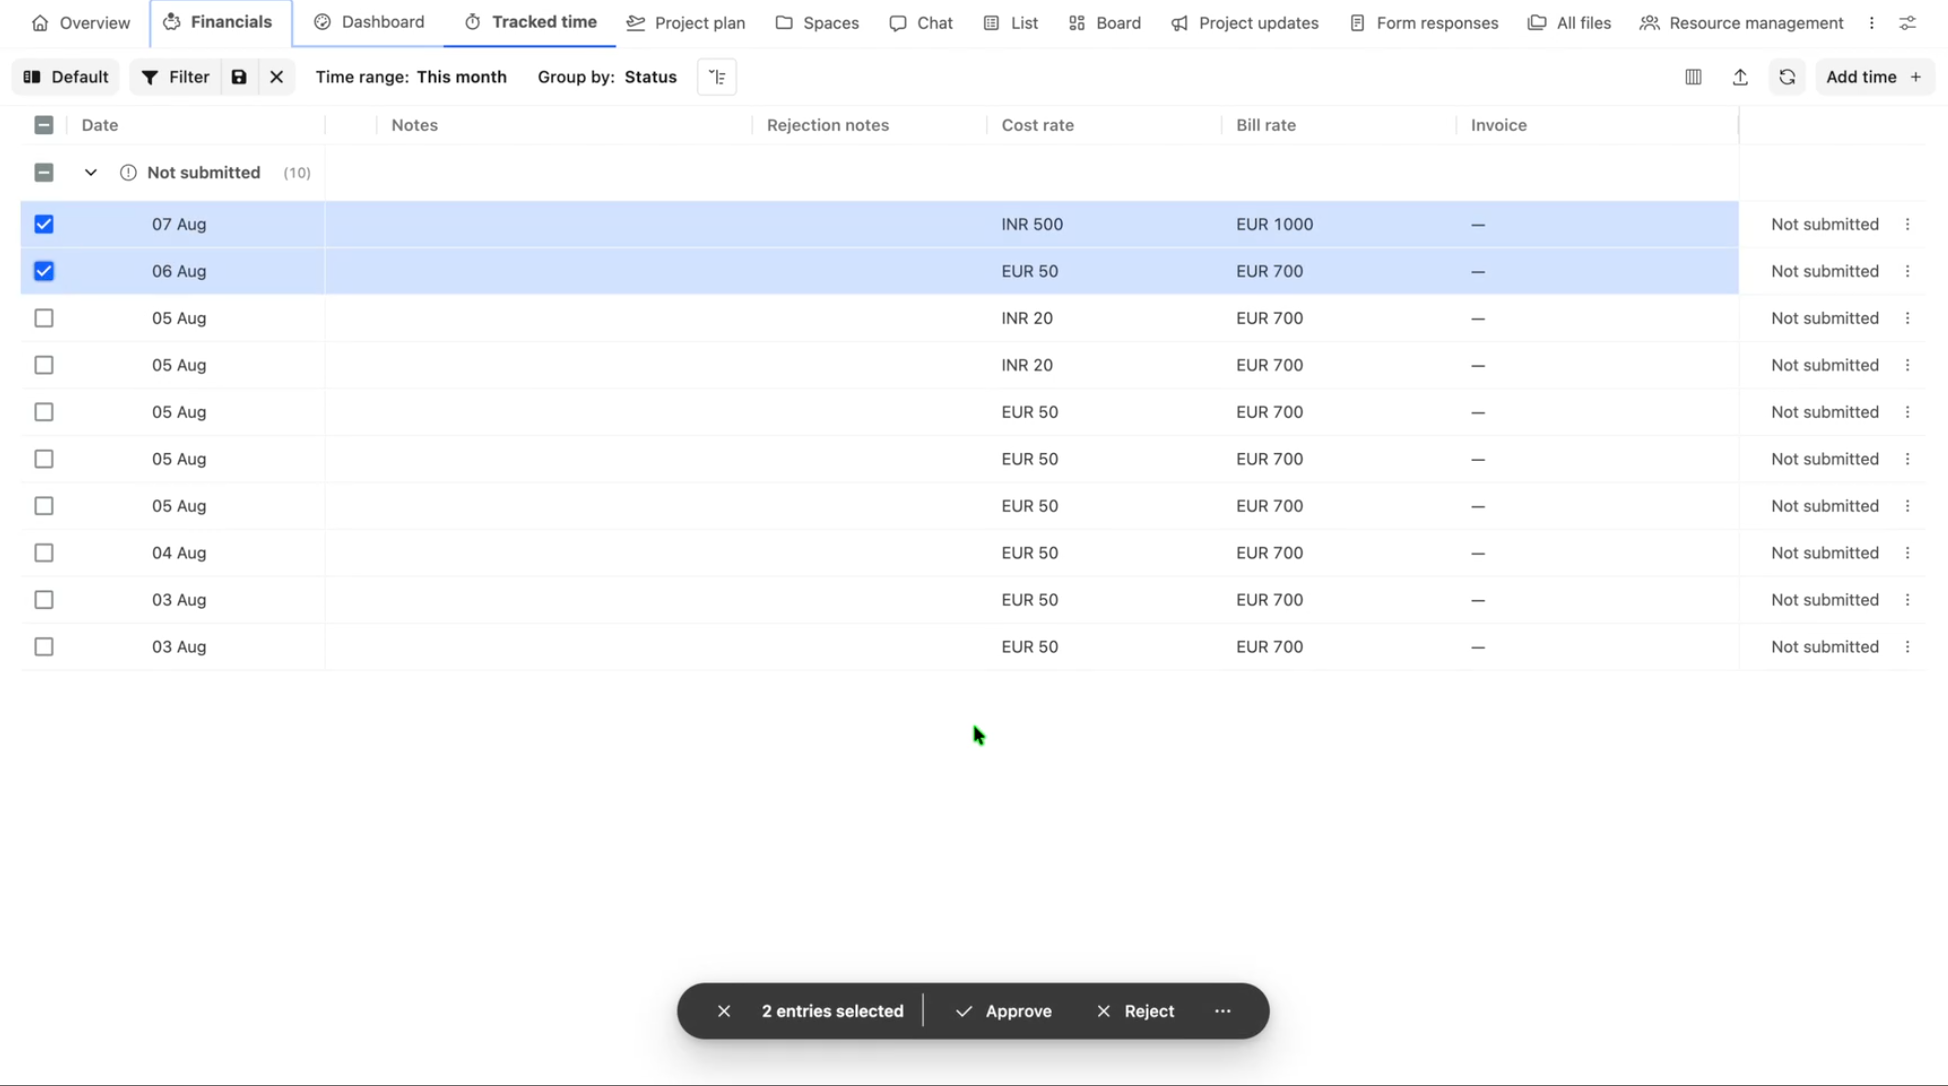
- Select Bill rate or Cost rate.
- Enter the new rate. For a cost-rate update, select the required currency.
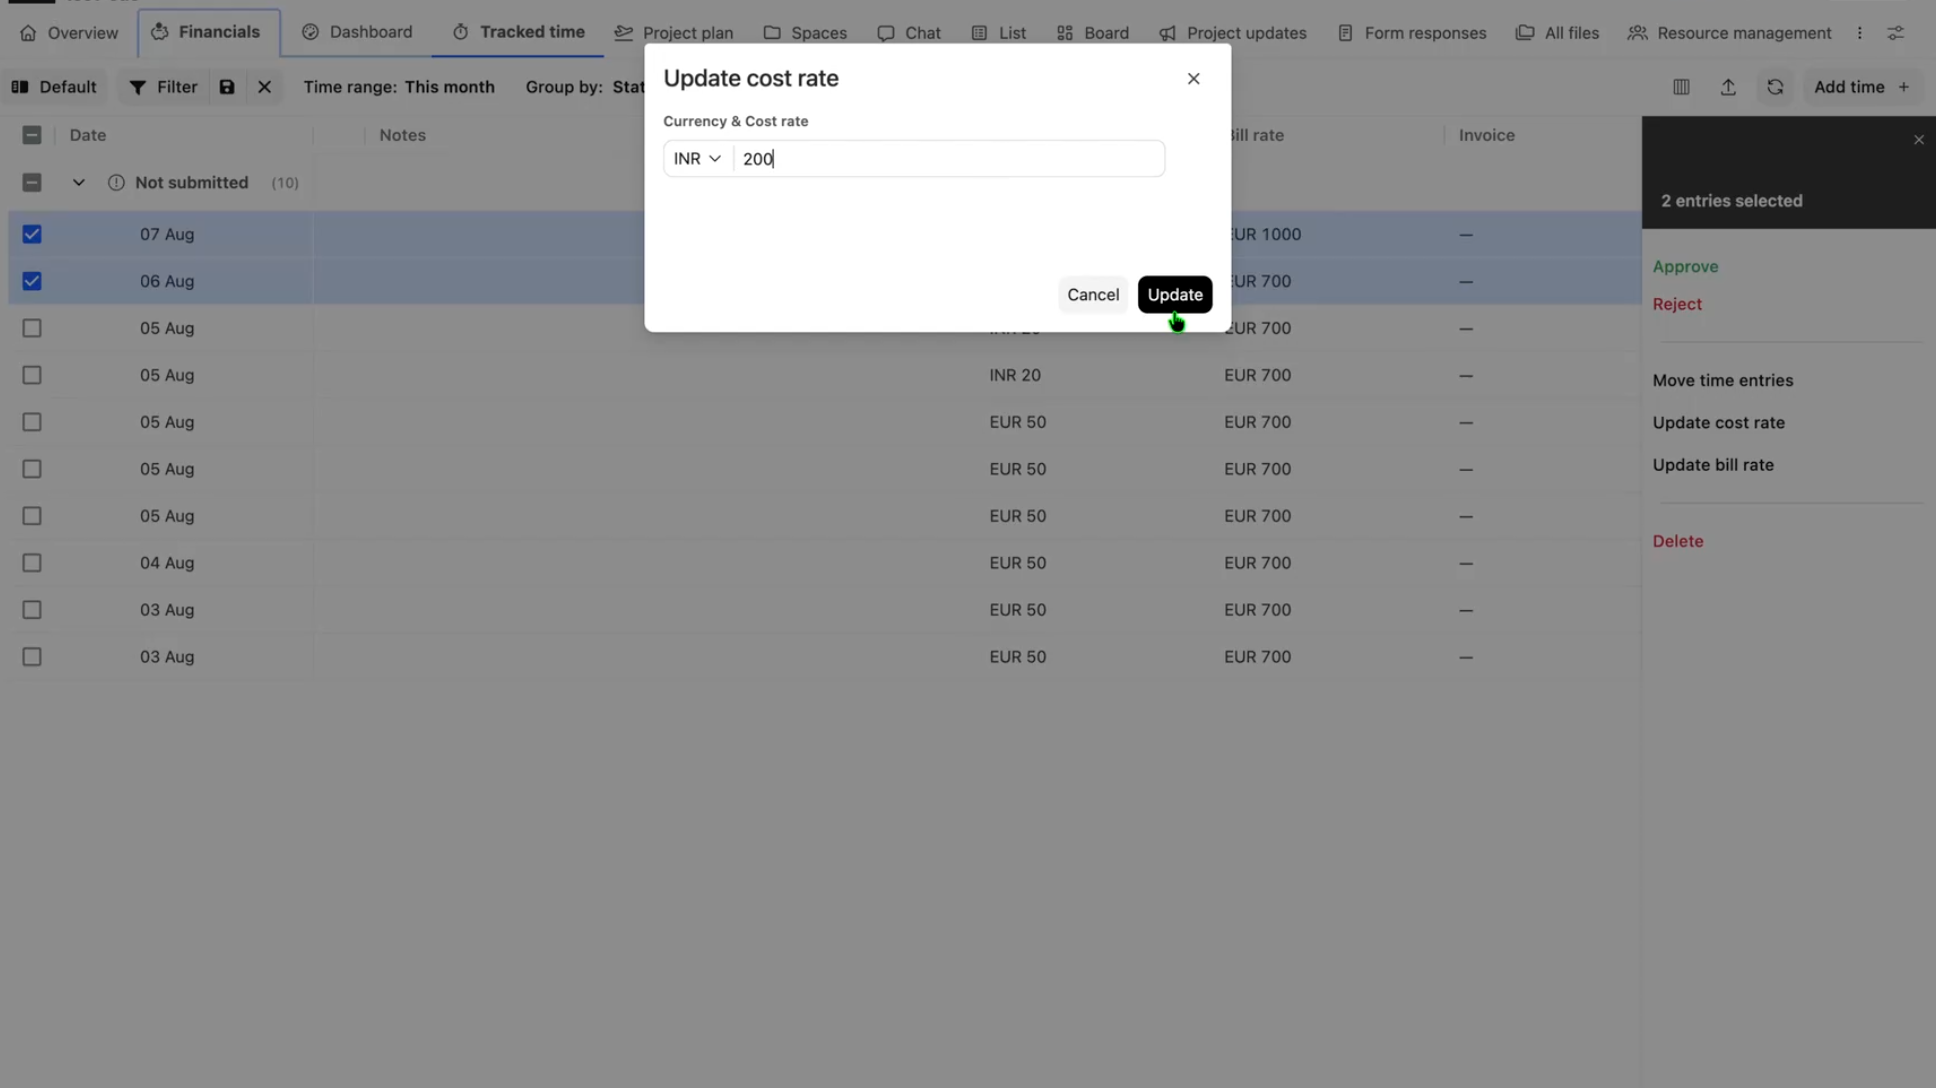
- Apply the changes.
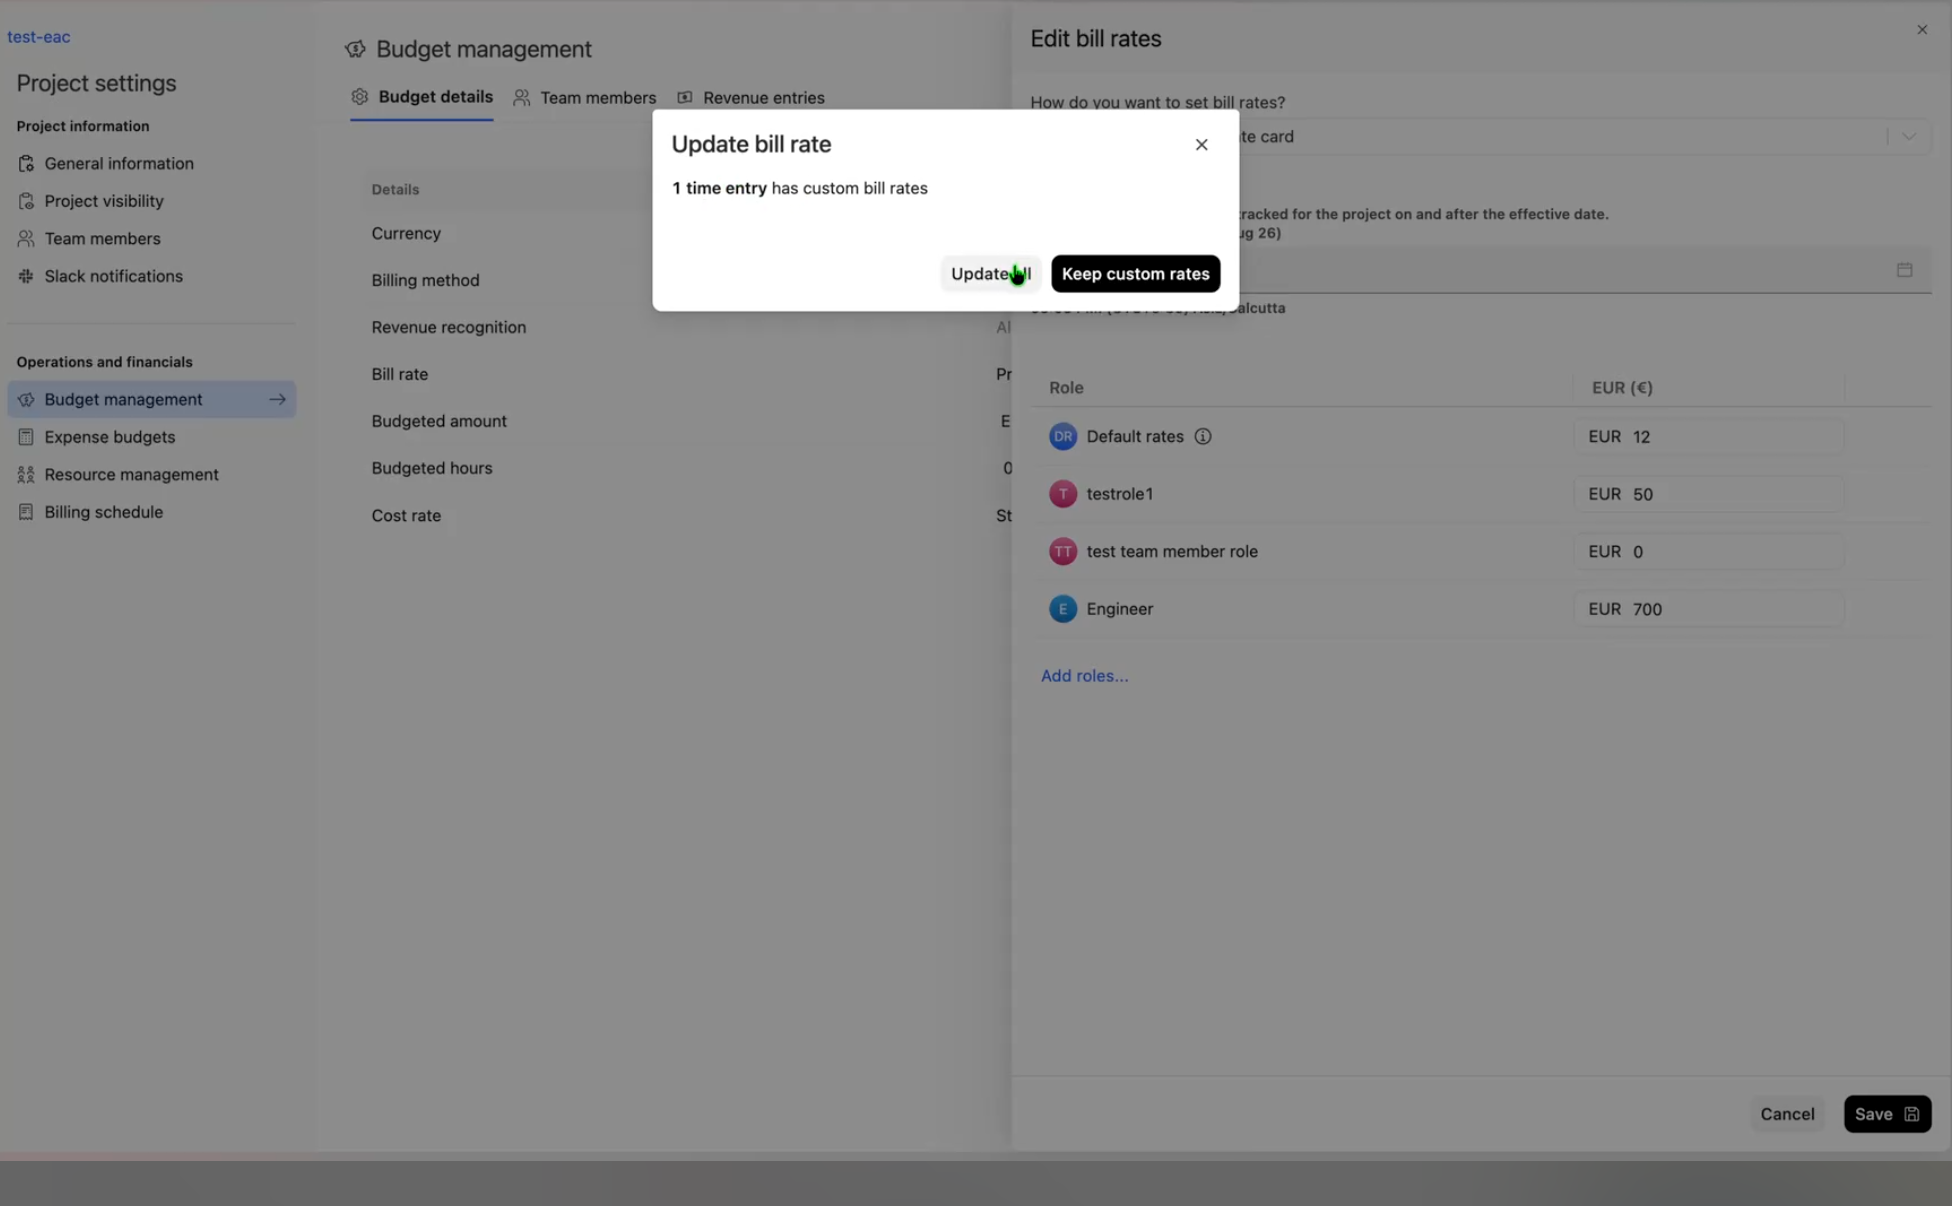
Rate overrides and rate-card updates
When you update a rate card, you can choose how the change should affect time entries that contain manual overrides:
- Preserve manual overrides: Retains the rates entered manually on individual time entries.
- Overwrite manual overrides: Replaces the manually entered rates with the updated rate-card values.
Manual rate overrides are also reflected in custom reports. When a report uses a different currency, Rocketlane converts the overridden rates accordingly.
To do this
- Navigate to your Project > Budget Management > Edit Bill Rate
- Set a date, for when the rate change takes effect.
- Save the changes.
Permissions required
Access to rate overrides is controlled by the following permissions under the Financials section in Settings > Permissions:
FAQ
Why can’t I see the Tracked Time tab?
Make sure the Time tab is enabled. If it is already enabled, you may not have the Approve time permission.
Why are my time entries not visible?
Check your RBAC permissions. You can only view time entries that fall within the scope you are authorized to approve.
Why is a specific column missing?
Check your column visibility settings. Financial columns such as bill rate and cost rate are visible only to users with the appropriate permissions.
How do I change the date or team member on a time entry?
Editing the date or team member directly is not permitted. Create a new time entry with the correct details instead.
Why can’t I edit the role on a time entry?
The user may have existing allocations across all possible roles, which prevents editing the role field.
How do I modify invoice-related information?
Invoice fields cannot be edited from the Tracked Time tab. Make changes directly within the invoice.
How do I adjust the bill rate or cost rate?
If you have the required permissions, you can override bill and cost rates on individual time entries from Project Financials > Time Tracked or Timesheets > List view. You can also update rates in bulk. Bill-rate overrides are available only for time and materials entries, and bulk bill-rate updates require all selected entries to belong to the same project.
How do I log time against a specific project?
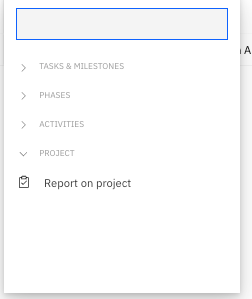
Select the time entry, choose Edit work, and use the Report to project option.