Sheets help teams capture, organise, and collaborate on structured project data directly inside Rocketlane. You can add sheets to projects, freeze sheet data, save and restore versions, highlight important values, comment at the cell level, and export sheet data for offline use.
In this article
Add a sheet to your project
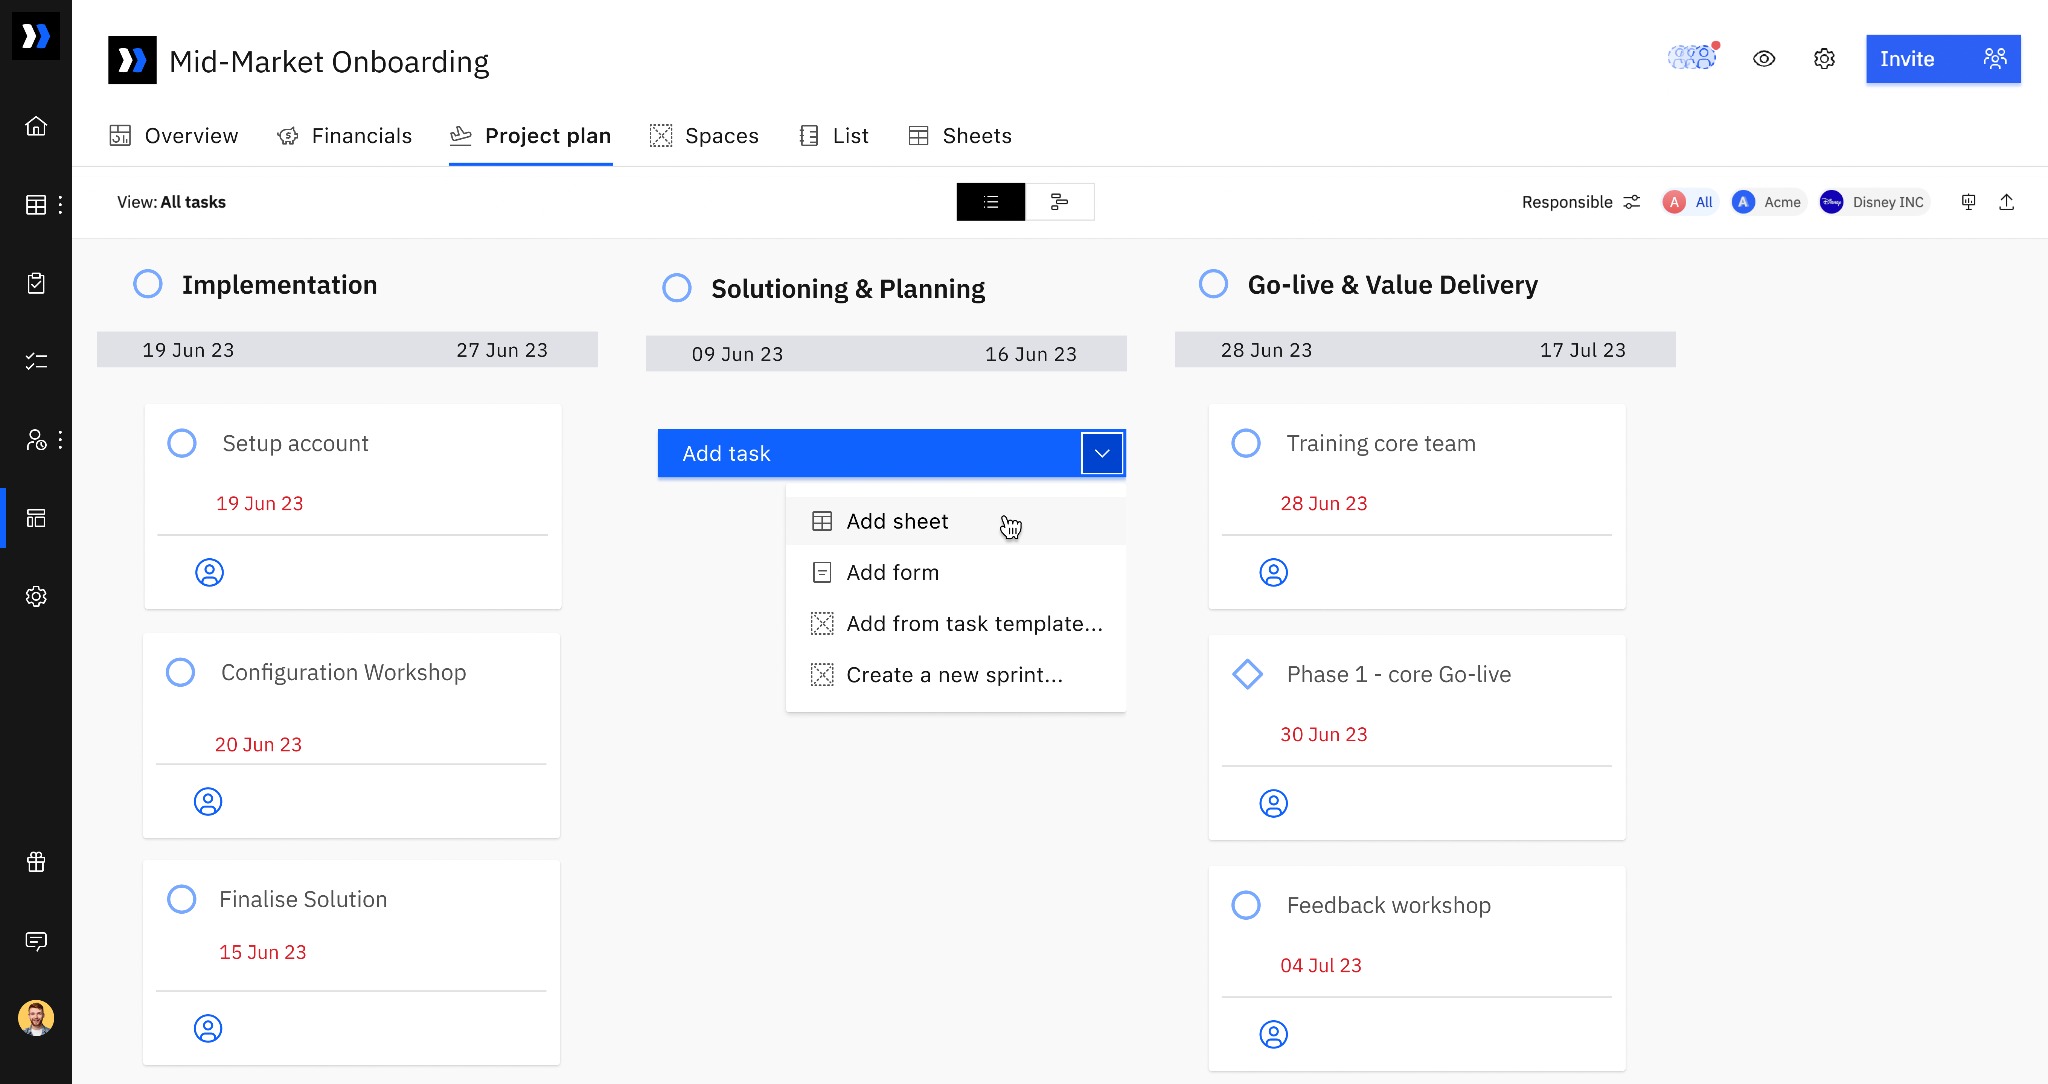
- Navigate to your project plan.
- Under a phase, open the dropdown menu next to Add task.
- Click Add sheet.
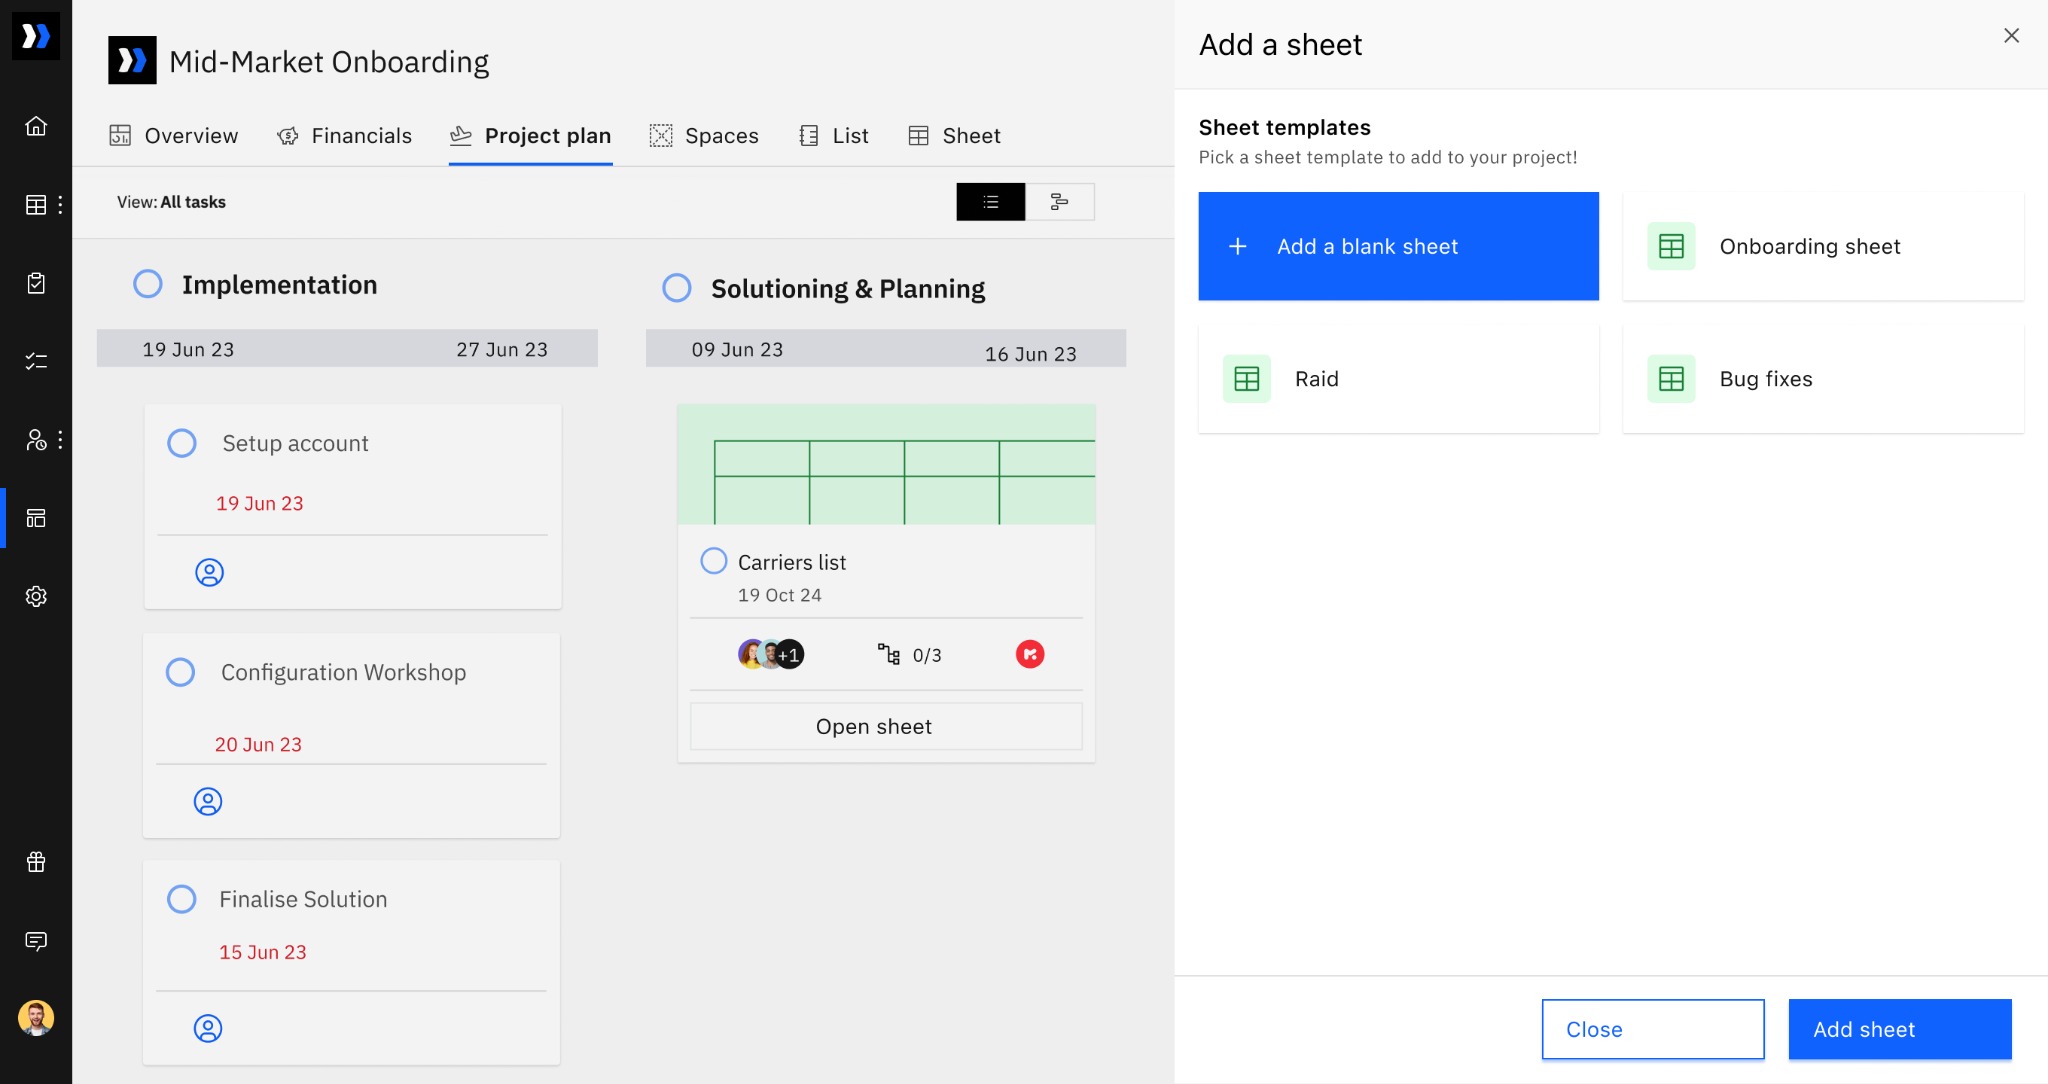
- Choose a sheet template or open a blank sheet.
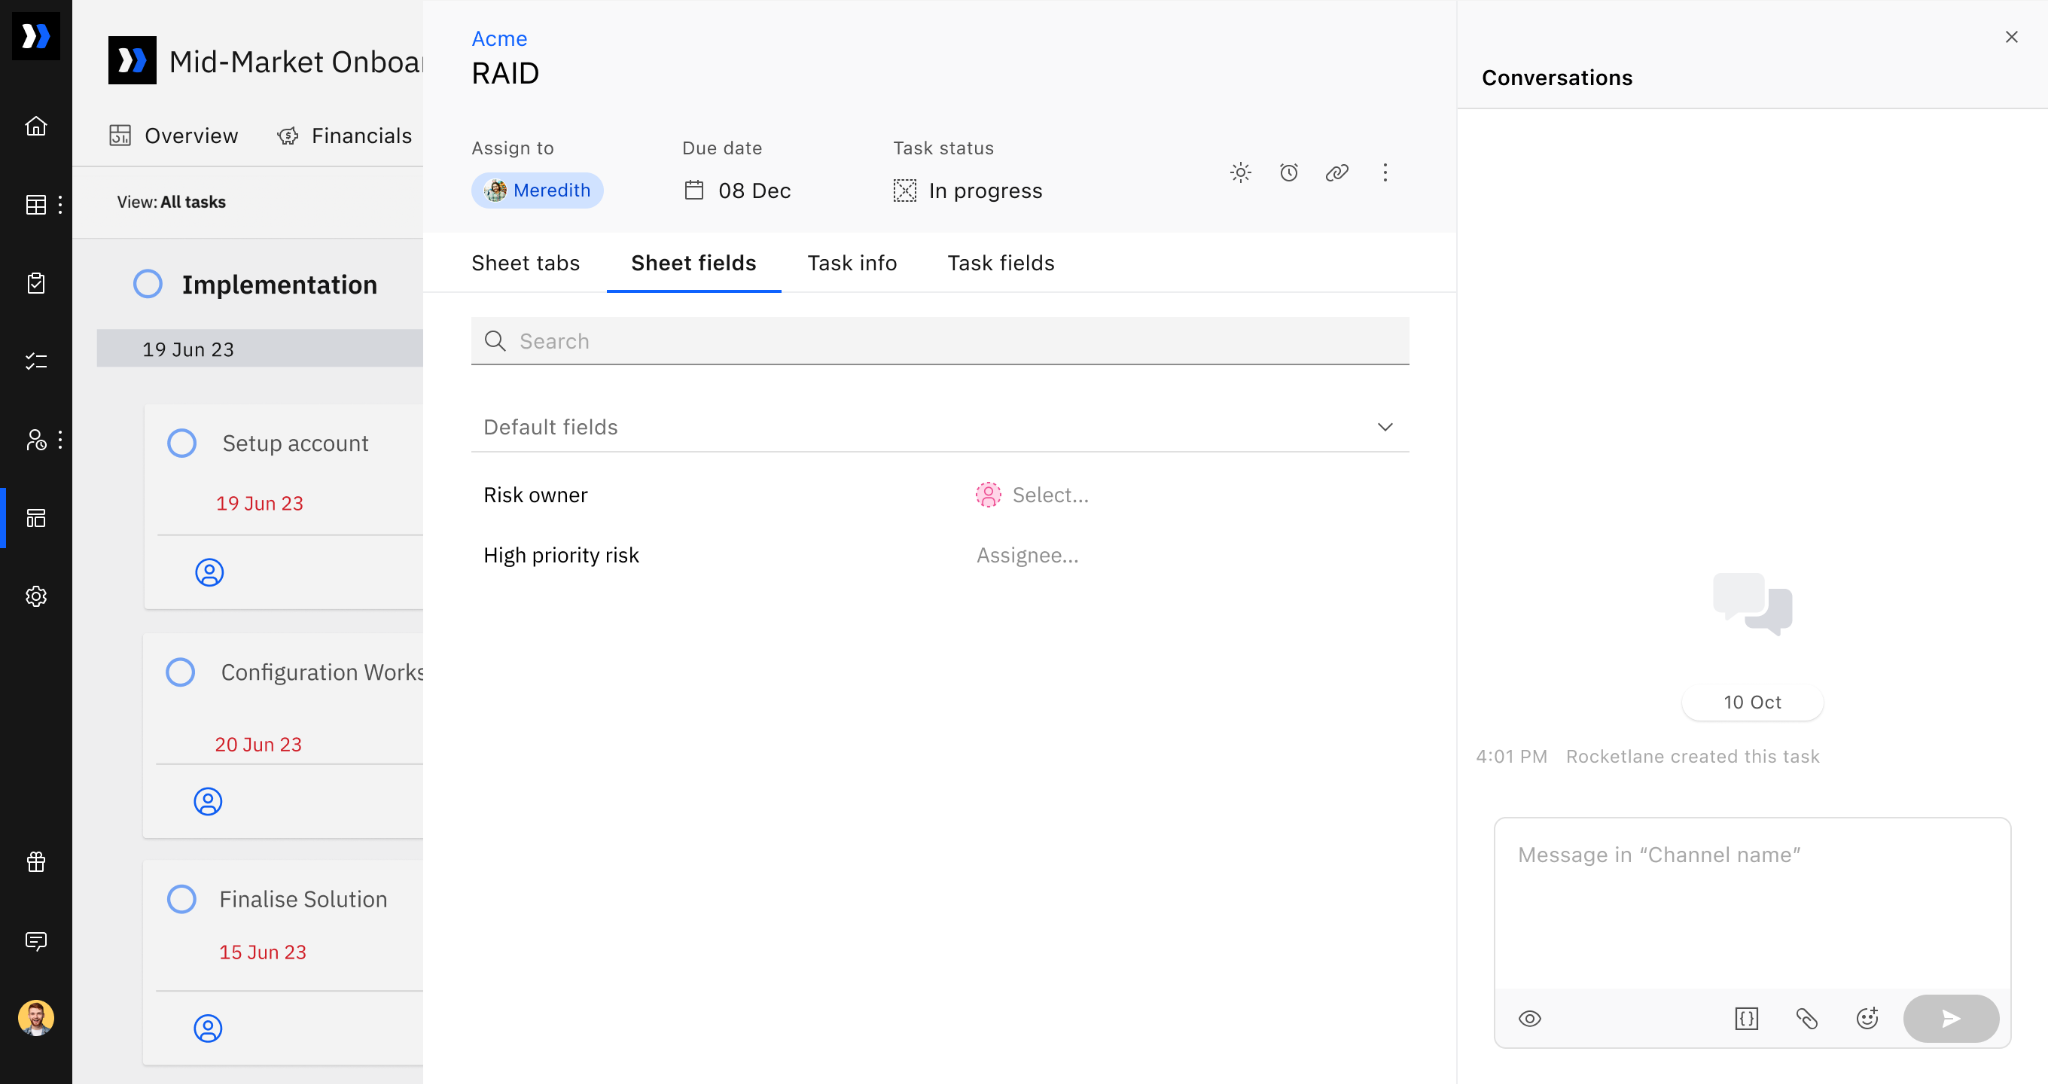
When you click a sheet from the project overview page, a side pane opens, similar to a task detail pane. From this pane, you can:
- Set task attributes such as Assignee, Due date, and Task status. The task status defaults to To Do when the sheet is created.
- View and configure sheet settings, including Sheet Tabs, Sheet Fields, Task Info, and Additional Info.
- Start conversations inside the sheet by clicking Conversations on the right side of the screen. You can tag people and use SmartFill to communicate relevant details about the sheet data.
Freeze sheet entries
If you need to lock data within a sheet and prevent further edits, you can freeze it. This helps preserve data integrity by disabling changes in the sheet or in a specific sheet tab.
Freeze an entire sheet
- Navigate to the Sheets section in your project.
- Scroll to the sheet you want to lock.
- Click the three dots (...) menu next to the sheet name and select Freeze Sheet.

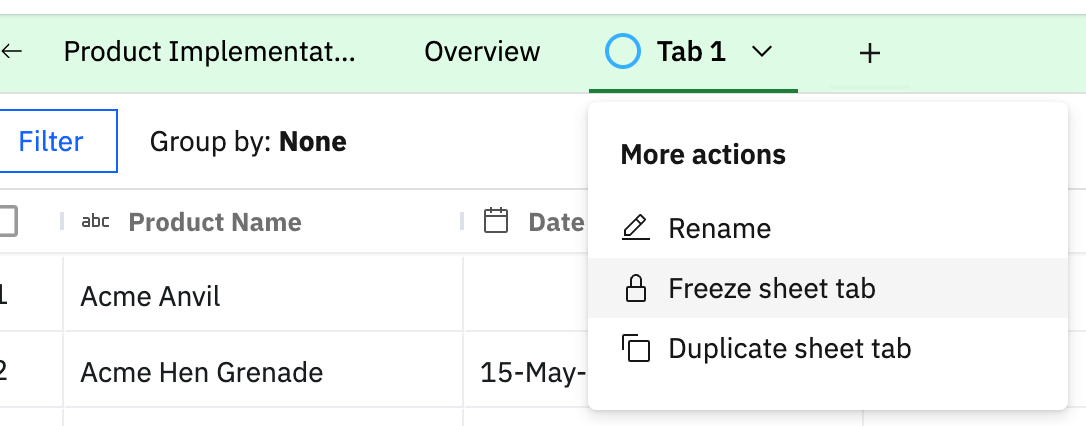
Freeze a specific sheet tab
- Open the sheet.
- Click the sheet tab dropdown.
- Select Freeze Tab.
Save and restore sheet versions
Sheet versions let you save the current state of a sheet, review previous versions, and restore an earlier version when needed. Each version captures the complete sheet, including:
- Sheet fields
- Tabs
- Row and cell data
- Pivot tables
- Widgets
- Validation errors from Workforce Agent runs
Save a version
- Open the sheet.
- Click the version history menu in the upper-right corner.
- Select Save version.
- Click Save version in the confirmation prompt.
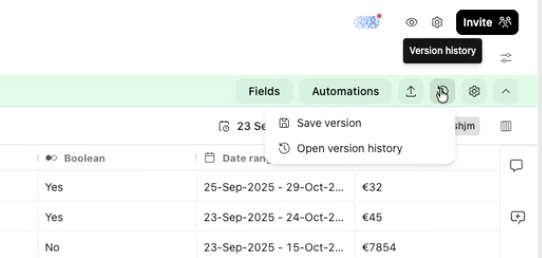
The saved version is added to the sheet's version history.
Access the version history
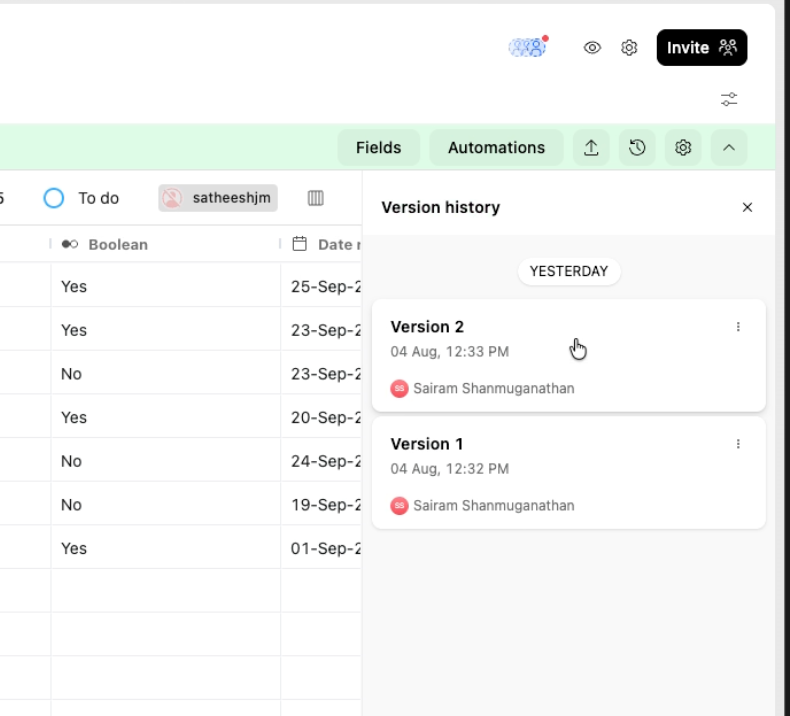
- Click the version history menu in the upper-right corner.
- Select Open version history.
The version history opens in a panel on the right. Each version displays the date, time, and team member who created it.
Preview a previous version
- Select a version from the version history.
- Review its contents across the available tabs, including data sheets, overview tabs, and pivot tables.
- Confirm that you have selected the version you want to restore.
Restore a version
- Select the required version from the version history.
- Click Restore this version.
- Review the default sheet name and edit it if required.
- Click Restore.
- Click View Sheet in the confirmation message to open the restored sheet.
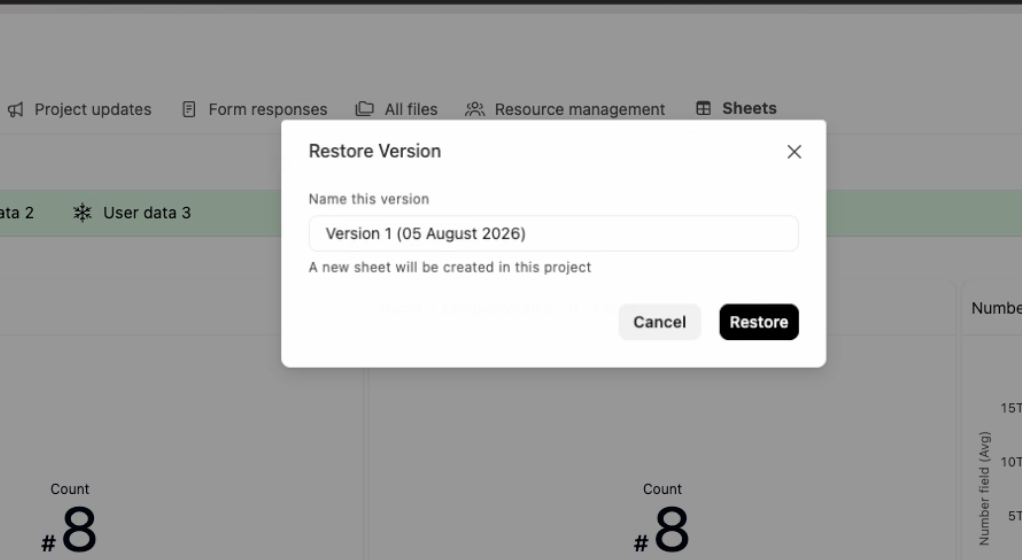
The restored version is added to the project as a new sheet.
Conditional highlighting
Use conditional highlighting to visually flag important values in project sheets and sheet templates based on numeric thresholds.
To configure conditional highlighting:
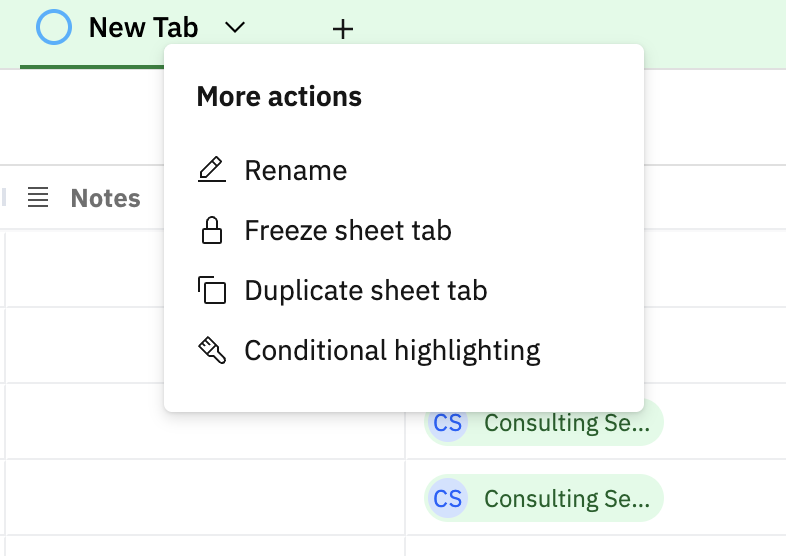
- Right-click any Sheet tab in a project sheet or sheet template.
- Select Conditional highlighting.
- Select a column to highlight and set your conditions and color.
Single color rules
Use single color rules to highlight cells in one color when they match specific conditions.
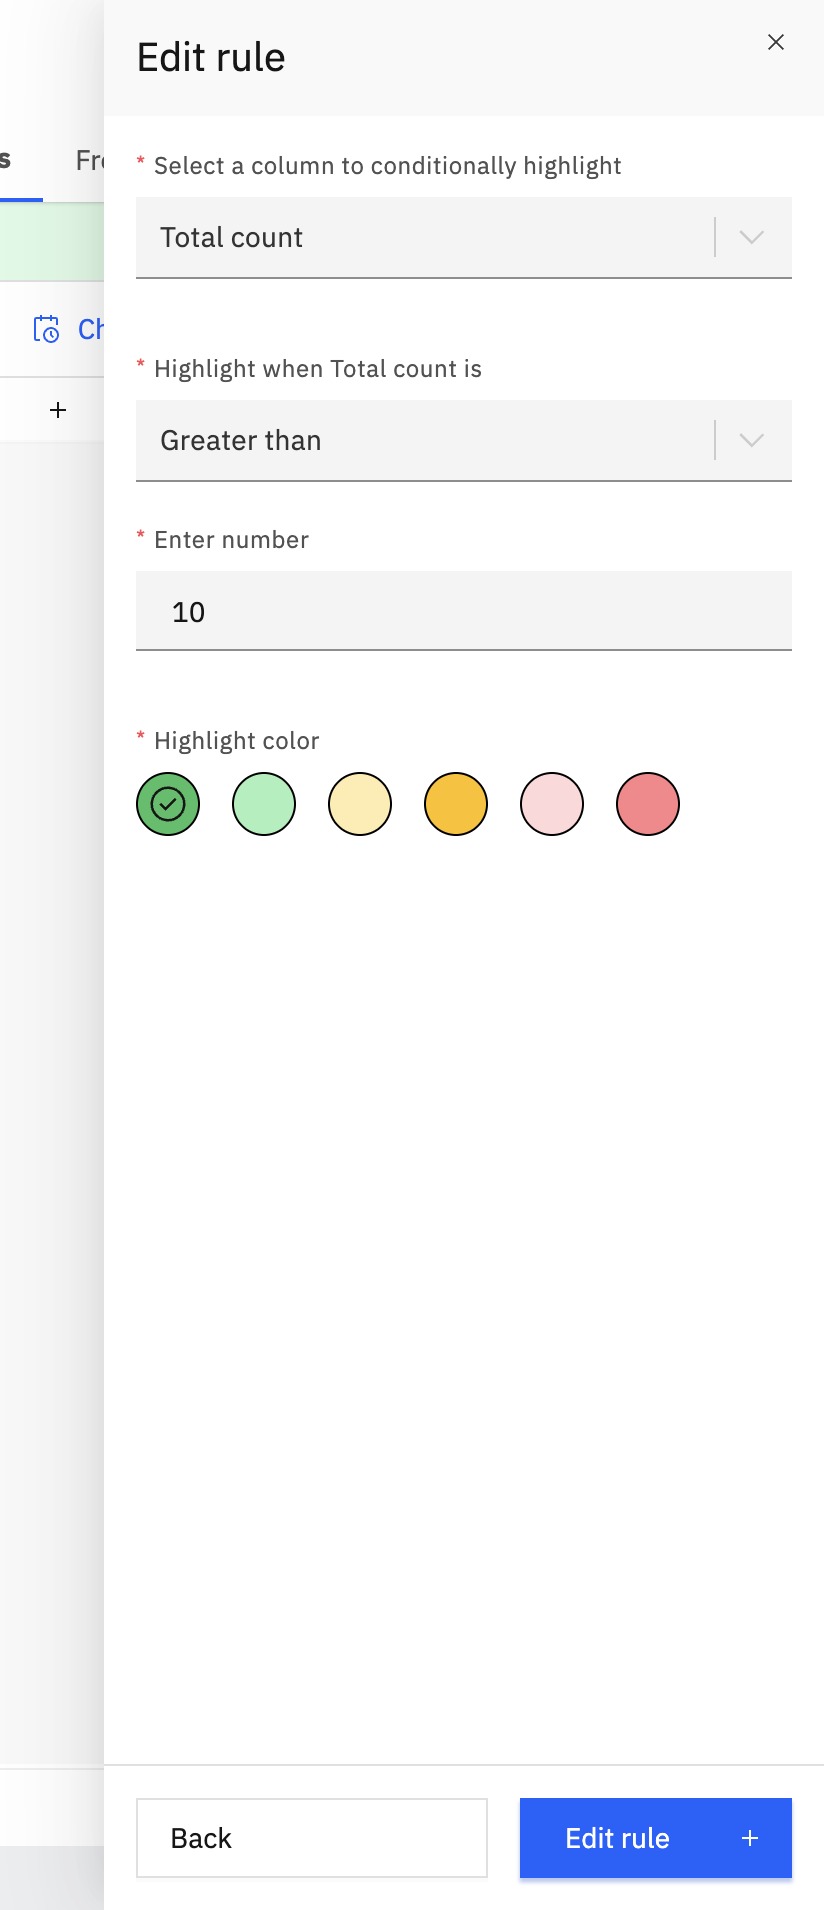
- Choose a numeric column (Number, Percentage, Rating, or Currency).
- Set a condition: greater than, less than, equal to, greater than or equal to, or less than or equal to.
- Enter the threshold value.
- Pick a highlight color for matching cells.
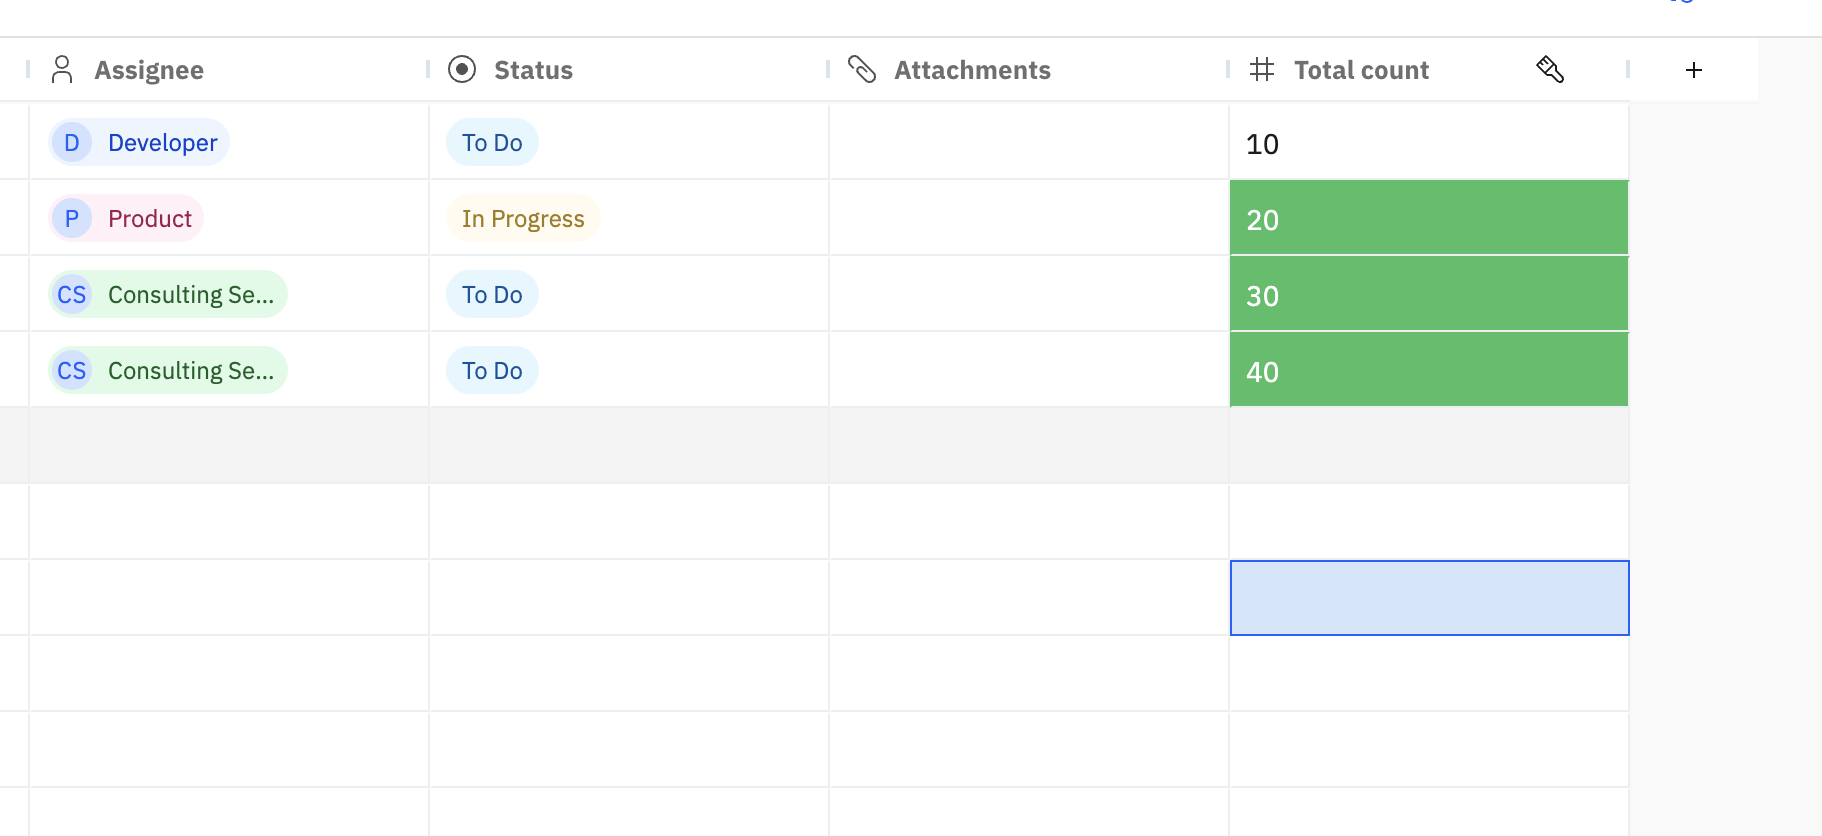
All cells in that column that meet the condition are highlighted in the selected color.
Multi color rules
Use multi color rules to visualise a range of values in a gradient.
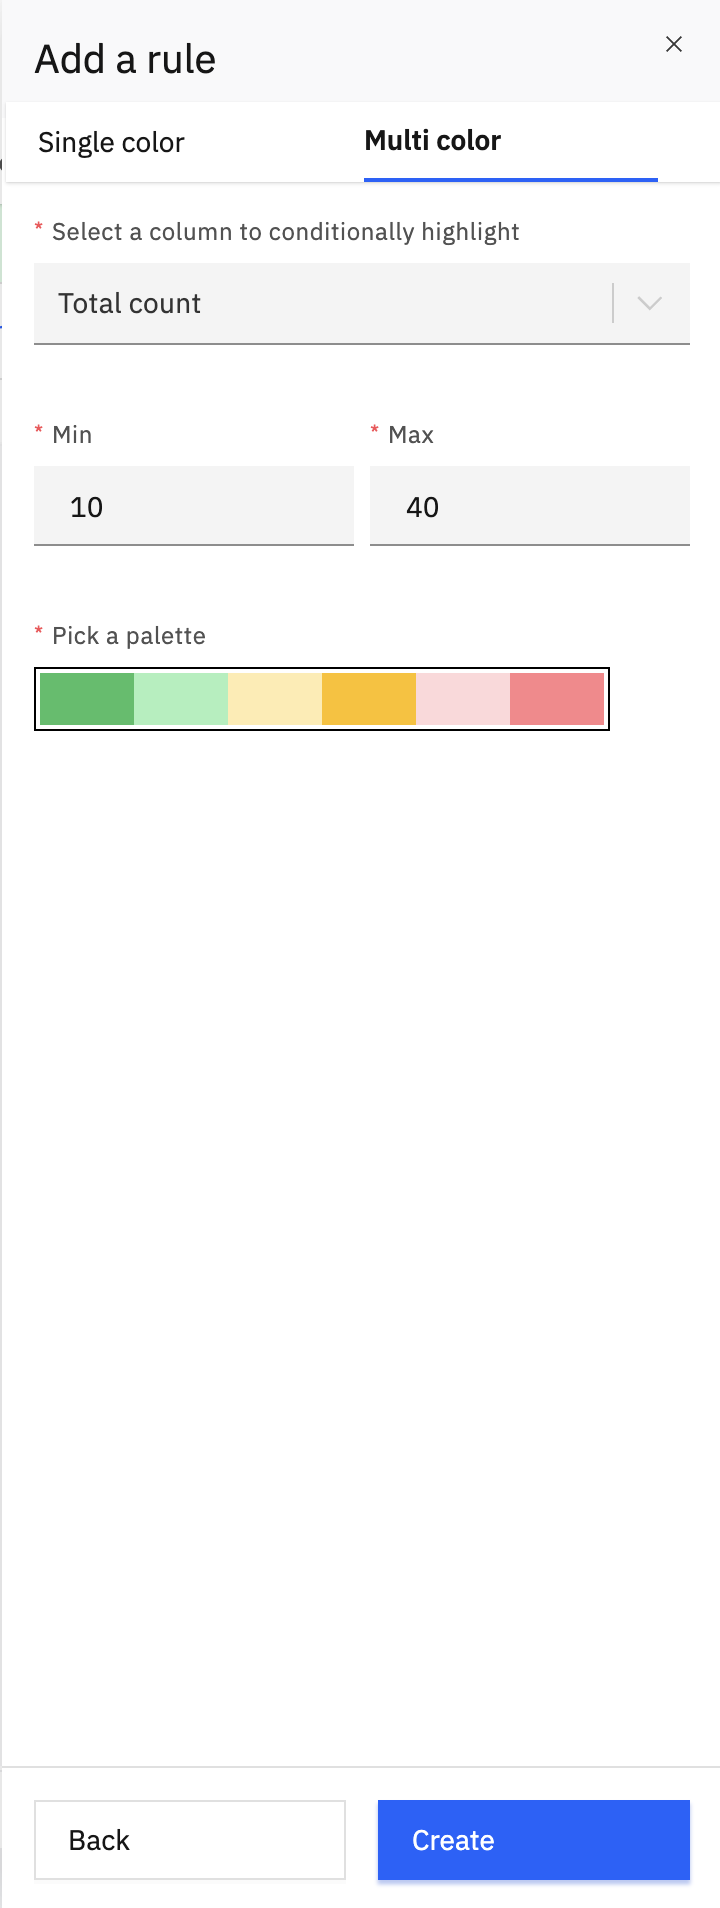
- Choose a numeric column.
- Define minimum and maximum values.
- Select a color palette to represent the range.
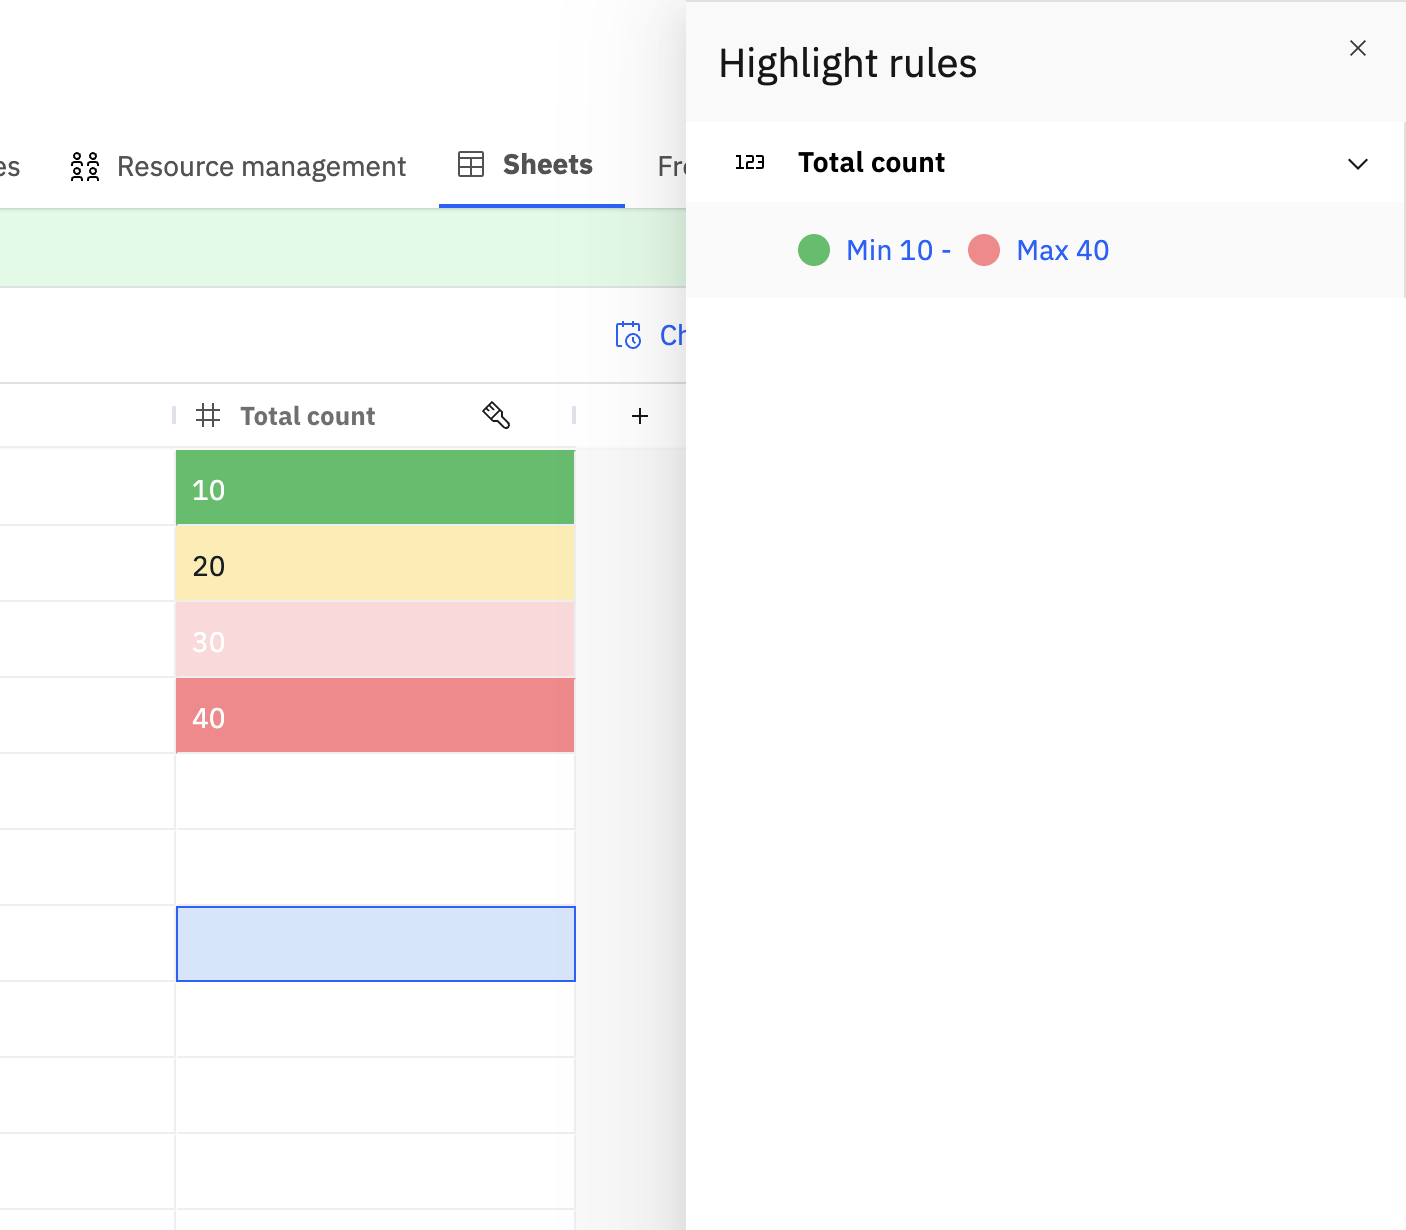
All cells in that column are automatically colored based on where their value falls between the defined minimum and maximum.
Cell level comments
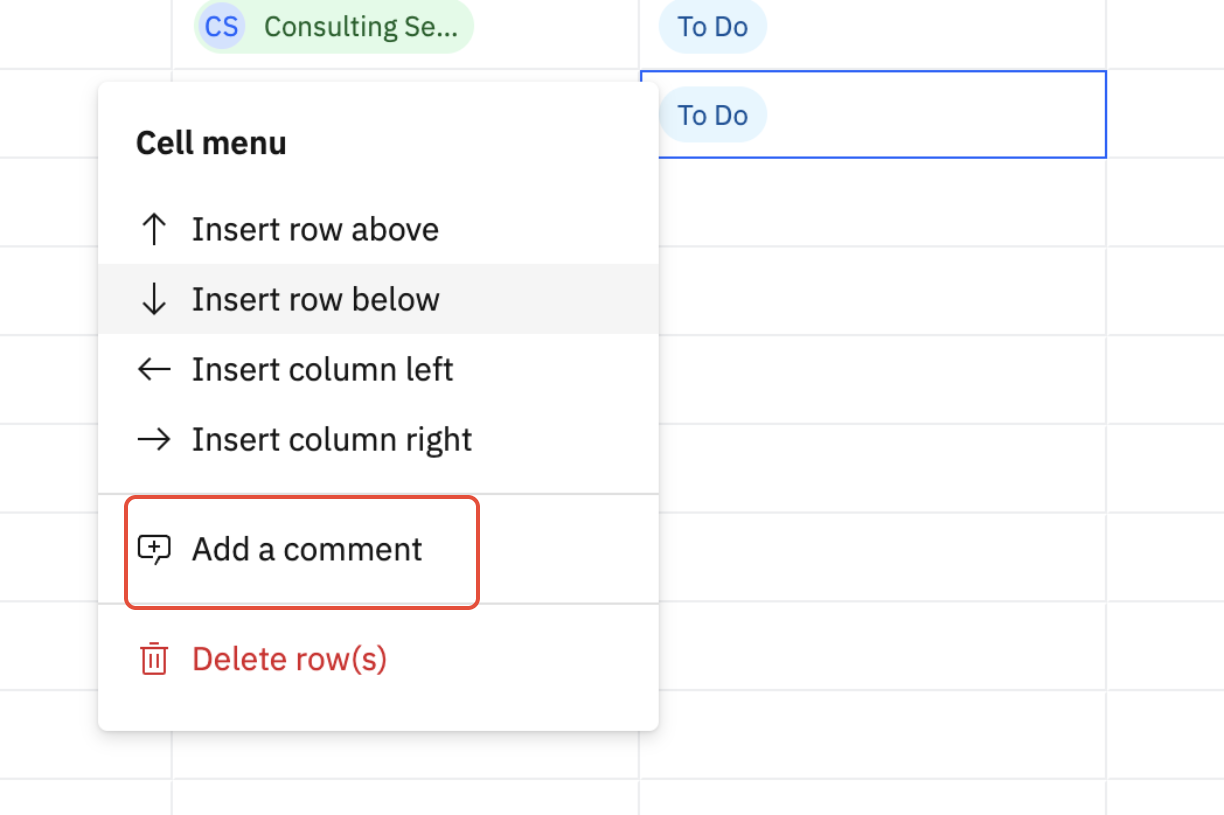
Cell level comments allow collaboration directly inside a sheet, at the level of a single cell.
You can:
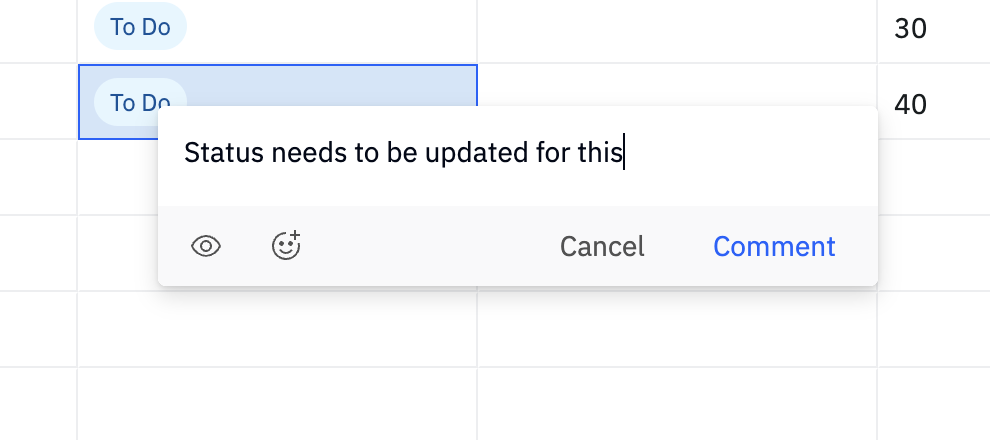
- Add comments to individual cells by right-clicking a cell and choosing the comment option.
- Mark comments as private when needed, based on workspace permissions.
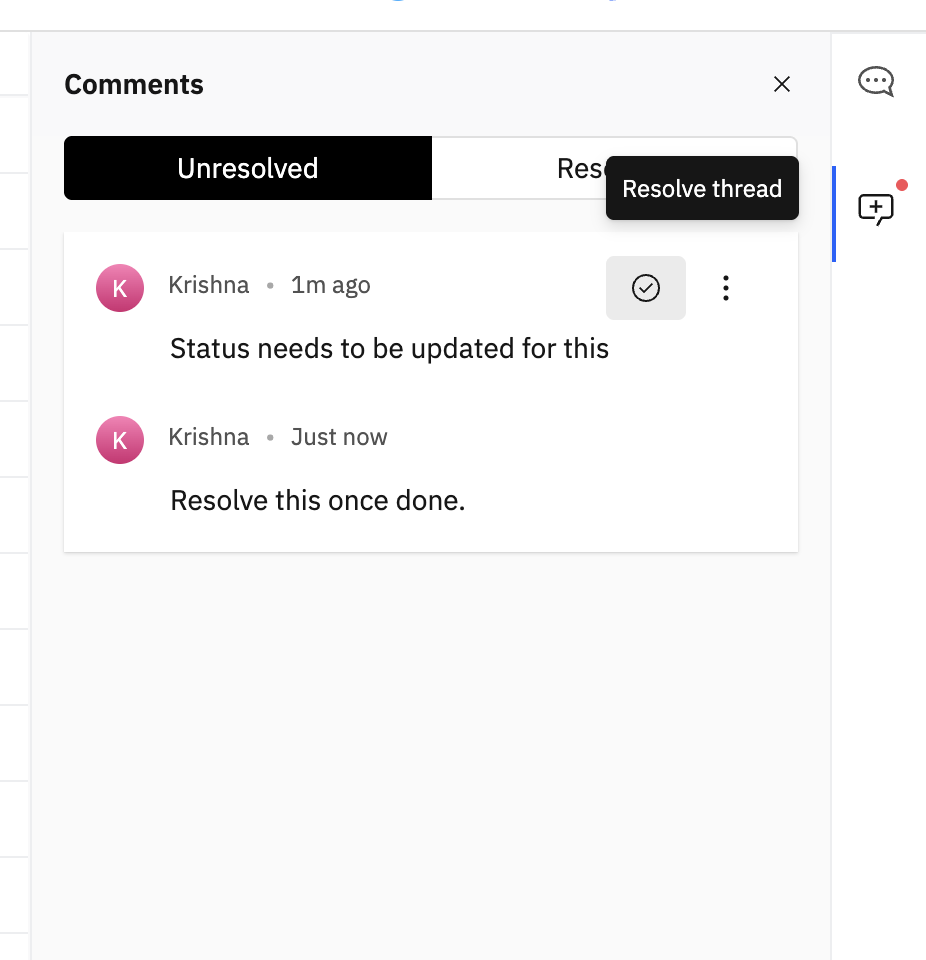
- View all comments in the Comments pane for better visibility and navigation.
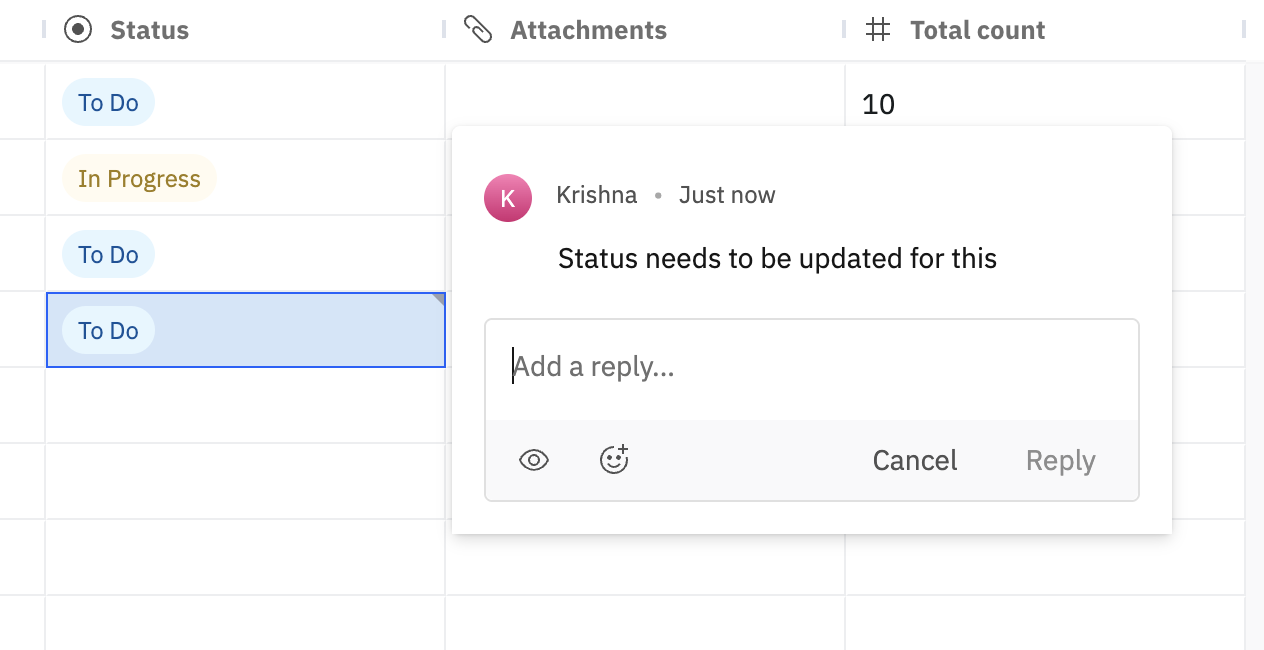
- Hover over a cell to quickly see comments associated with that cell.
- Reply to comments to continue the conversation in context.
- Edit or delete comments when updates or corrections are needed.
- Mark comments as resolved once the underlying issue or question has been addressed.
Export a sheet
You can export a project sheet when you need to download sheet data for offline review, reporting, sharing, or analysis outside Rocketlane.
Rocketlane supports two export formats:
To export a sheet:
- Open the project sheet.
- Click Export.
- Select CSV or Excel.
- Download the exported file.

What is included in the export
Sheet fields include sheet-level details such as Status, Assignee, Due Date, Start Date, and any configured custom sheet fields.
Tab fields include per-tab details such as Tab Name, Status, Assignee, Due Date, and Start Date.
For CSV exports, these details are included as separate files in the ZIP. For Excel exports, they are included as separate worksheets in the workbook.
Export processing time
Notifications for sheet changes
Sheets notifications keep project members informed when a sheet, tab, or row changes. Notifications can be triggered when tabs are created, reassigned, renamed, deleted, or given a new status or due date.
Changes that trigger Sheets notifications
- A sheet is deleted.
- A sheet tab is created.
- A sheet tab's status changes.
- A sheet tab is assigned to someone.
- A sheet tab's assignees change.
- A sheet tab's due date changes.
- A sheet tab is renamed.
- A sheet tab is deleted.
- A sheet row is assigned to someone.
Who receives notifications
Most Sheets notifications are sent to everyone on the project except the person who made the change. The two assignment events notify only the person being assigned.
For example, when someone changes a tab's assignees: the newly added assignee receives Sheet tab is assigned to me; other project members receive Sheet tab assignee changed; the person who made the change receives no notification. The assignee change notification identifies the people who were added and removed.
You receive a Sheets notification only when you are a member of the project, you have permission to view the sheet, and the notification event is enabled in your notification settings.
What the notifications include
Each notification identifies the person who made the change and the tab where the change occurred. Examples:
- [Name] created a new tab [Tab name]
- [Name] updated the status of [Tab name] from [Old status] to [New status]
- [Name] updated the due date of [Tab name] from Mar 01, 2026 to Mar 05, 2026
- [Name] updated assignees of tab [Tab name] (Added: [Names]) (Removed: [Names])
- [Name] renamed tab [New tab name]
- [Name] assigned you to tab [Tab name]
- [Name] assigned you to a row in tab [Tab name]
- [Name] deleted tab [Tab name]
- [Name] deleted the sheet "[Sheet name]"
Opening a Sheets notification
Select the tab name in a Sheets notification to open the sheet with the relevant tab already selected.
Notifications about comments and mentions inside a sheet cell open the relevant tab, scroll to the affected row, and open the comment on the exact cell. Comment and mention notifications are controlled under Messages in notification settings.
Notifications for deleted tabs and sheets
If a tab is deleted after a notification was sent, selecting the notification opens the sheet on its first available tab.
If the entire sheet was deleted, selecting the notification opens a Not found page with the message: "Sorry, the sheet you are looking for does not exist." Select Back home to leave the page.
Configure Sheets notifications
You can choose which events you receive by email, in-app, or through Slack. Go to Settings > Notifications > Sheets to configure your preferences. For the complete list of events, default channels, and Slack availability, see Managing Notification Settings.