In this article
Sheet automations allow you to streamline your workflows by setting up triggers that perform actions automatically, saving you time and effort.
For example, you can use automations to:
- Schedule a daily check of your RAID sheet for SLA breaches. If a row has a "Risk Status" of "Open" and its "Date Reported" is older than 7 days, the automation will trigger.
- Send data to an external system via an HTTP request on a set schedule.
You can also create manual triggers, allowing a user to activate an automation only after confirming a specific action - giving maximum control over when it runs.
Create an automation
- Navigate to the Automations tab within your sheet template and click New automation.

- Select a trigger type:

- Event on sheet: Triggers when something changes in the sheet (for example a row is updated).
- Set schedule: Triggers at a specific time or on a recurring basis. (Deprecated)
- Click of a button: Allows for manual triggering of the automation.
- Configure the trigger: Define the specific conditions. You can choose between Sheet triggers and Sheet Tab triggers.
For example, if you chose "Event on sheet," you might select "When row matches a condition" and specify the target sheet tab and exact criteria (for example "where Priority is exactly High").
- Define the actions: Add an action block. You can set conditions for this block to run.
- Choose an action: Select the action you want to perform from the list, which includes Sheet Actions, Project Actions, and Notifications (for example "Create sheet tab" or "Send HTTP request").

- Configure the action: Fill in the details. For example, an "Update sheet field" action requires selecting the field to update and the new value. For an "HTTP request," provide the URL, method, headers, and body.

- Save the automation. It will now run whenever the trigger conditions are met.
Event on sheet
Automations are triggered based on the occurrence of an event, such as a status being updated, which could then automatically create a new sheet tab.
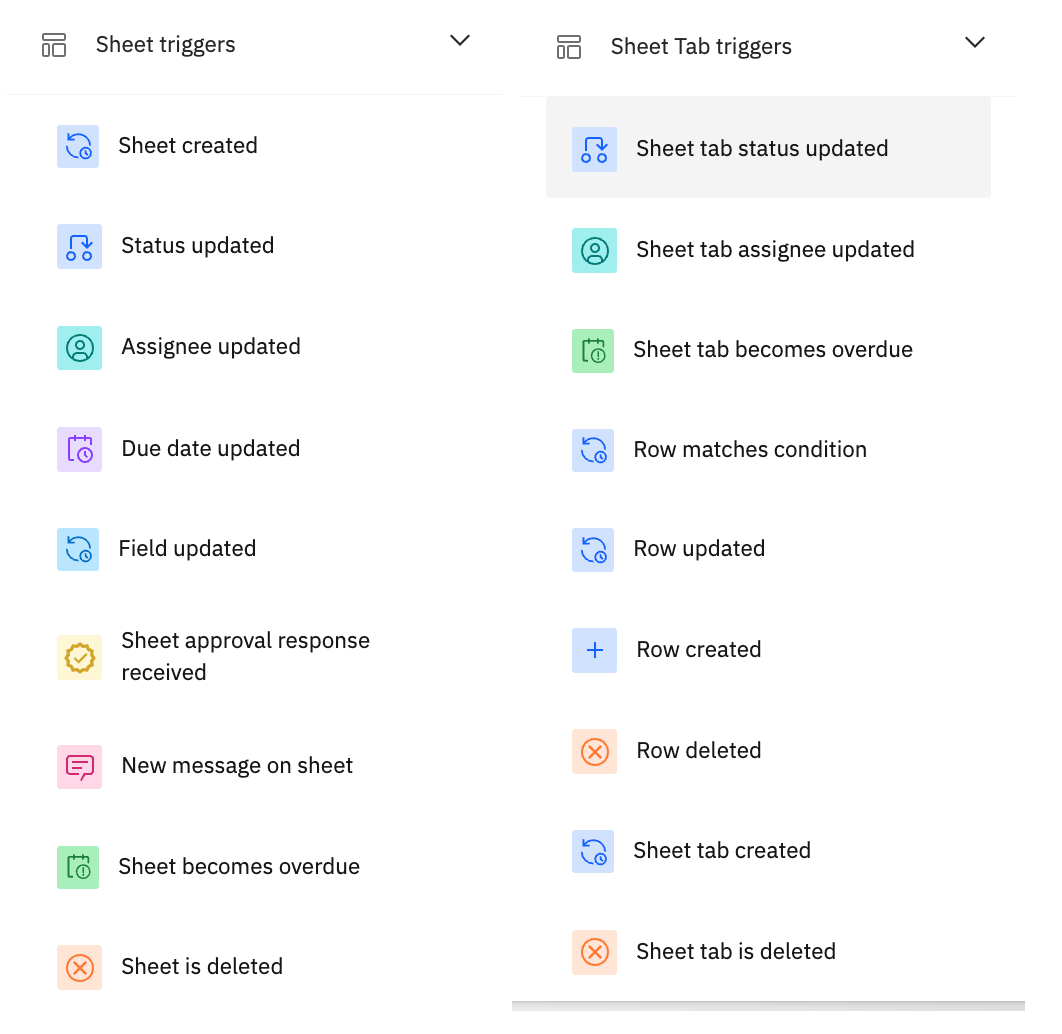
Once you choose the event, select the specific trigger type. Rocketlane offers two categories: Sheet triggers and Sheet tab triggers.
Sheet triggers
- Sheet created
- Status updated
- Assignee updated
- Due date updated
- Field updated
- Sheet approval response received
- New message on sheet
- Sheet becomes overdue
- Sheet is deleted
Sheet tab triggers
- Sheet tab assignee updated
- Sheet tab status updated
- Sheet tab becomes overdue
- Row matches condition
- Row updated
- Row created
- Row deleted
- Sheet tab created
- Sheet tab is deleted
After selecting a trigger, you can add conditions and actions. If you're new to these concepts, see the Automations documentation for a refresher.
Available actions
In addition to standard actions, you can perform specific actions on your sheet's fields:
Click of a button
The Click of a button trigger is designed for workflows where you need maximum control, ensuring an automation executes only when a user manually clicks a specific button. The configuration of conditions and actions remains the same as any other automation type, but the trigger requires a conscious user action.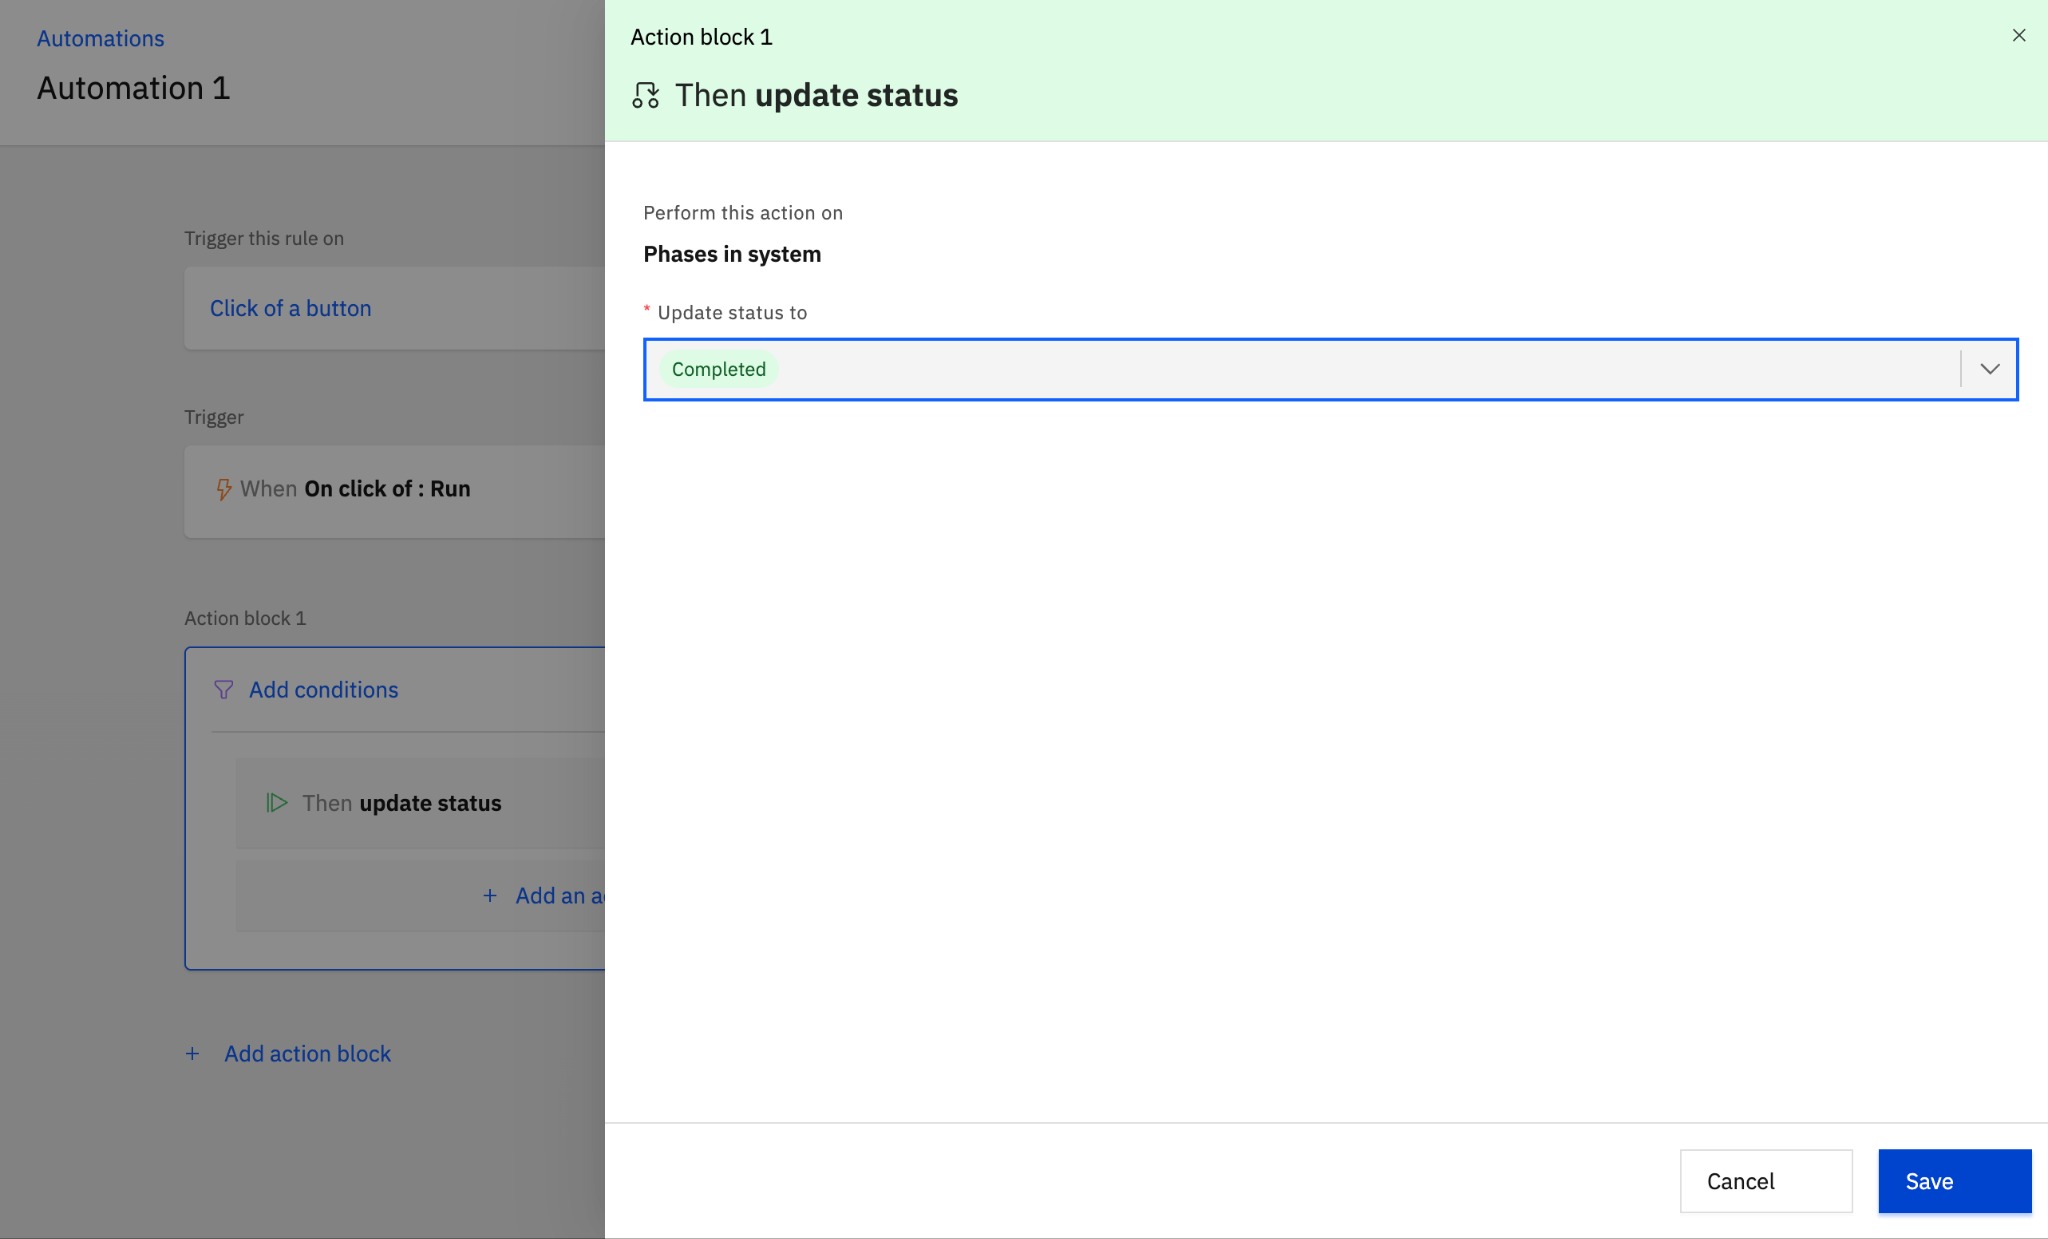
This is ideal for critical, high-impact processes like a UAT sign-off. The UAT Lead must first verify that all critical items are resolved before manually triggering the automation - preventing accidental or premature project advancement (for example marking the UAT phase as complete and notifying stakeholders).
