Backlogs in Rocketlane are your team’s source of truth for unassigned work - a central hub for everything that’s not yet planned into a sprint but still needs attention.
If Sprints represent your current commitments and Epics your strategic goals, the Backlog is everything waiting to be picked up: unfinished tasks, deferred items, and future priorities.
What Is the Backlog?
The Backlog is a dynamic list of tasks that meet the following criteria:
They’re incomplete
They’re not assigned to any sprint
They belong to selected projects and/or epics
Think of it as your team’s “to-do pool” - a holding zone for work that hasn’t been scheduled yet. During sprint planning, this is where your team goes to decide what to tackle next.
How to Enable Backlogs
Before you can use the Backlog feature, you’ll need to enable it for your workspace.
To enable Backlogs:
Go to Settings.
Under the Sprints section, click Sprint Settings.
Find the Backlogs option and toggle the switch to enable it.
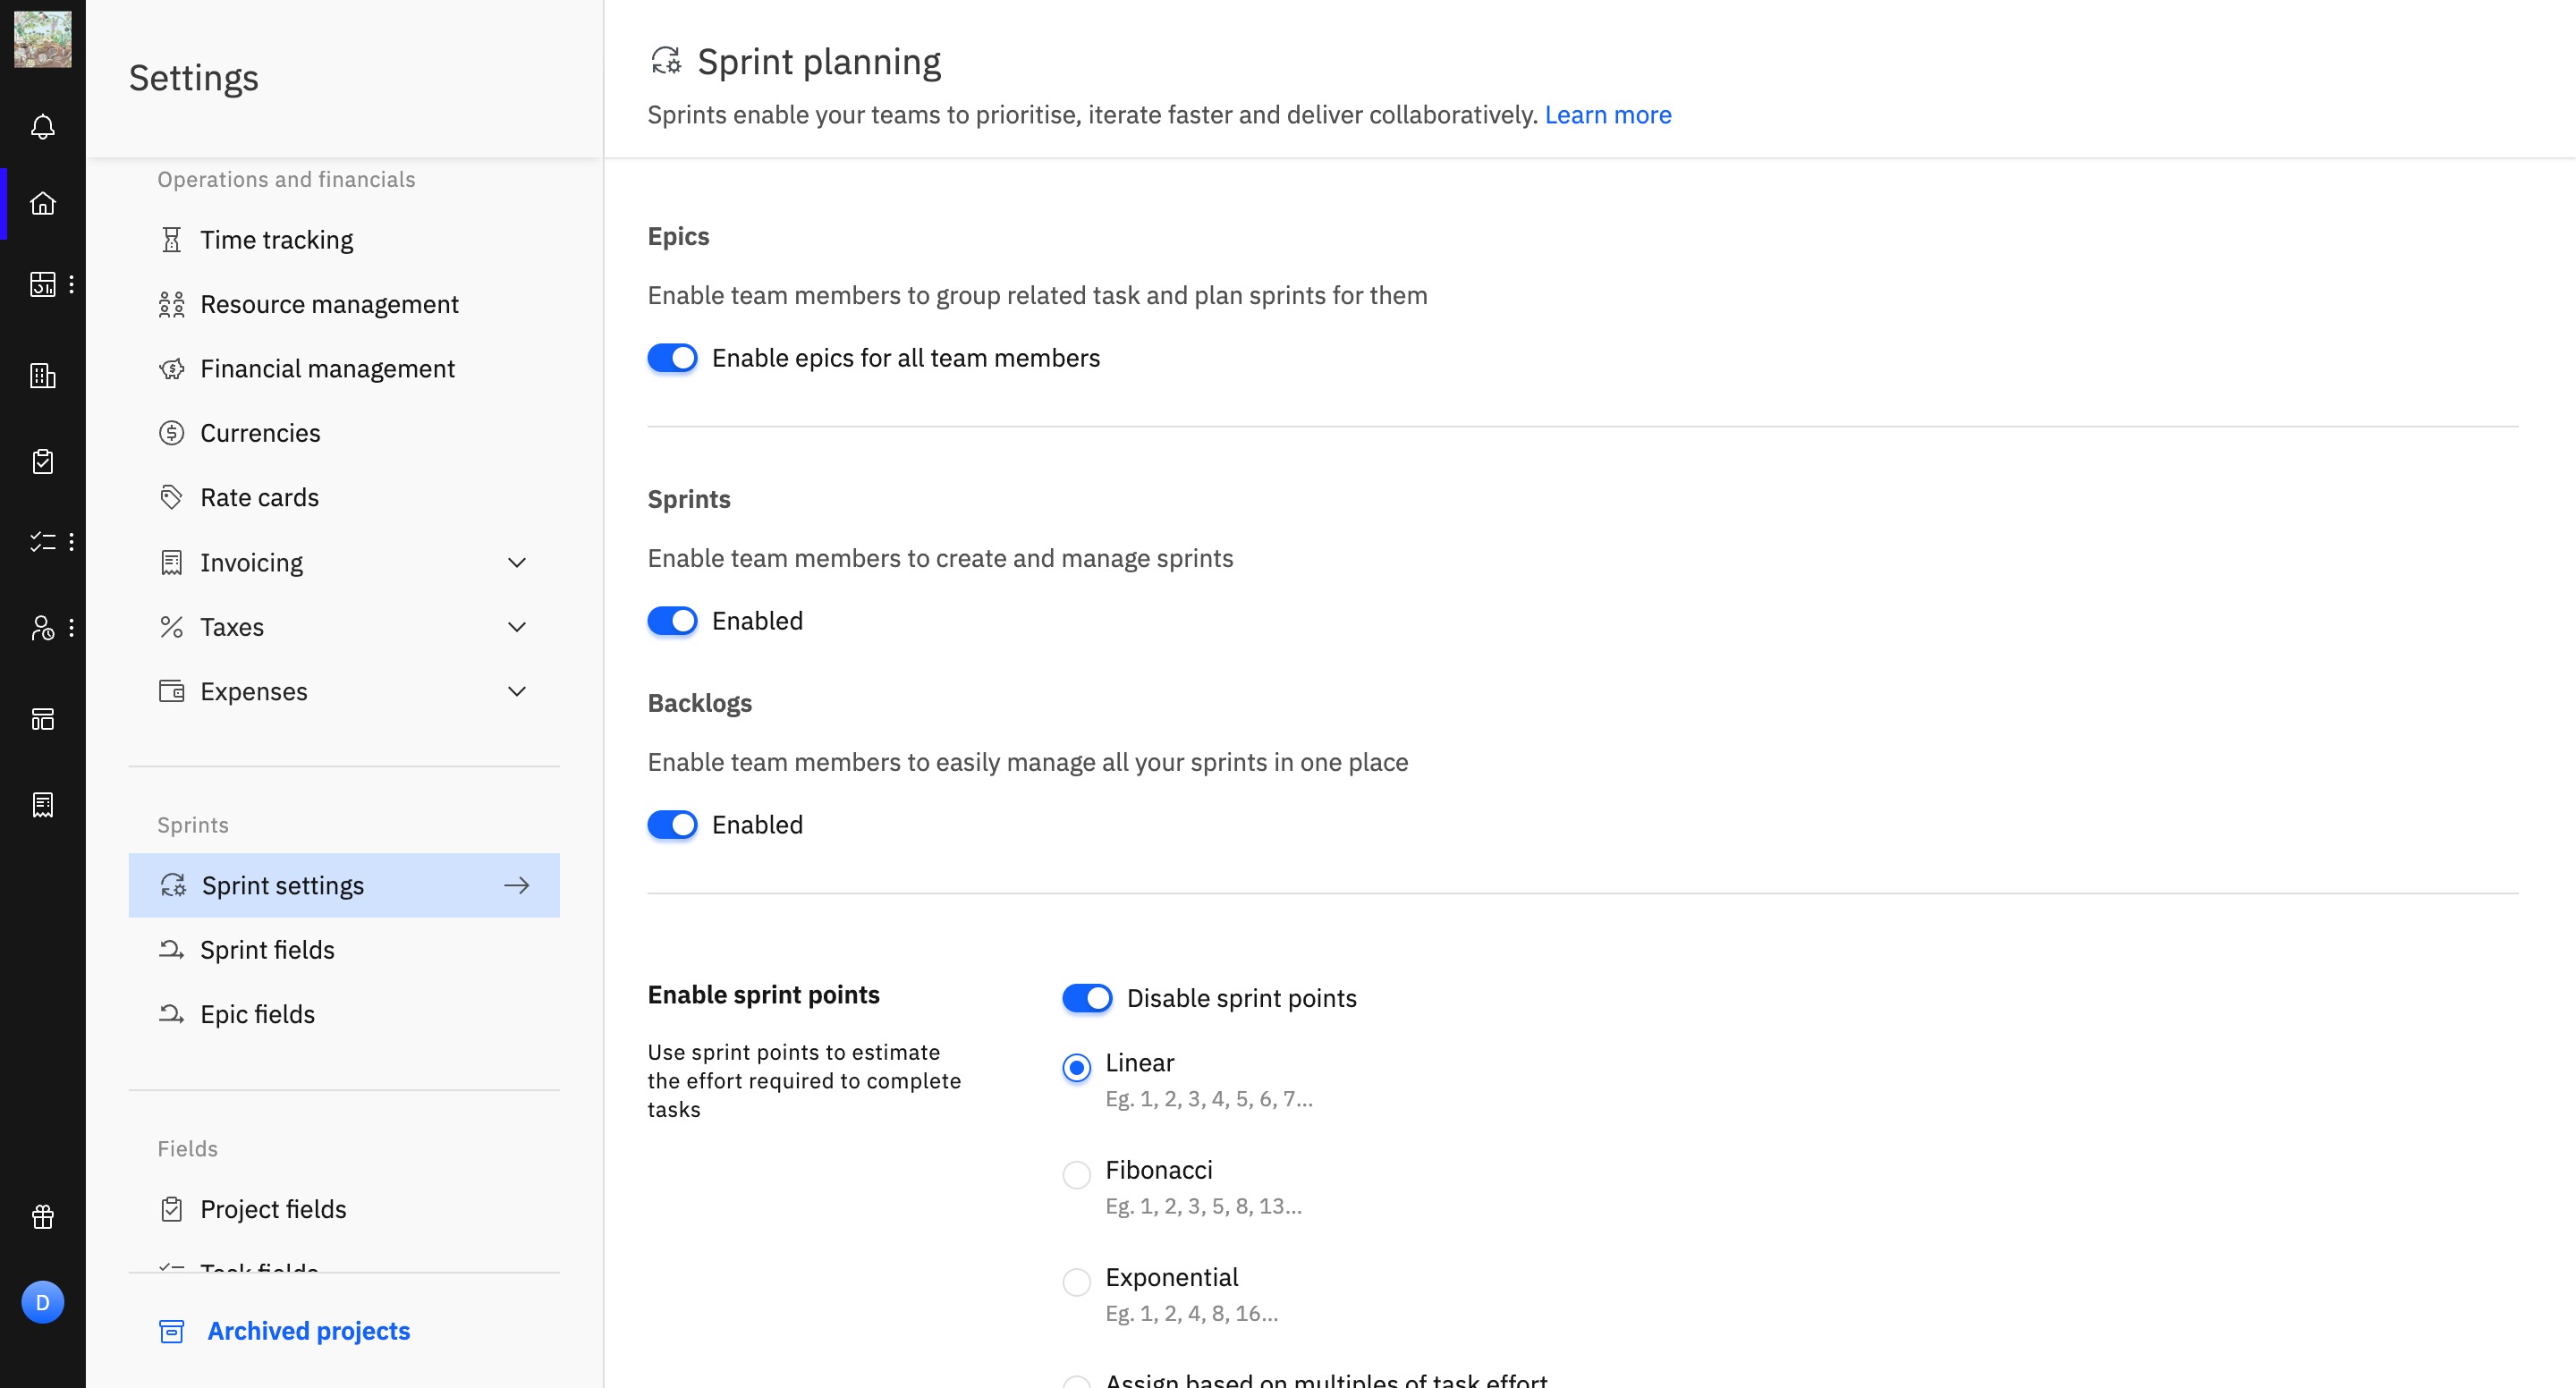
Once enabled, the Backlog becomes available for all users involved in sprint planning.
To access the Backlog:
Click the Sprint Planning button from the left navigation bar.

In the Sprint Planning screen, click on the Backlogs tab.

How To Create A New Backlog
To create a new backlog, navigate to the Backlog tab within the sprint planning section and click New Backlog.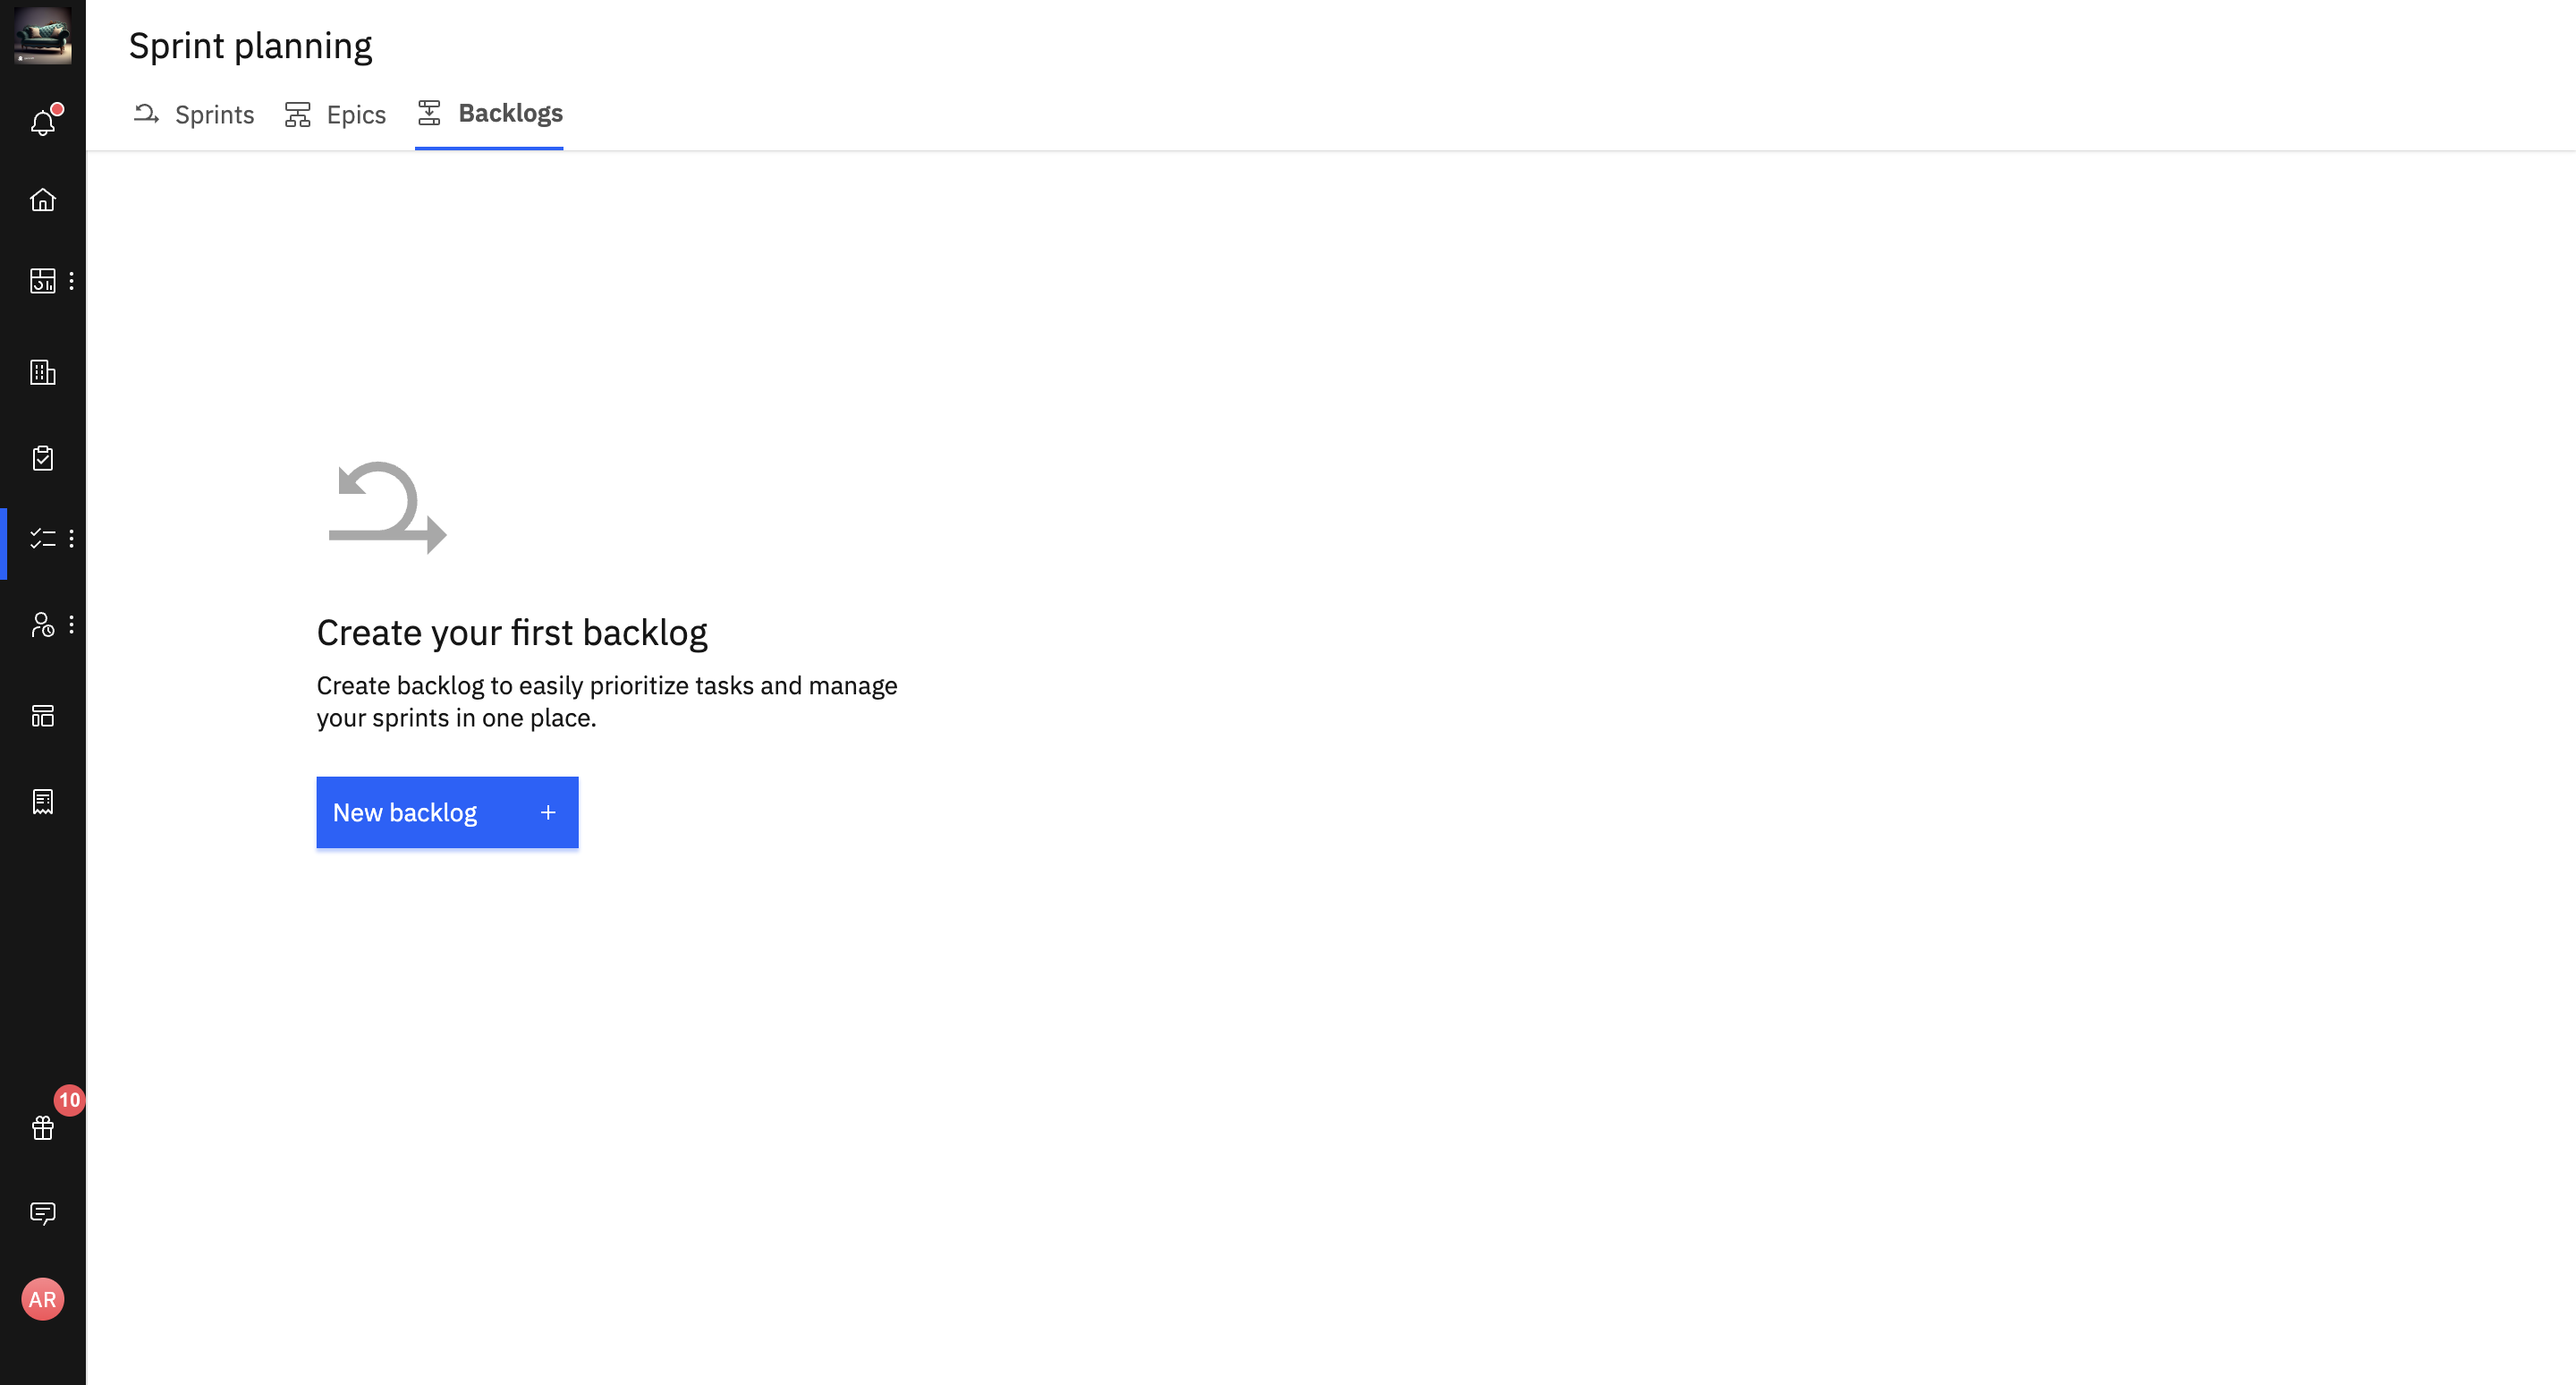
You will then be prompted to configure your backlog with the following steps:
Name your backlog: Give it a clear and descriptive name.
Assign an owner: Select the individual responsible for managing this backlog.
Choose a source for tasks: Under the “Where do you want to add tasks from?” option, you can choose to pull tasks from Projects, Epics, or both. Once selected, you can add the specific projects and epics you wish to include.

The backlog will now contain all the tasks from the projects and epics selected.
Managing Sprints in Your Backlog
You have the flexibility to either add existing sprints or create new sprints directly from your backlog.
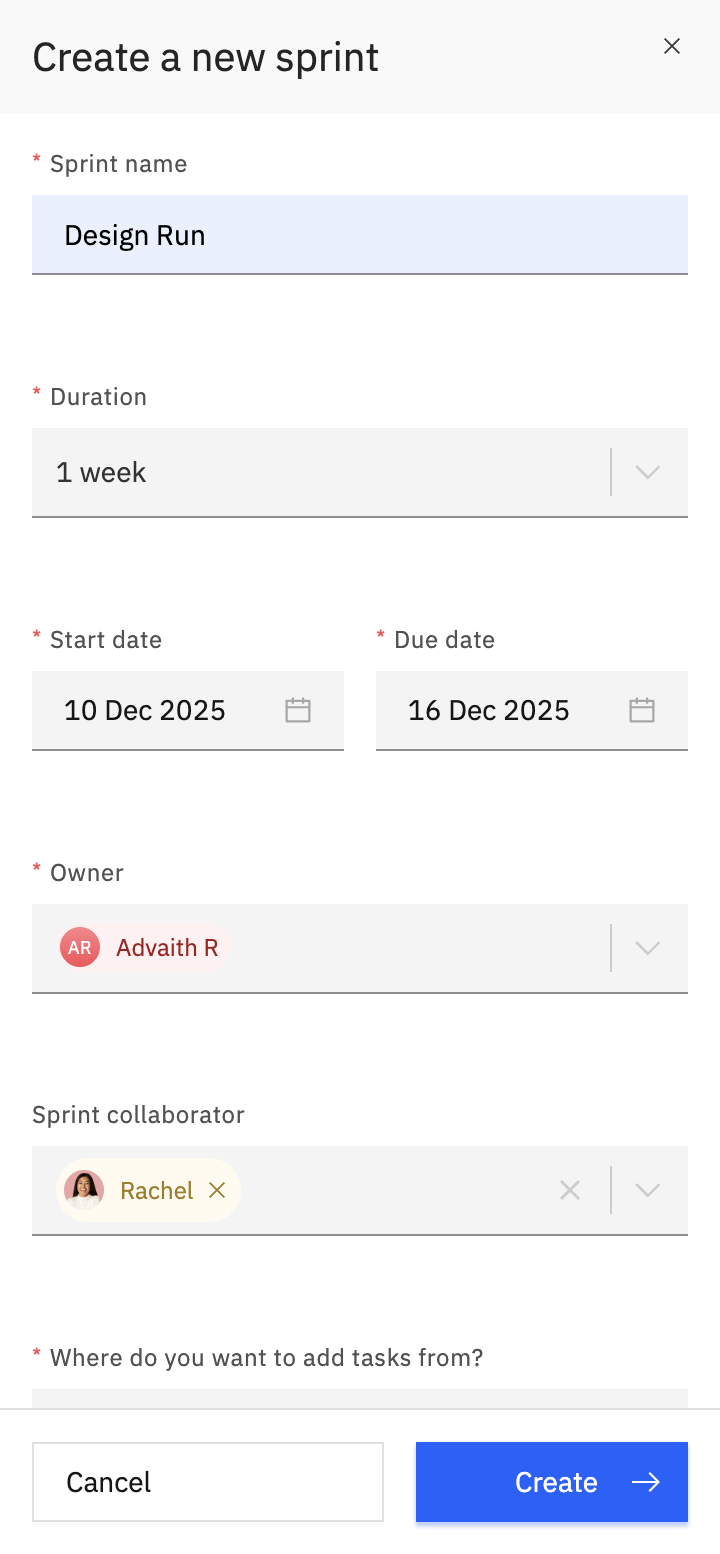
Adding a New Sprint
To add a new sprint, click the + near "Add an Existing Sprint" and fill in the following details:
Name: Give your sprint a clear, descriptive name.
Duration: Set the length of the sprint.
Owner/Collaborator: Assign a team member to manage the sprint.
Task Source: Select where to add tasks from, such as a project or an epic. You can only select from the projects and epics that are already part of the backlog.

Adding an Existing Sprint
You can also add an existing sprint by selecting it from a list. Once a sprint is linked to the backlog, you can drag and drop tasks into it.
Note: If you add a sprint that contains tasks from a project or epic outside the backlog's current scope, the backlog's scope will automatically extend to include those items.
How Tasks Are Organized
Tasks in the Backlog view are automatically sorted by due date (ascending) so the most urgent items appear first. This helps teams easily spot what’s pressing and prioritize with intention.
You can also filter the view by:
Project
Assignee
Task status
Epic association
These filters allow you to zero in on specific workloads and make smarter decisions during planning.
Backlogs vs. Epics: What’s the Difference?
While Epics help you organize large-scale initiatives with custom fields and structured views, Backlogs are simpler and focused on unplanned tasks.
Backlogs are practical and execution-focused. Epics give you strategic context.