Enabling Epics and Backlogs in Rocketlane
To start using Epics and Backlogs:
Go to Settings > Sprint Settings.
Enable the toggles for Epics.

Once enabled, these tabs will be available in your Sprint Planning workspace.
Navigating to Epics
Click the checklist icon on the left navigation bar.
Select Sprint Planning.

Use the top navigation to switch between Sprints, Epics, and Backlogs.

Using Epics in Rocketlane
Epics help you group related tasks across projects under one broader initiative. For example, if your design team handles requests from multiple projects, you can create a “Design Bucket” epic and track all design-related tasks in one place.
To create a new Epic:
Navigate to Epics tab
Click Create a new Epic.

Add a name and assign an owner.
Optionally, set a start date, end date, and status if you plan to complete the epic within a timeframe.
Choose one or more projects from which you want to pull tasks into this epic.

Fill in any custom epic fields (configured in Settings > Epic Fields).

After creating the epic, you’ll be taken to the Tasks tab within the epic.
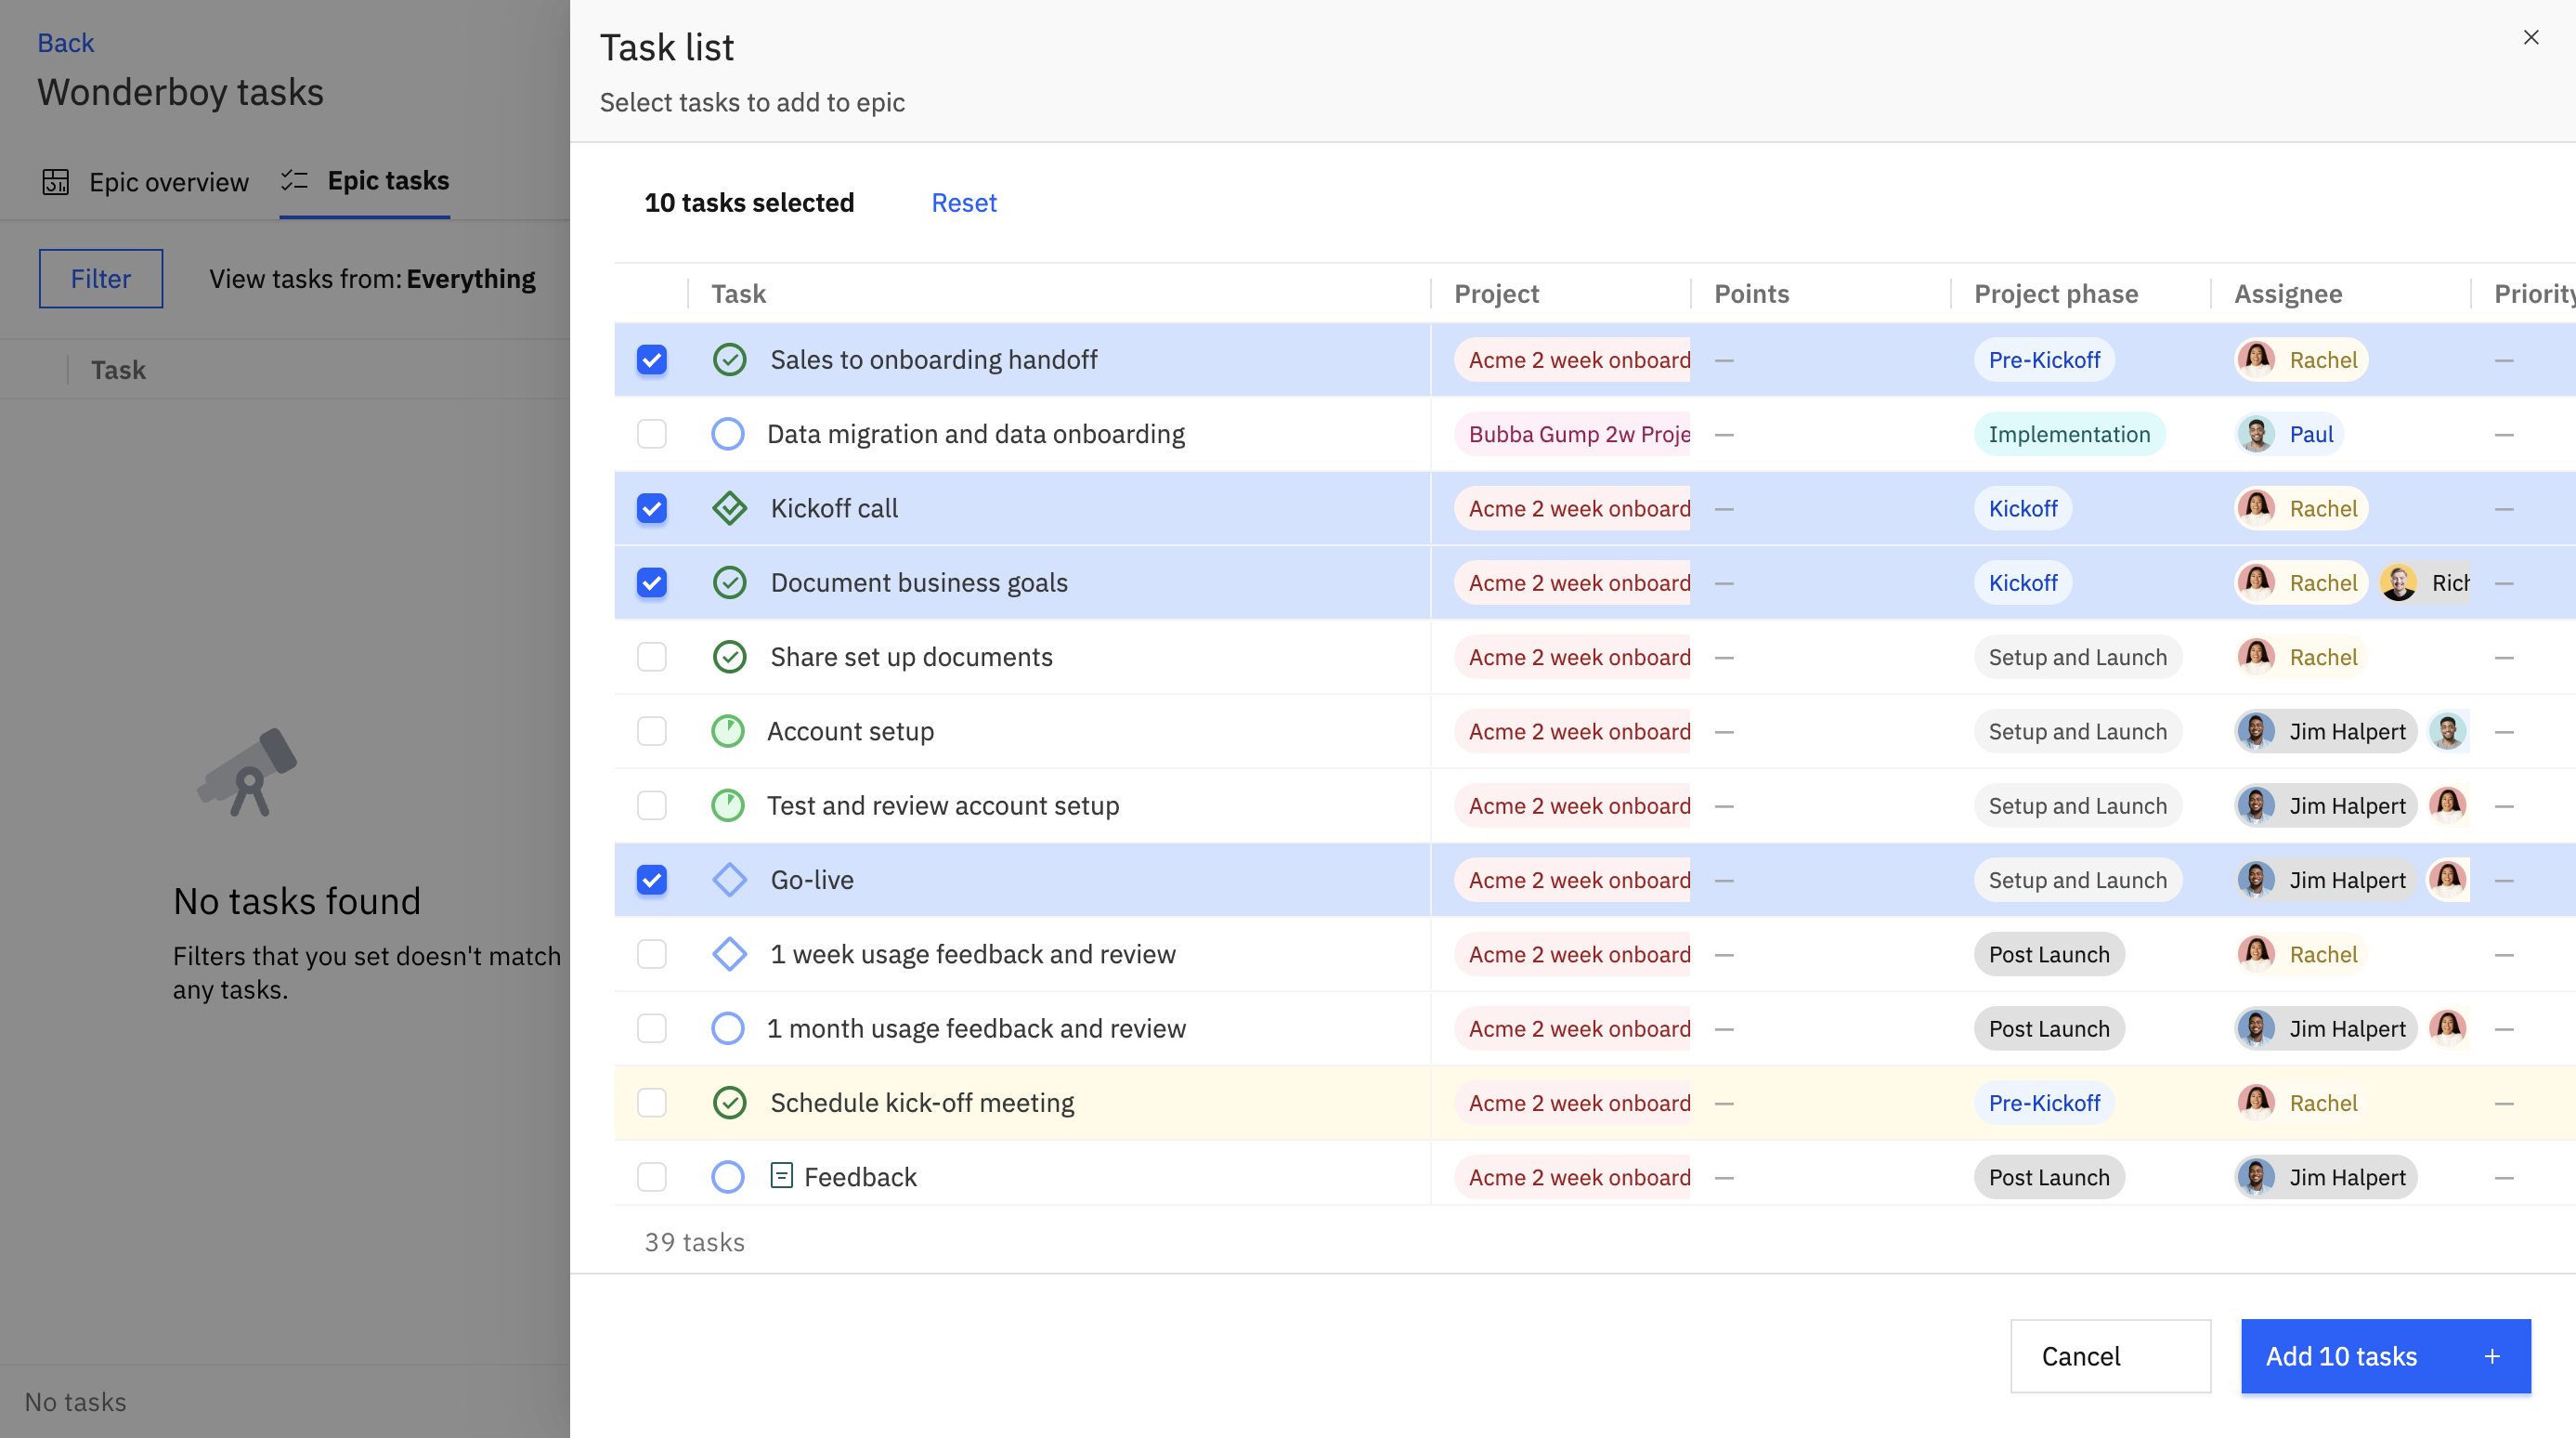
Adding Tasks to an Epic
A pop-up will prompt you to select tasks from the projects you linked earlier.
Select the tasks you want to include, then click Add [X] tasks.
You can also click Add task to create a new task directly inside the epic. This lets you define the project, assignee, due date, and description.
You can add more projects to an epic at any time.
Filtering and Managing Tasks within an Epic
Within your epic’s task list, use filters to narrow down your view by:
Assignee
Responsible
Project
Due Date
Created By
Task status or other criteria

In the Epic Overview tab, where you’ll find all the populated epic fields displayed as cards along with the summary of progress and tasks