A Documentation Agent connects a Nitro page template to selected sources, knowledge bases, and a trigger. Once configured, the agent uses the template structure to generate documentation from meetings, emails, and supporting knowledge.
Documentation Agents can run manually or automatically, depending on the trigger setup. They help teams create structured documents such as handoff notes, discovery summaries, implementation documentation, onboarding summaries, and customer context pages.
Navigate to the Agent Builder
To create a Documentation Agent:
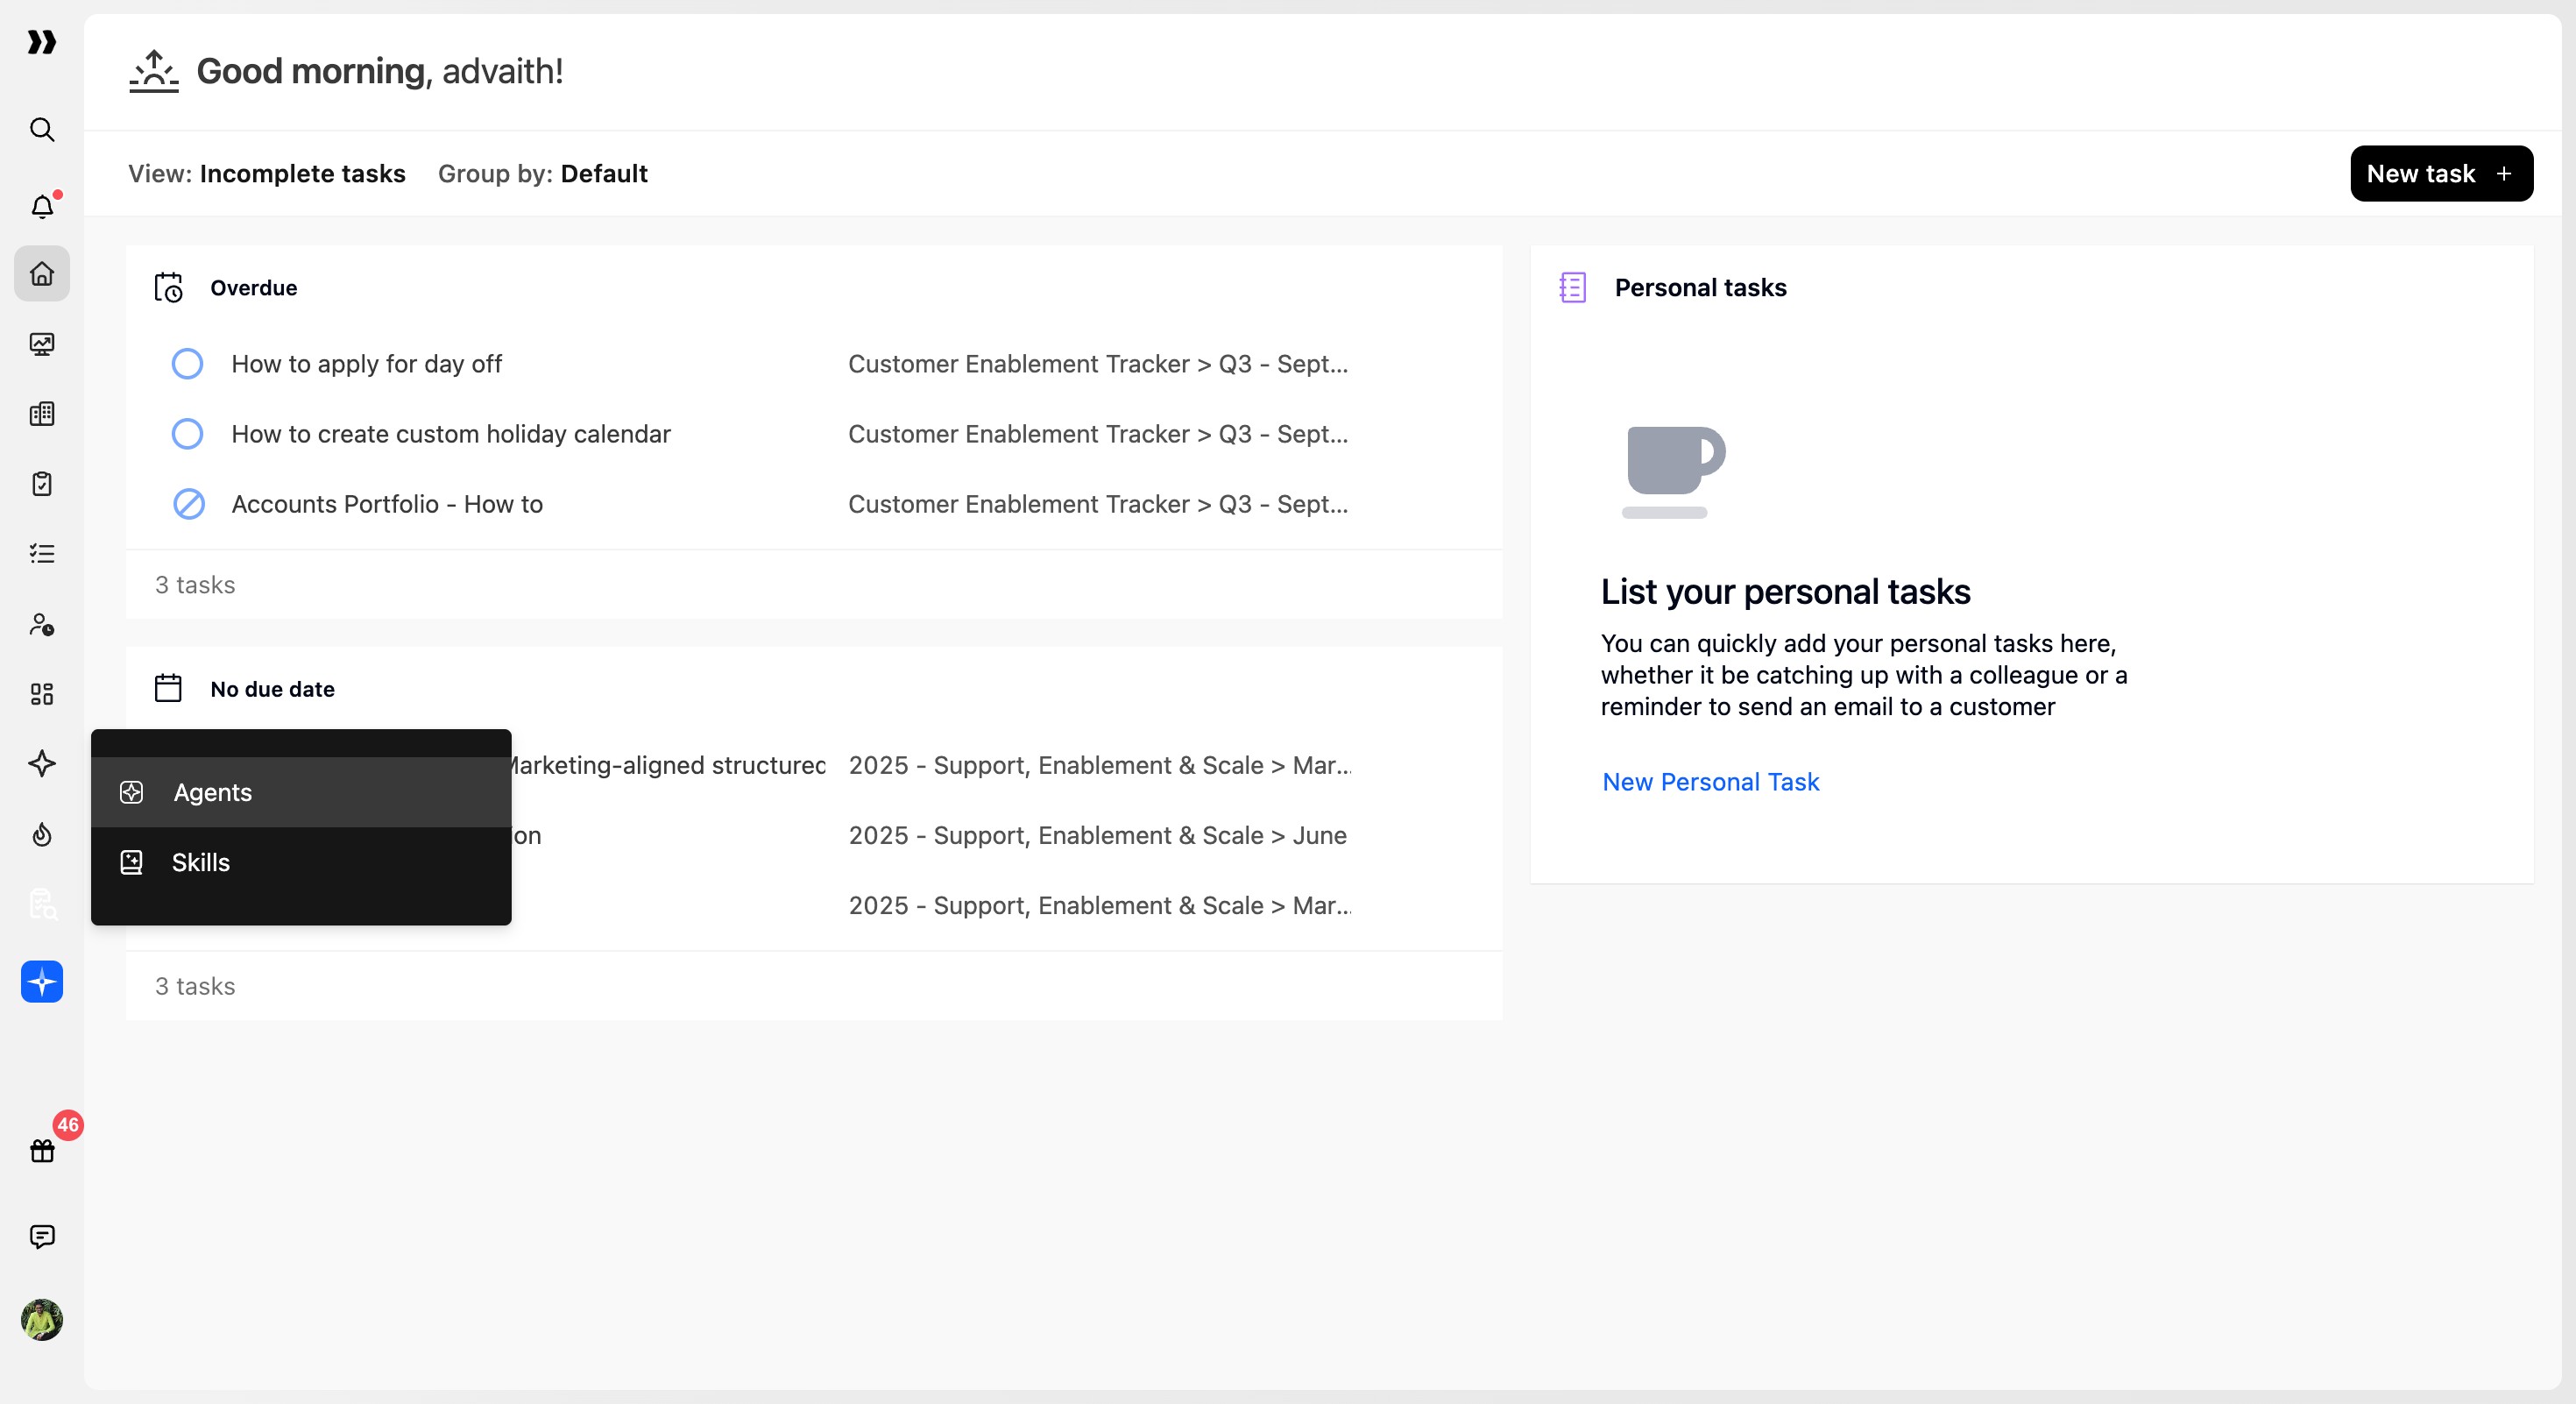
Click the sparkle icon from the left sidebar.
Select Agents.
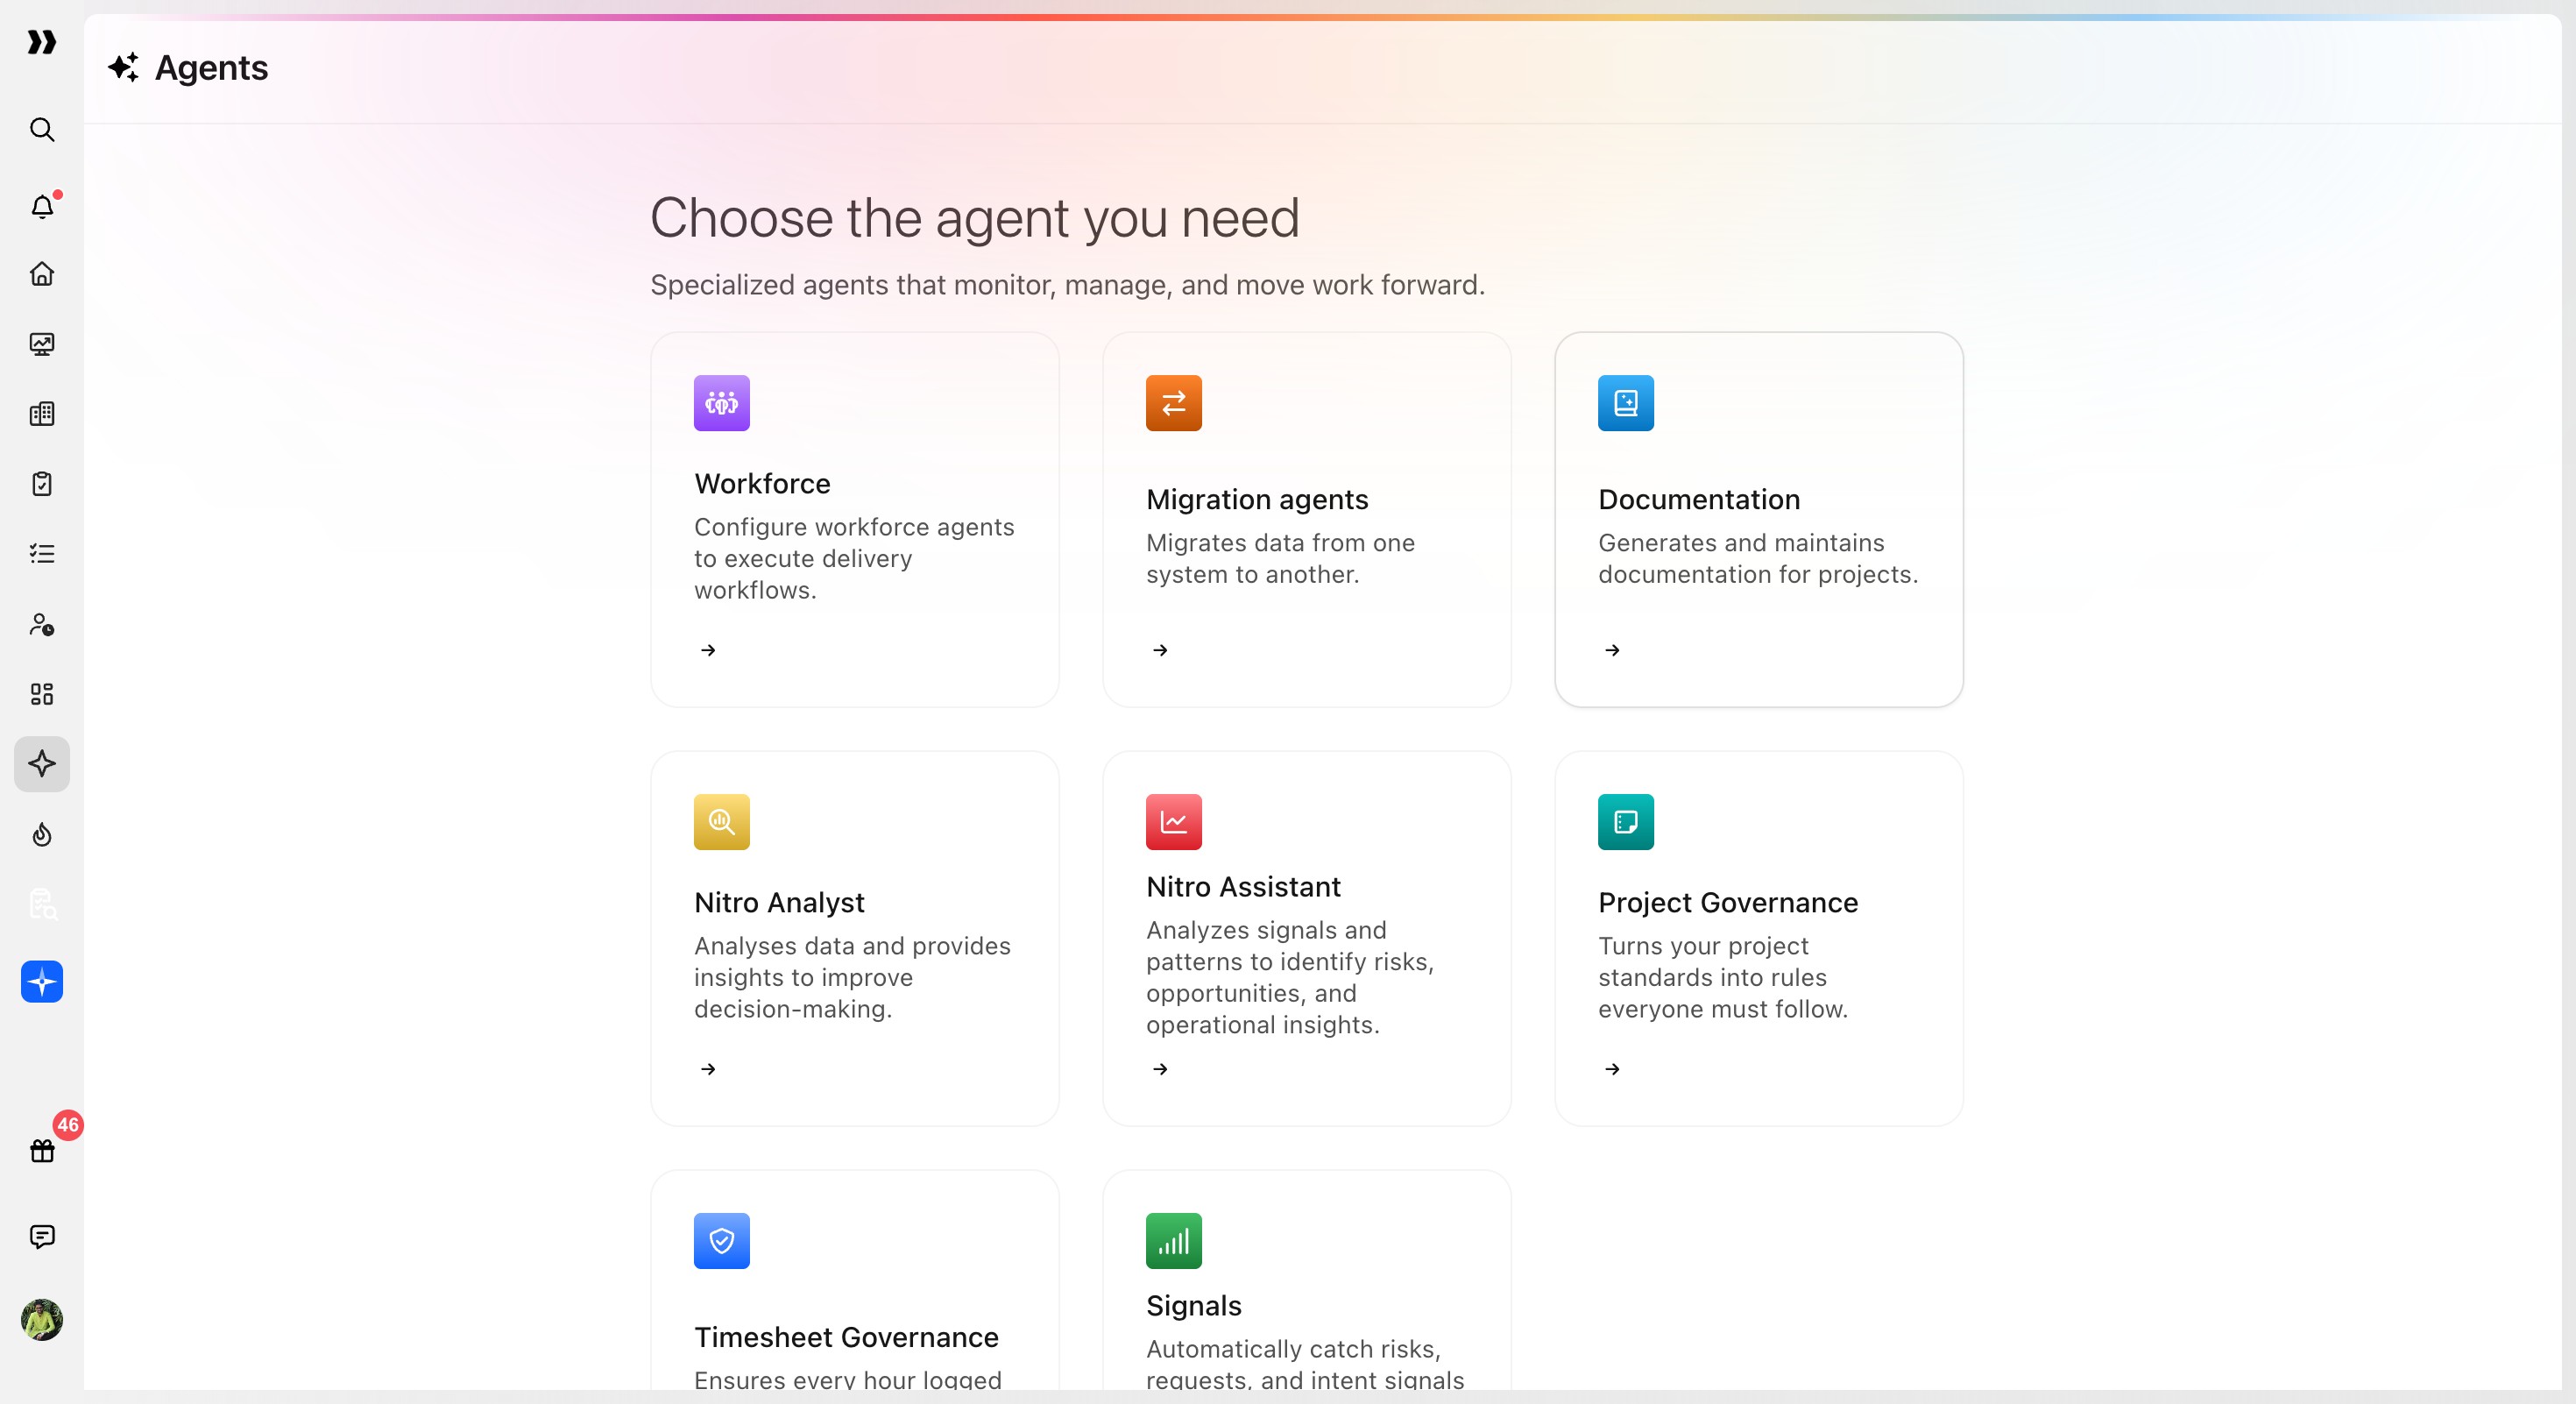
Select Documentation Agent from the agents list.
Click + New Agent.
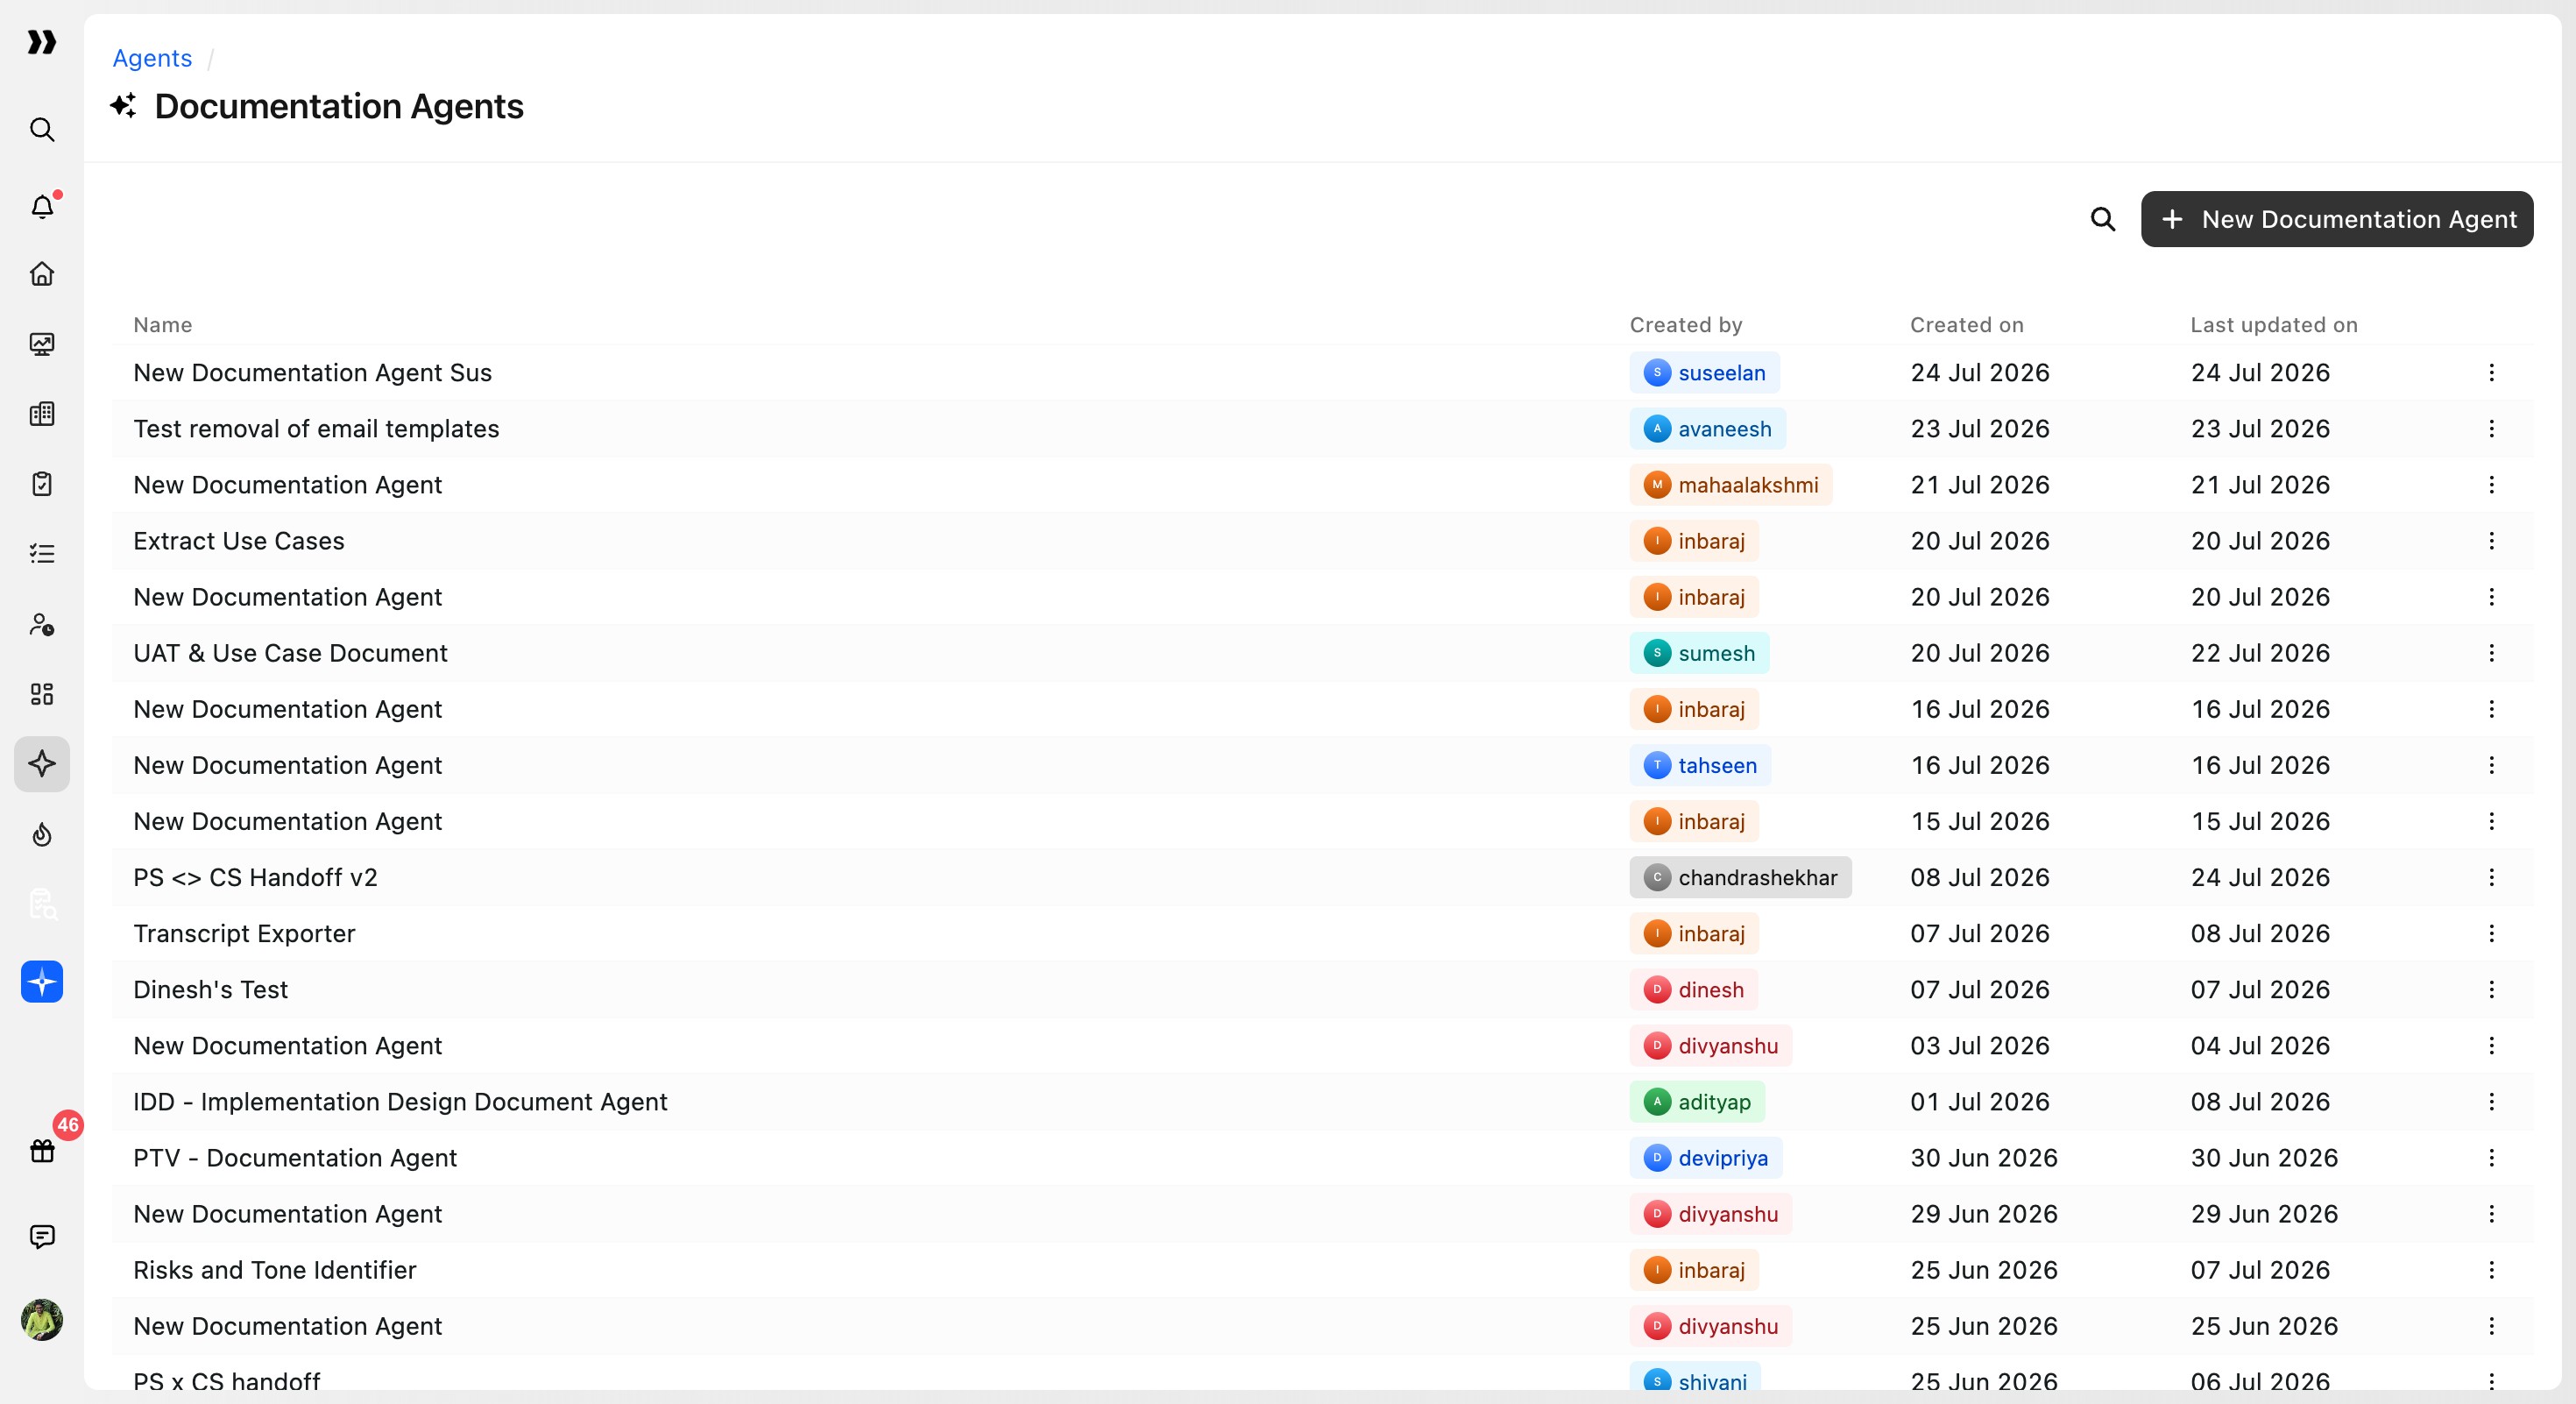
The New Documentation Agent setup page opens.
Step 1: Select a Template and Configure Sources
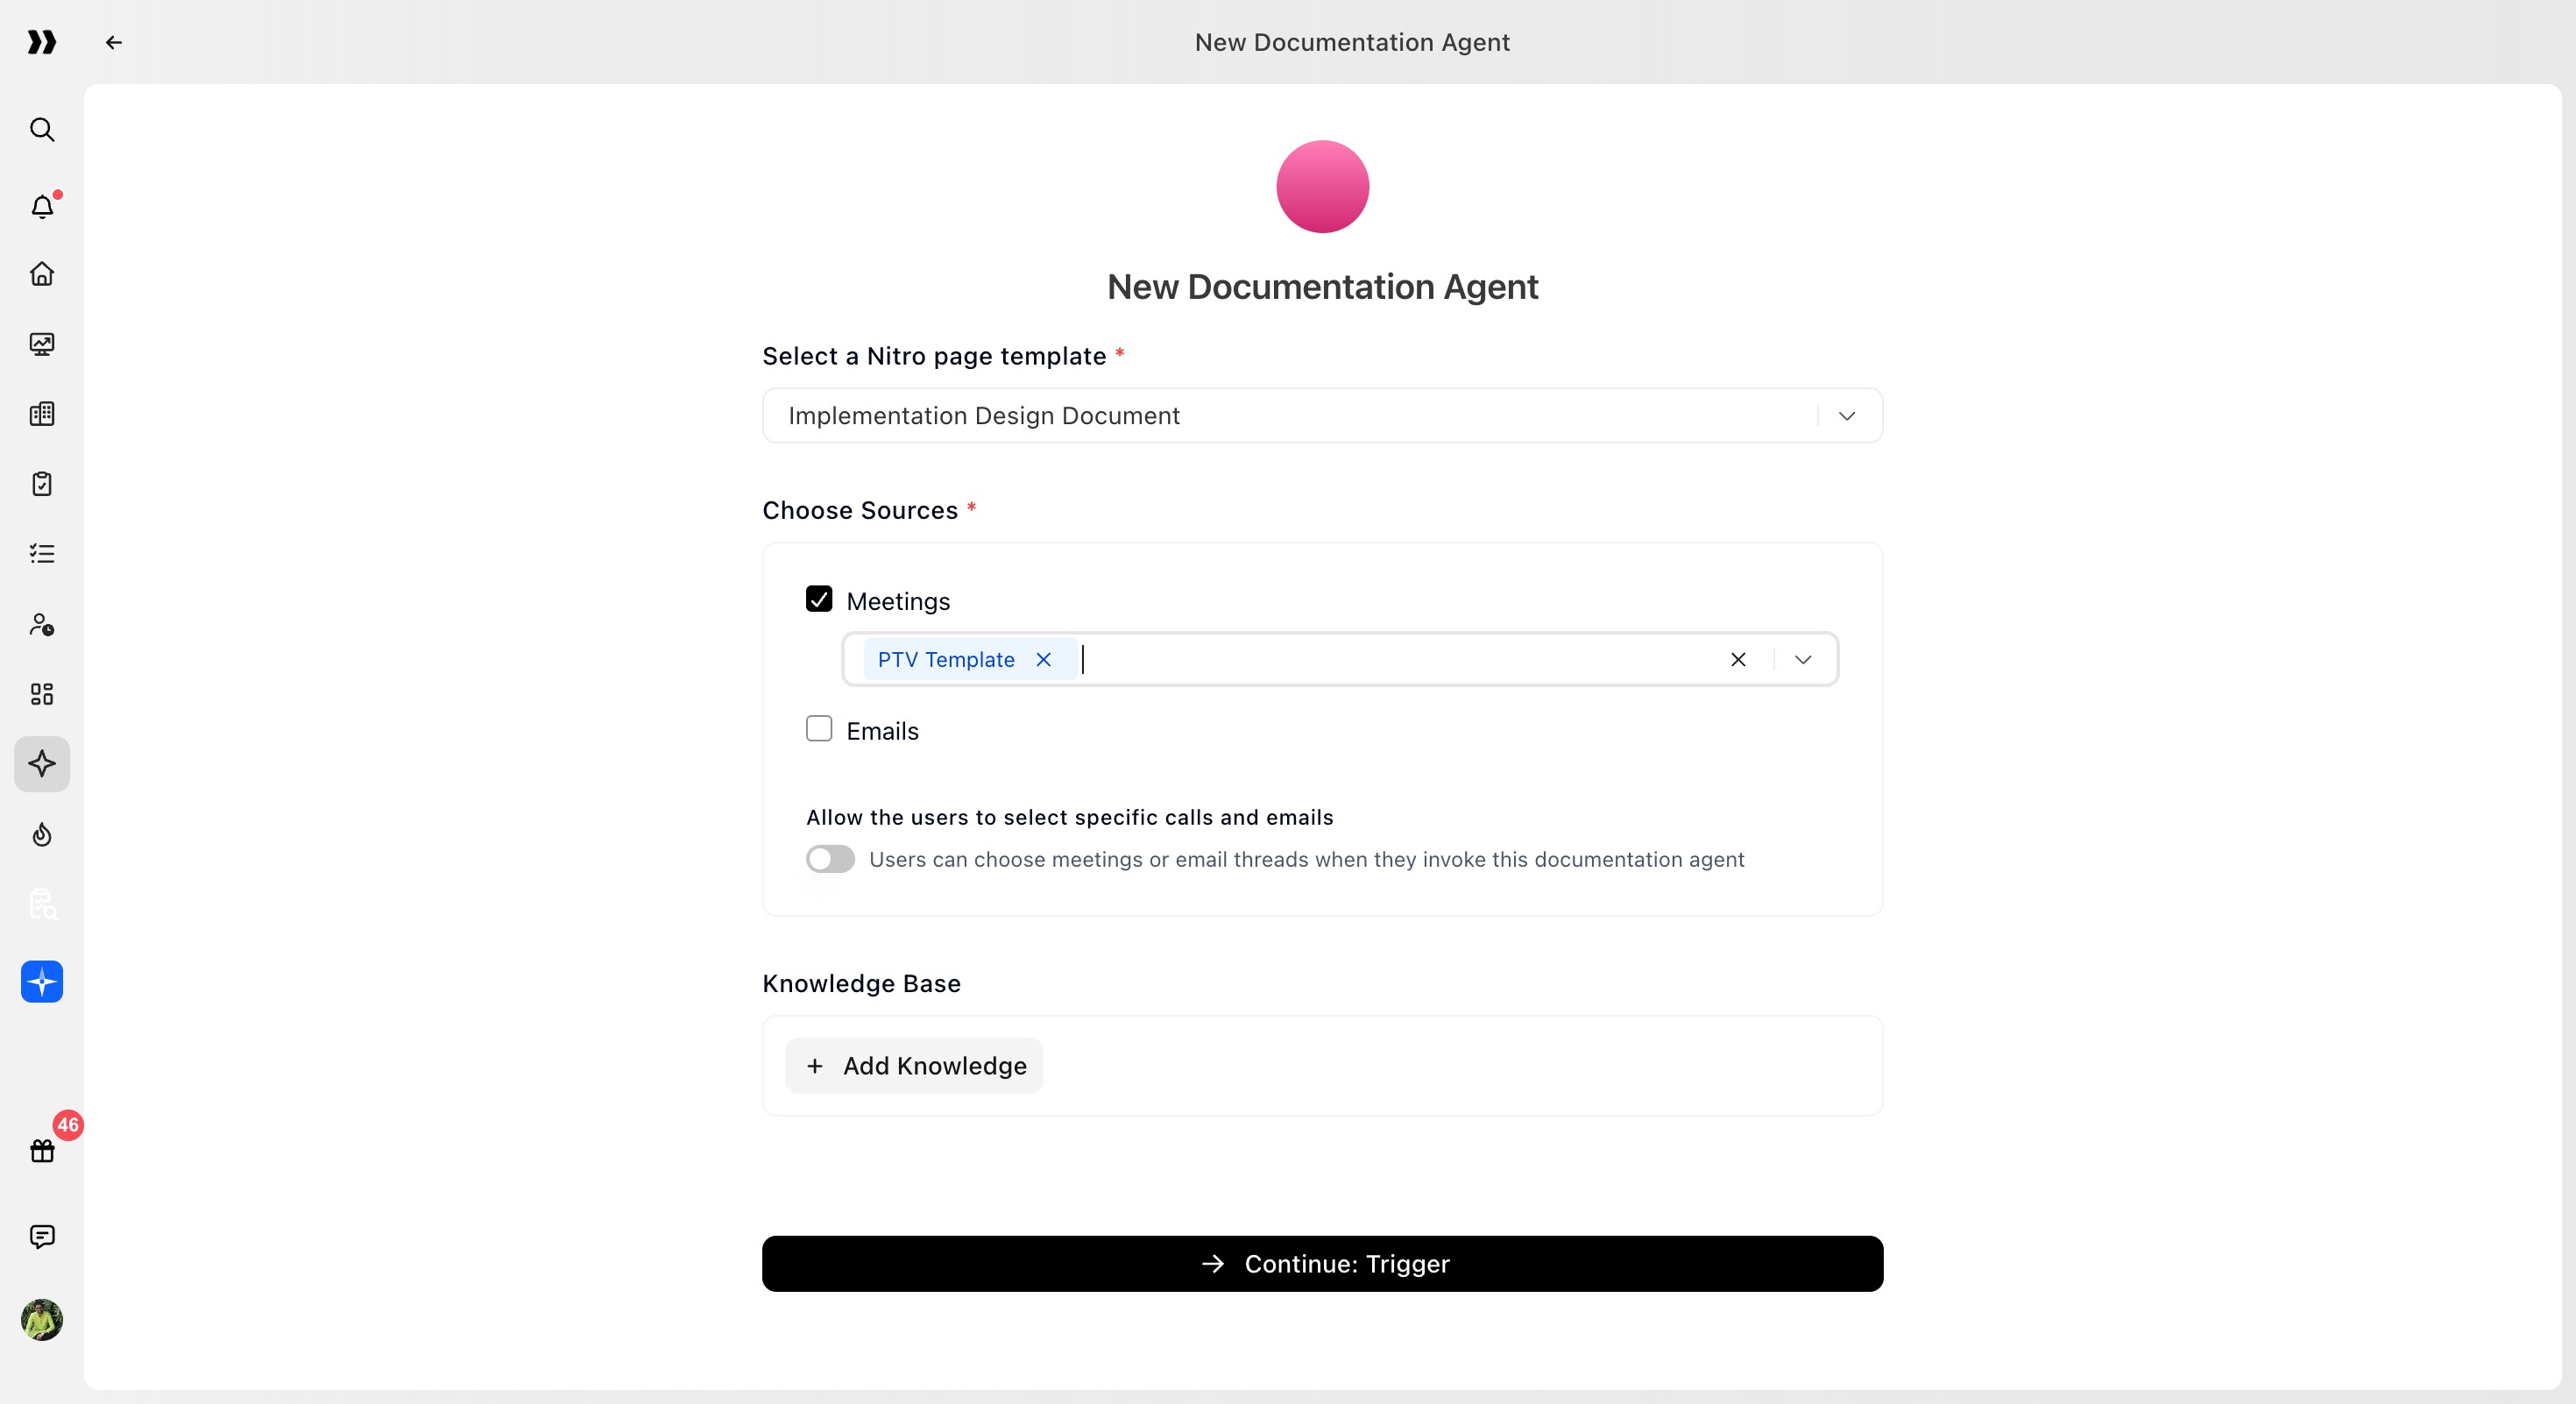
The first step is to choose the Nitro page template, define the sources the agent can use, add document context fields, and attach knowledge bases.
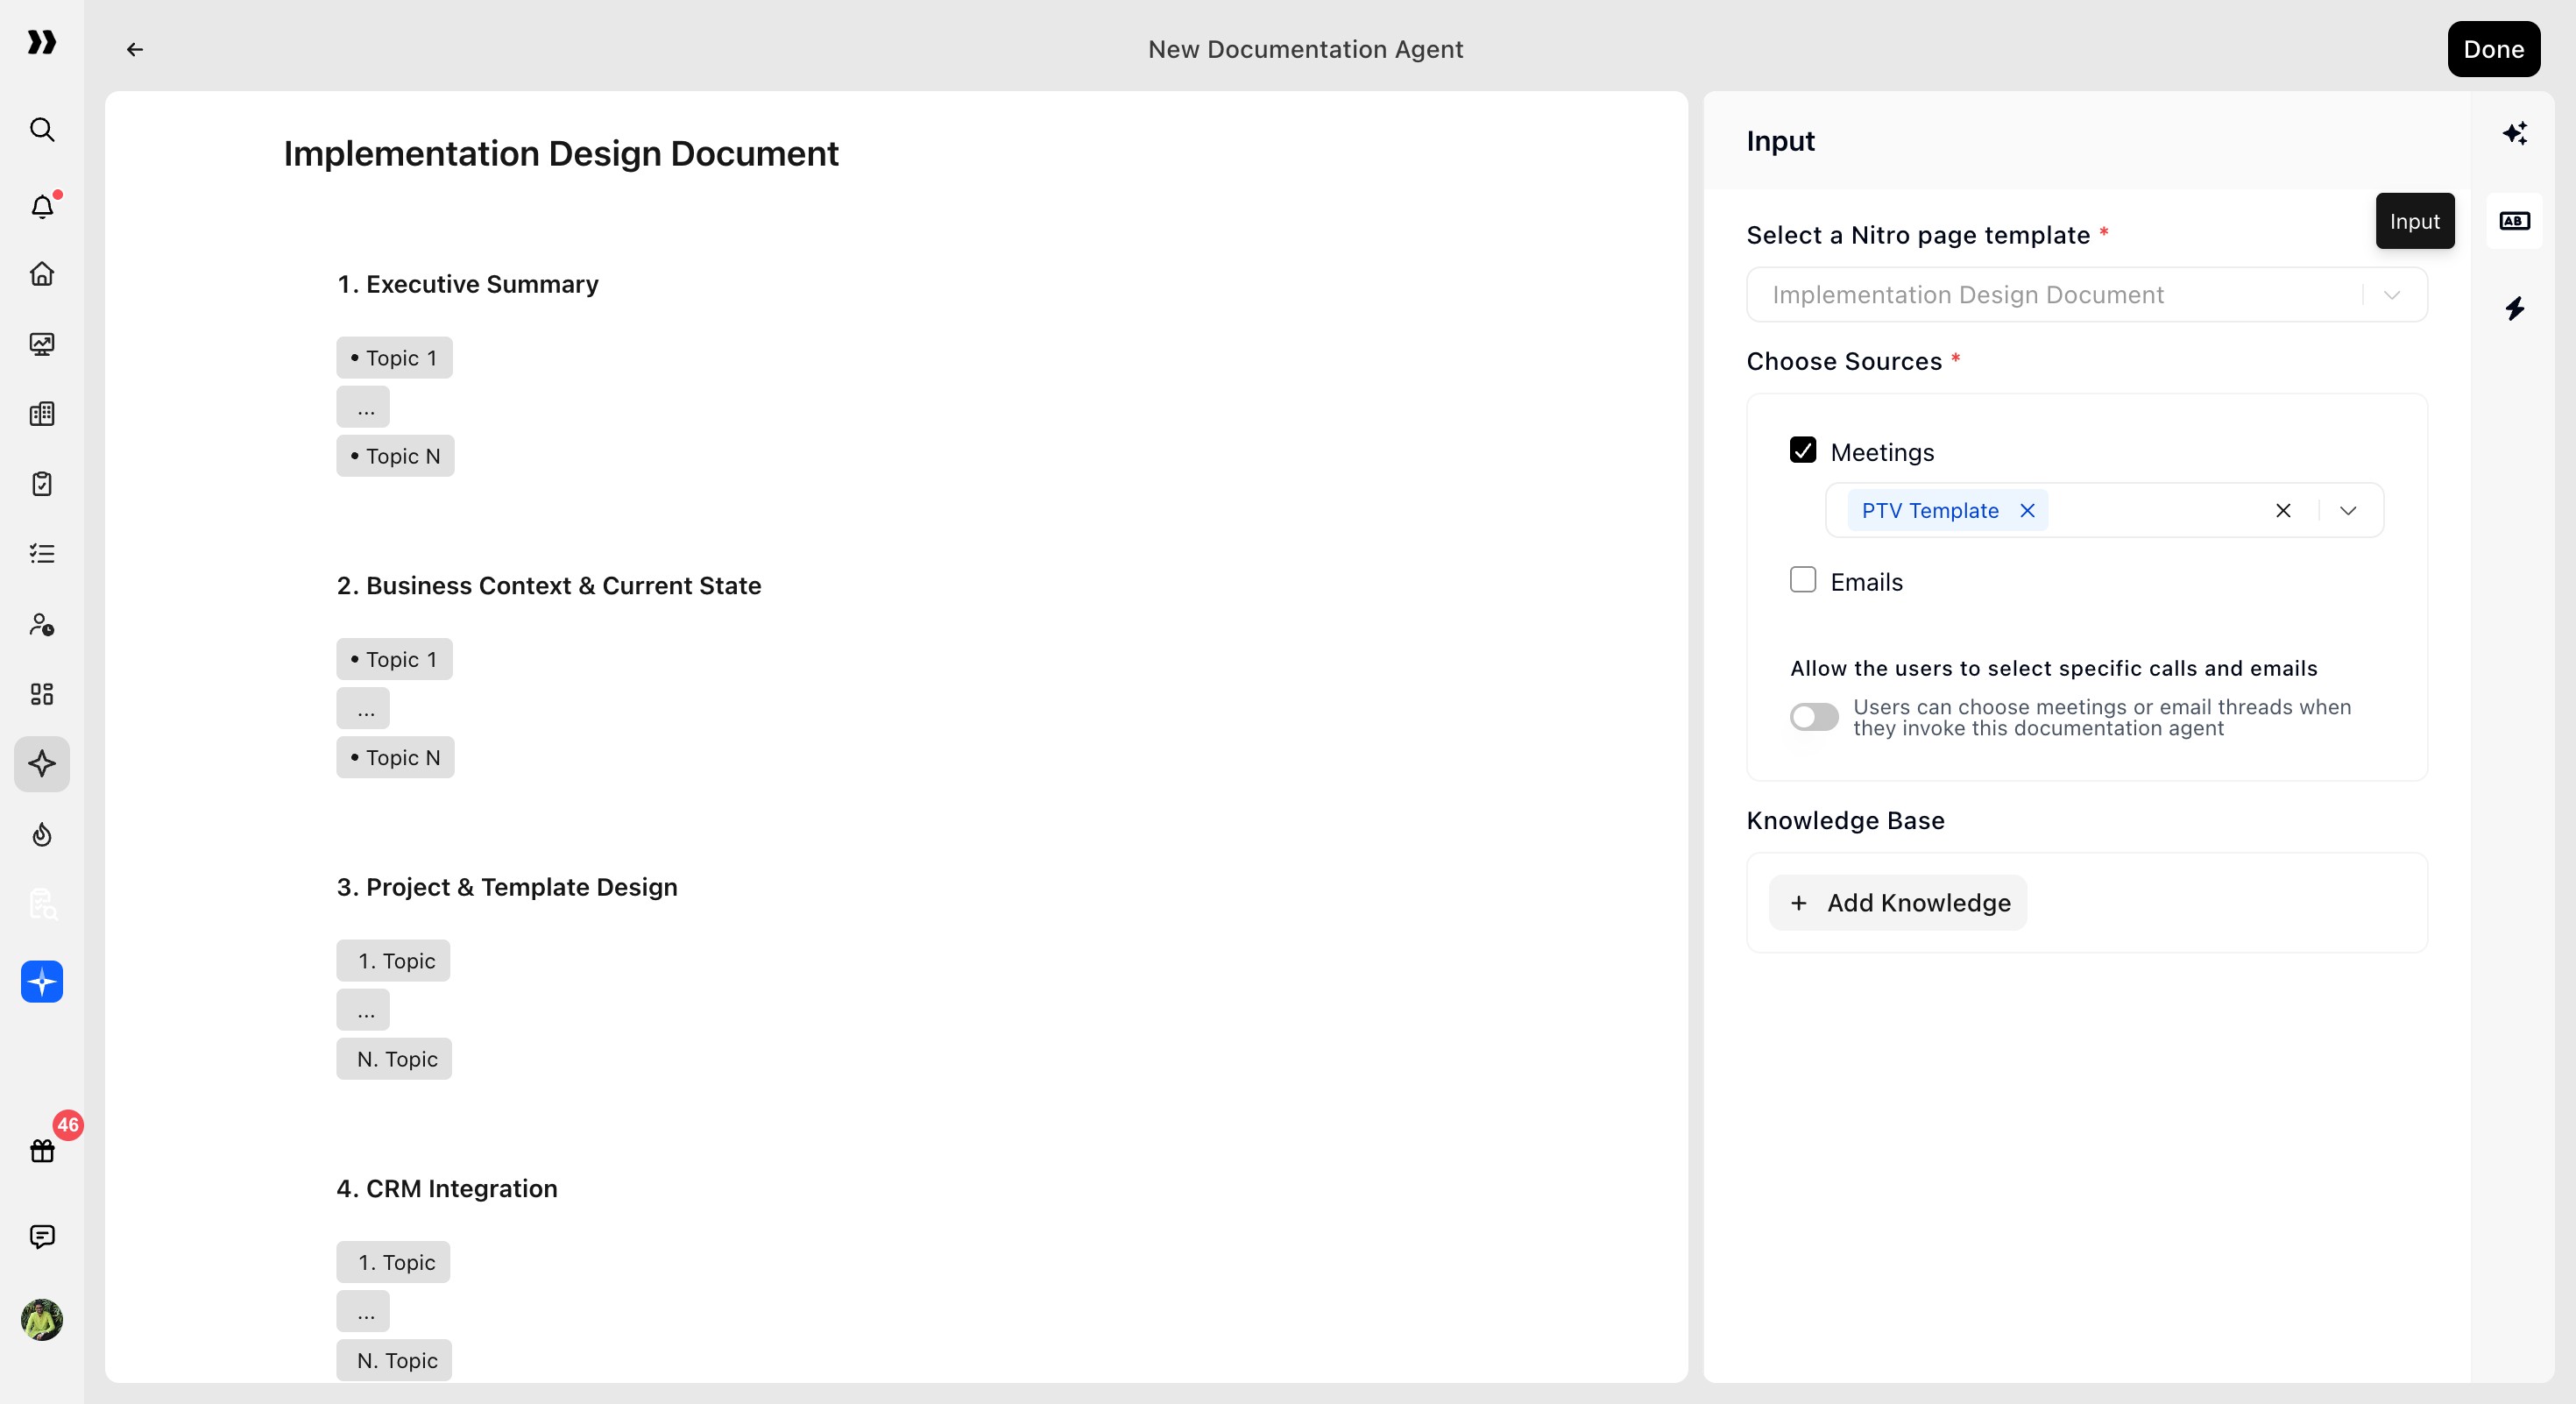
Select a Nitro Page Template
The Nitro page template defines the structure of the document the agent will generate. It controls the blocks, sections, questions, summaries, tables, and other content areas the agent fills.
To select a template:
In the Agent name field, enter a name for the agent.
Example: Document my ItemsUse the Select a Nitro page template dropdown.
Choose the template the agent should use.
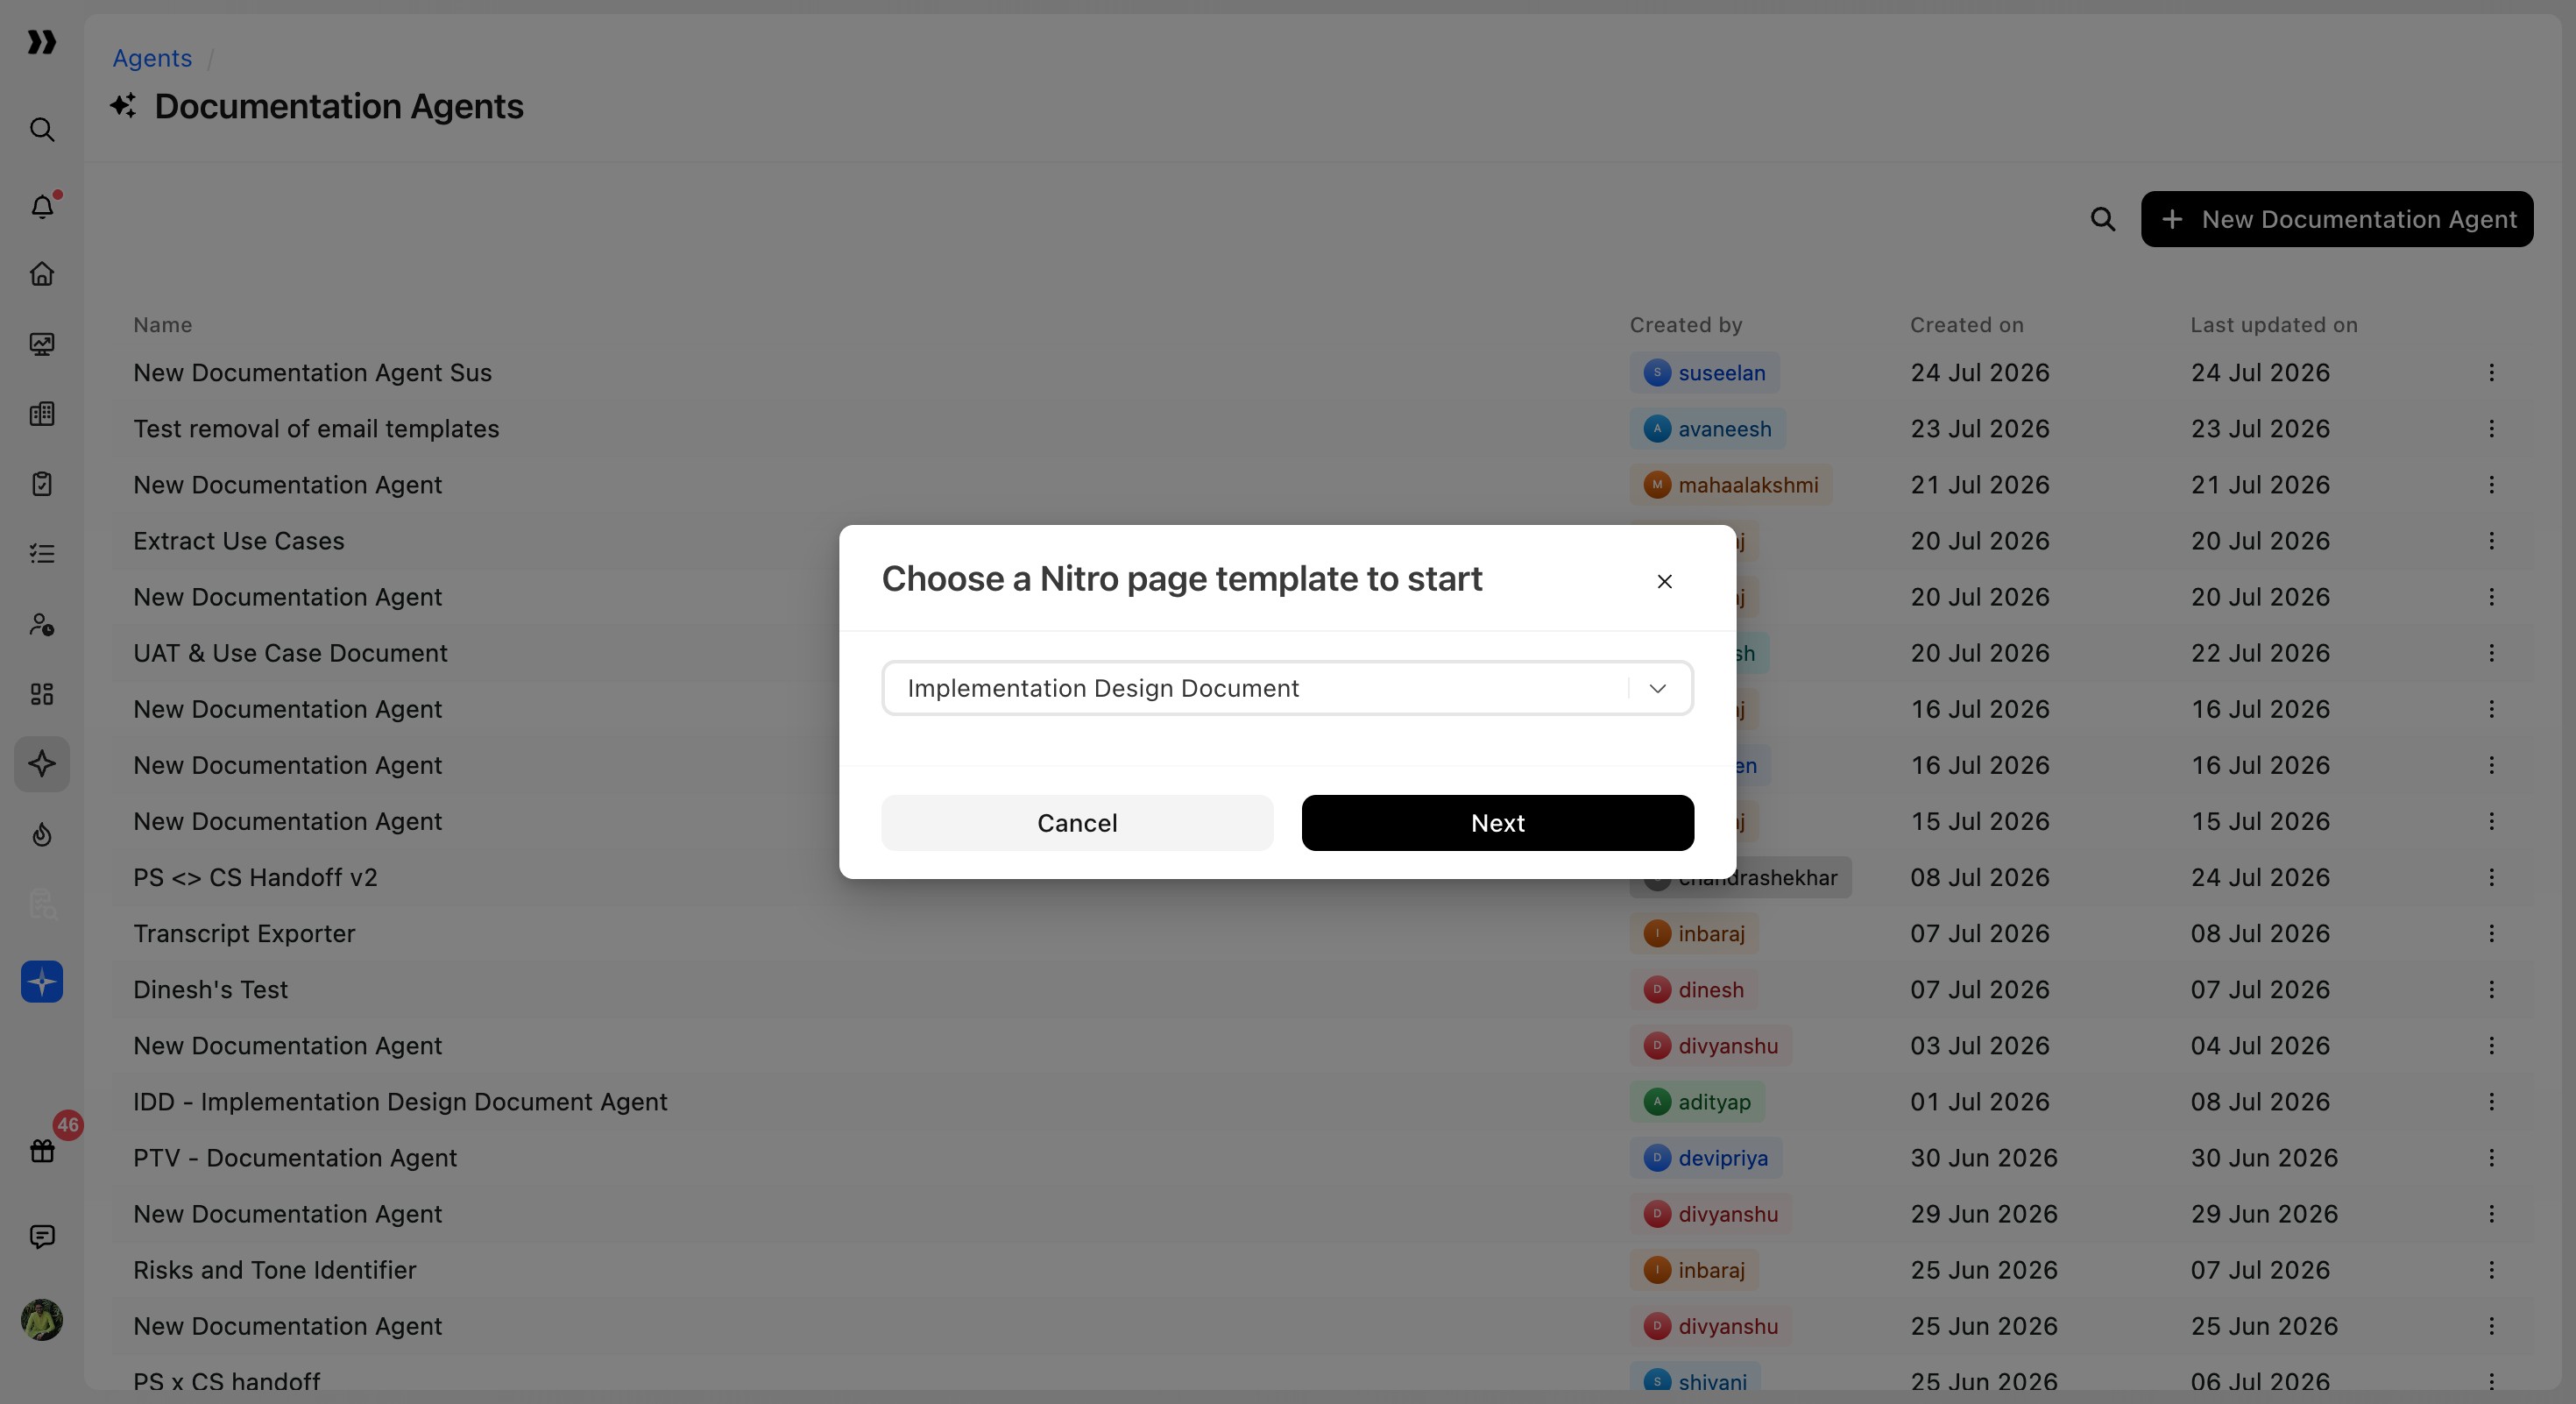
Select the template that best matches the type of document this agent should generate.
Choose Sources
Sources define the content the agent can use to generate the document.
Two source types are available:
At least one source must be selected.
Use meeting sources
Enable Meetings if the agent should generate content from meeting recordings or transcripts.
After enabling Meetings, use the dropdown to select specific meeting templates. This limits which meetings qualify as sources for the agent.
Use email sources
Enable Emails if the agent should generate content from email threads.
After enabling Emails, use the dropdown to select specific email templates.
Example: Default Email Template
Add Document Context Fields
The Get document context section lets you define structured input fields that provide additional context when the agent runs.
These fields help the agent understand the document’s purpose, scope, or specific instructions.
A default field such as Risk analysis may appear as an example.
Add a new input field
To add a field:
Click + Add input.
In the New Agent Field modal, enter the Field Name.
Example: Risk analysisSelect the Field Type.
Available field types include:Boolean
Multi-line Text
Text
Number
Date
Single Select
Multi Select
Single User
Add a Description, if required.
The description is used as AI context.
Example: “This field tracks the number of risks raised by the customer and why it affects them.”Click Add Field to save the field.
Click Cancel to discard the field.
Edit or remove input fields
Click the pencil icon to edit an existing field.
Click the × icon to remove a field.
Allow Users to Select Specific Calls and Emails
Use this toggle when users should be able to choose the exact meetings or email threads each time they run the Documentation Agent.
When enabled, users can select specific meeting recordings or email threads during agent invocation.
Use this when the document should be generated from a curated set of sources instead of all qualifying sources.
Add Knowledge Base Context
Attach knowledge bases so the agent can reference supporting material while generating the document.
Knowledge bases can include:
Product documentation
SOW templates
Internal implementation guides
Process documents
Customer-facing reference material
To attach a knowledge base, use the Knowledge base section in the agent setup.Add Knowledge, then select the relevant folders or files.
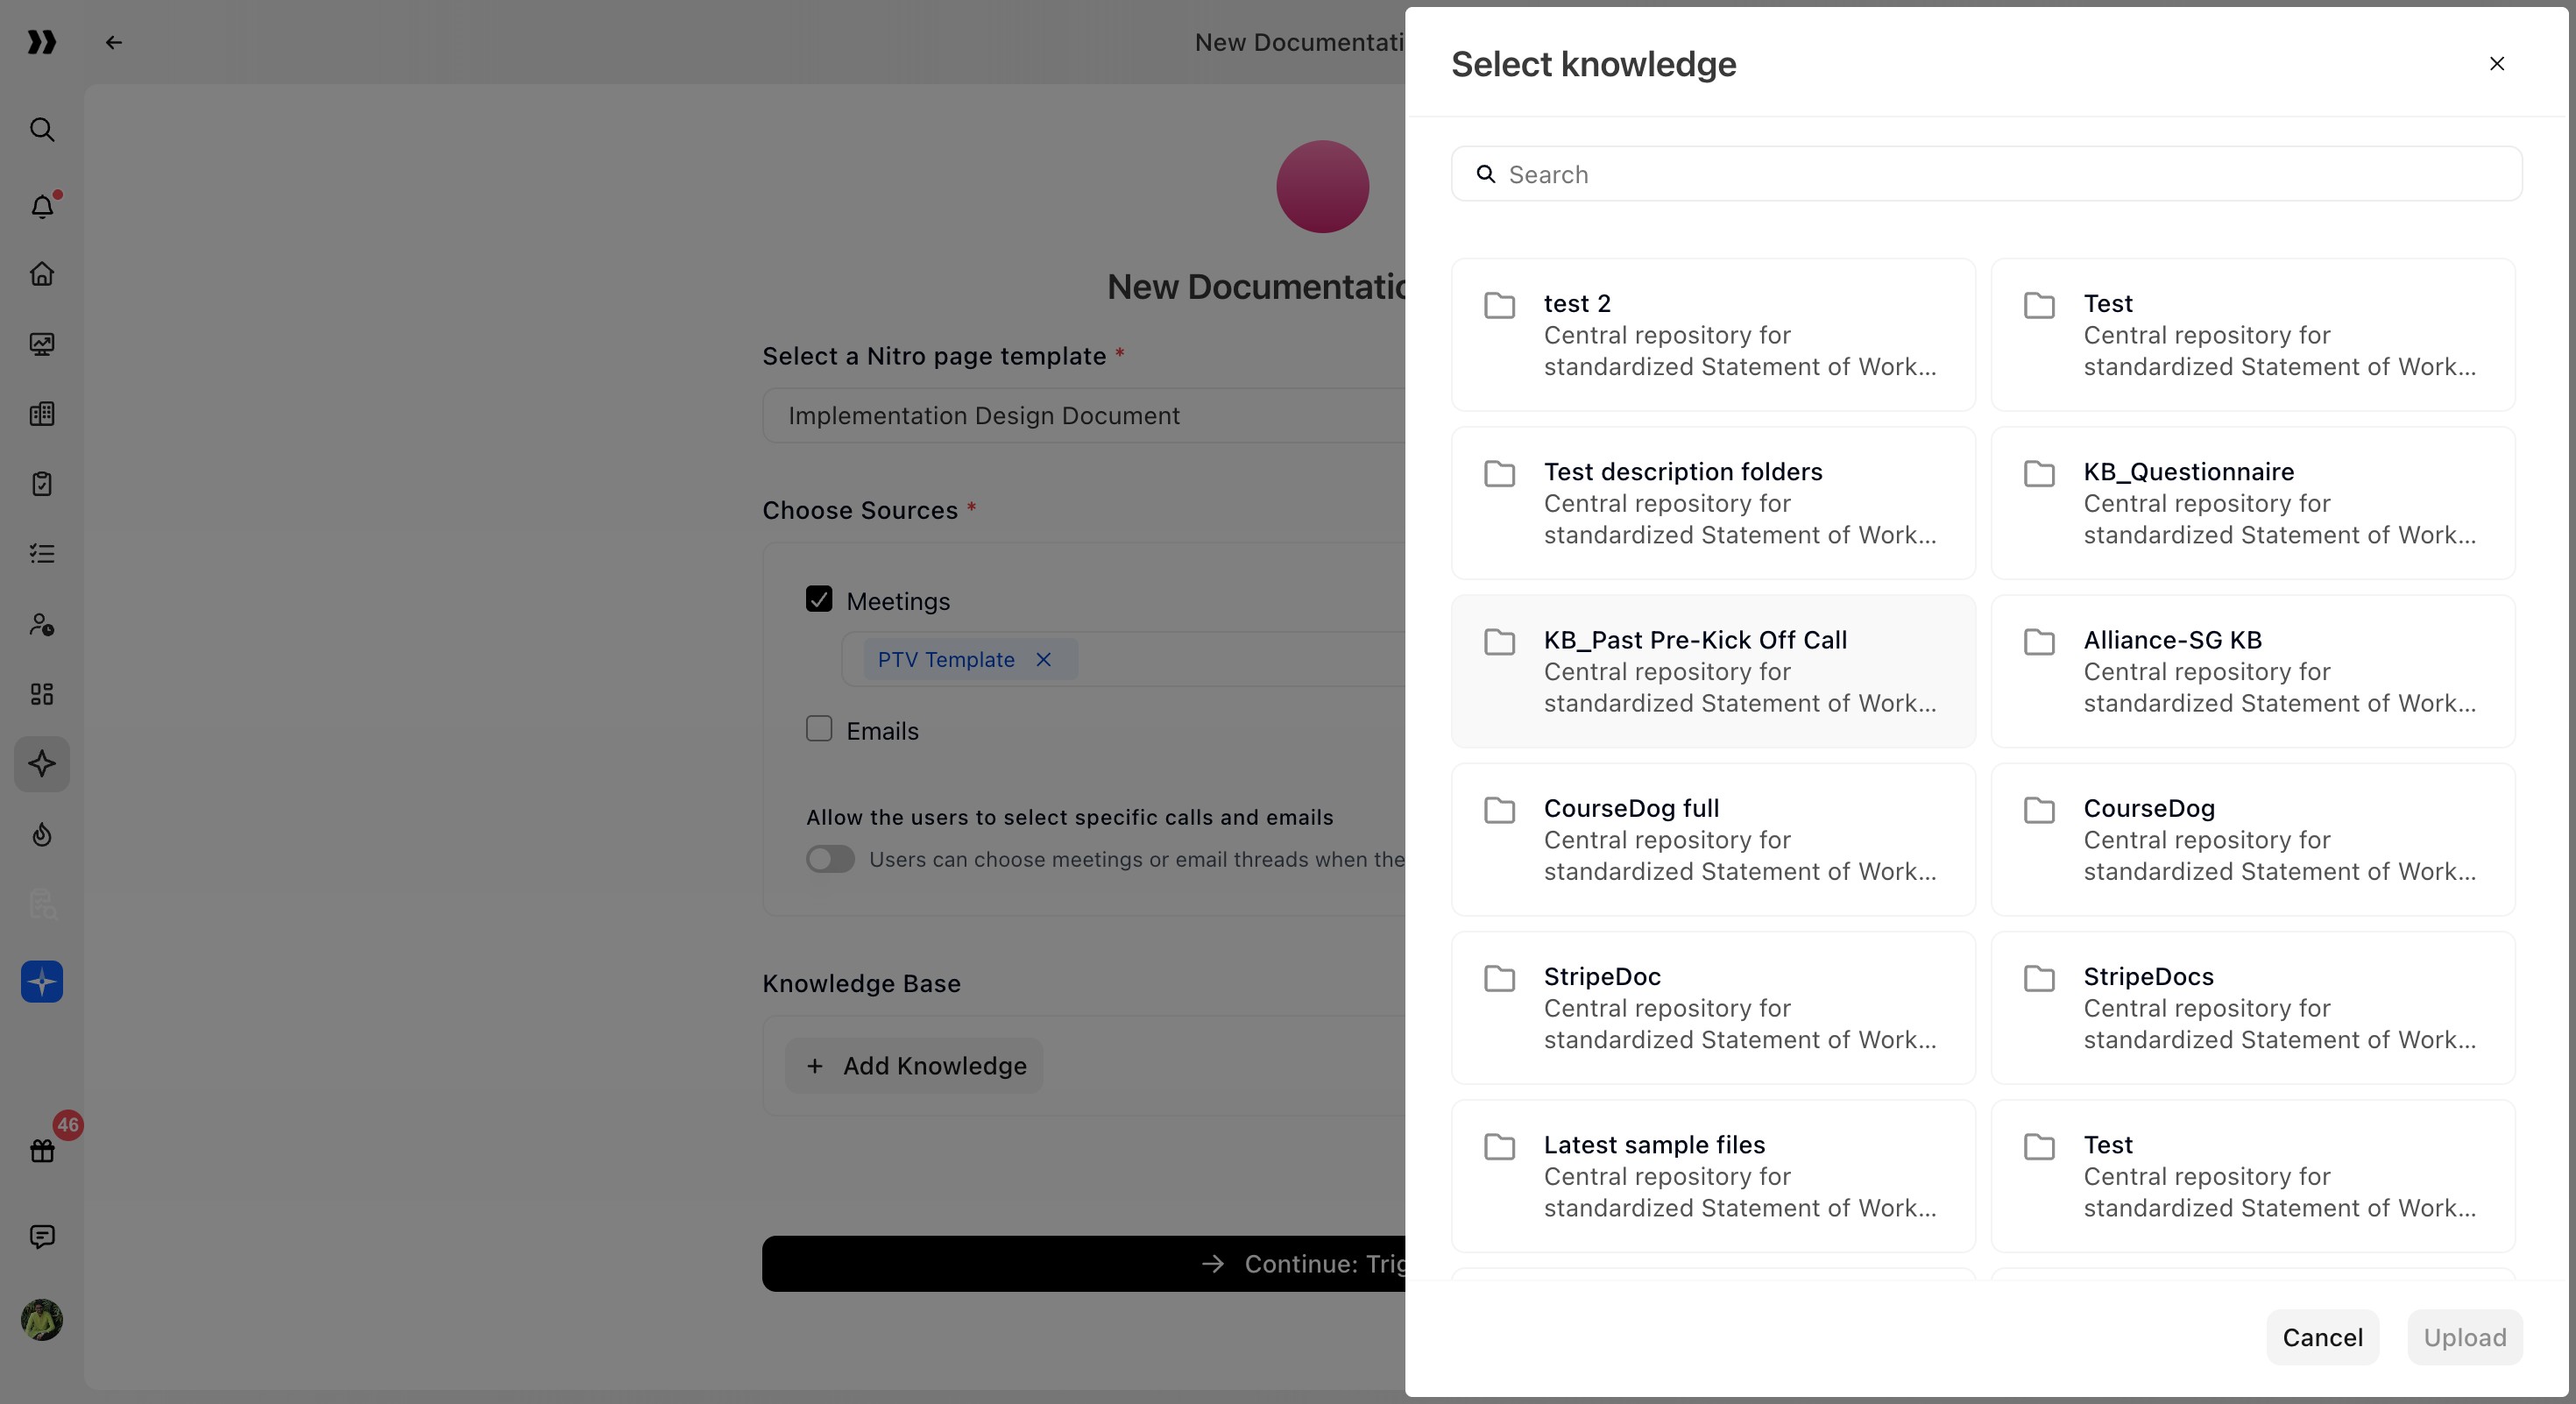
For more details on creating knowledge bases, refer to the knowledge base setup article.
After configuring sources, input fields, and knowledge base context, click Continue: Trigger.
Step 2: Configure the Trigger
The trigger defines when and how the Documentation Agent runs.
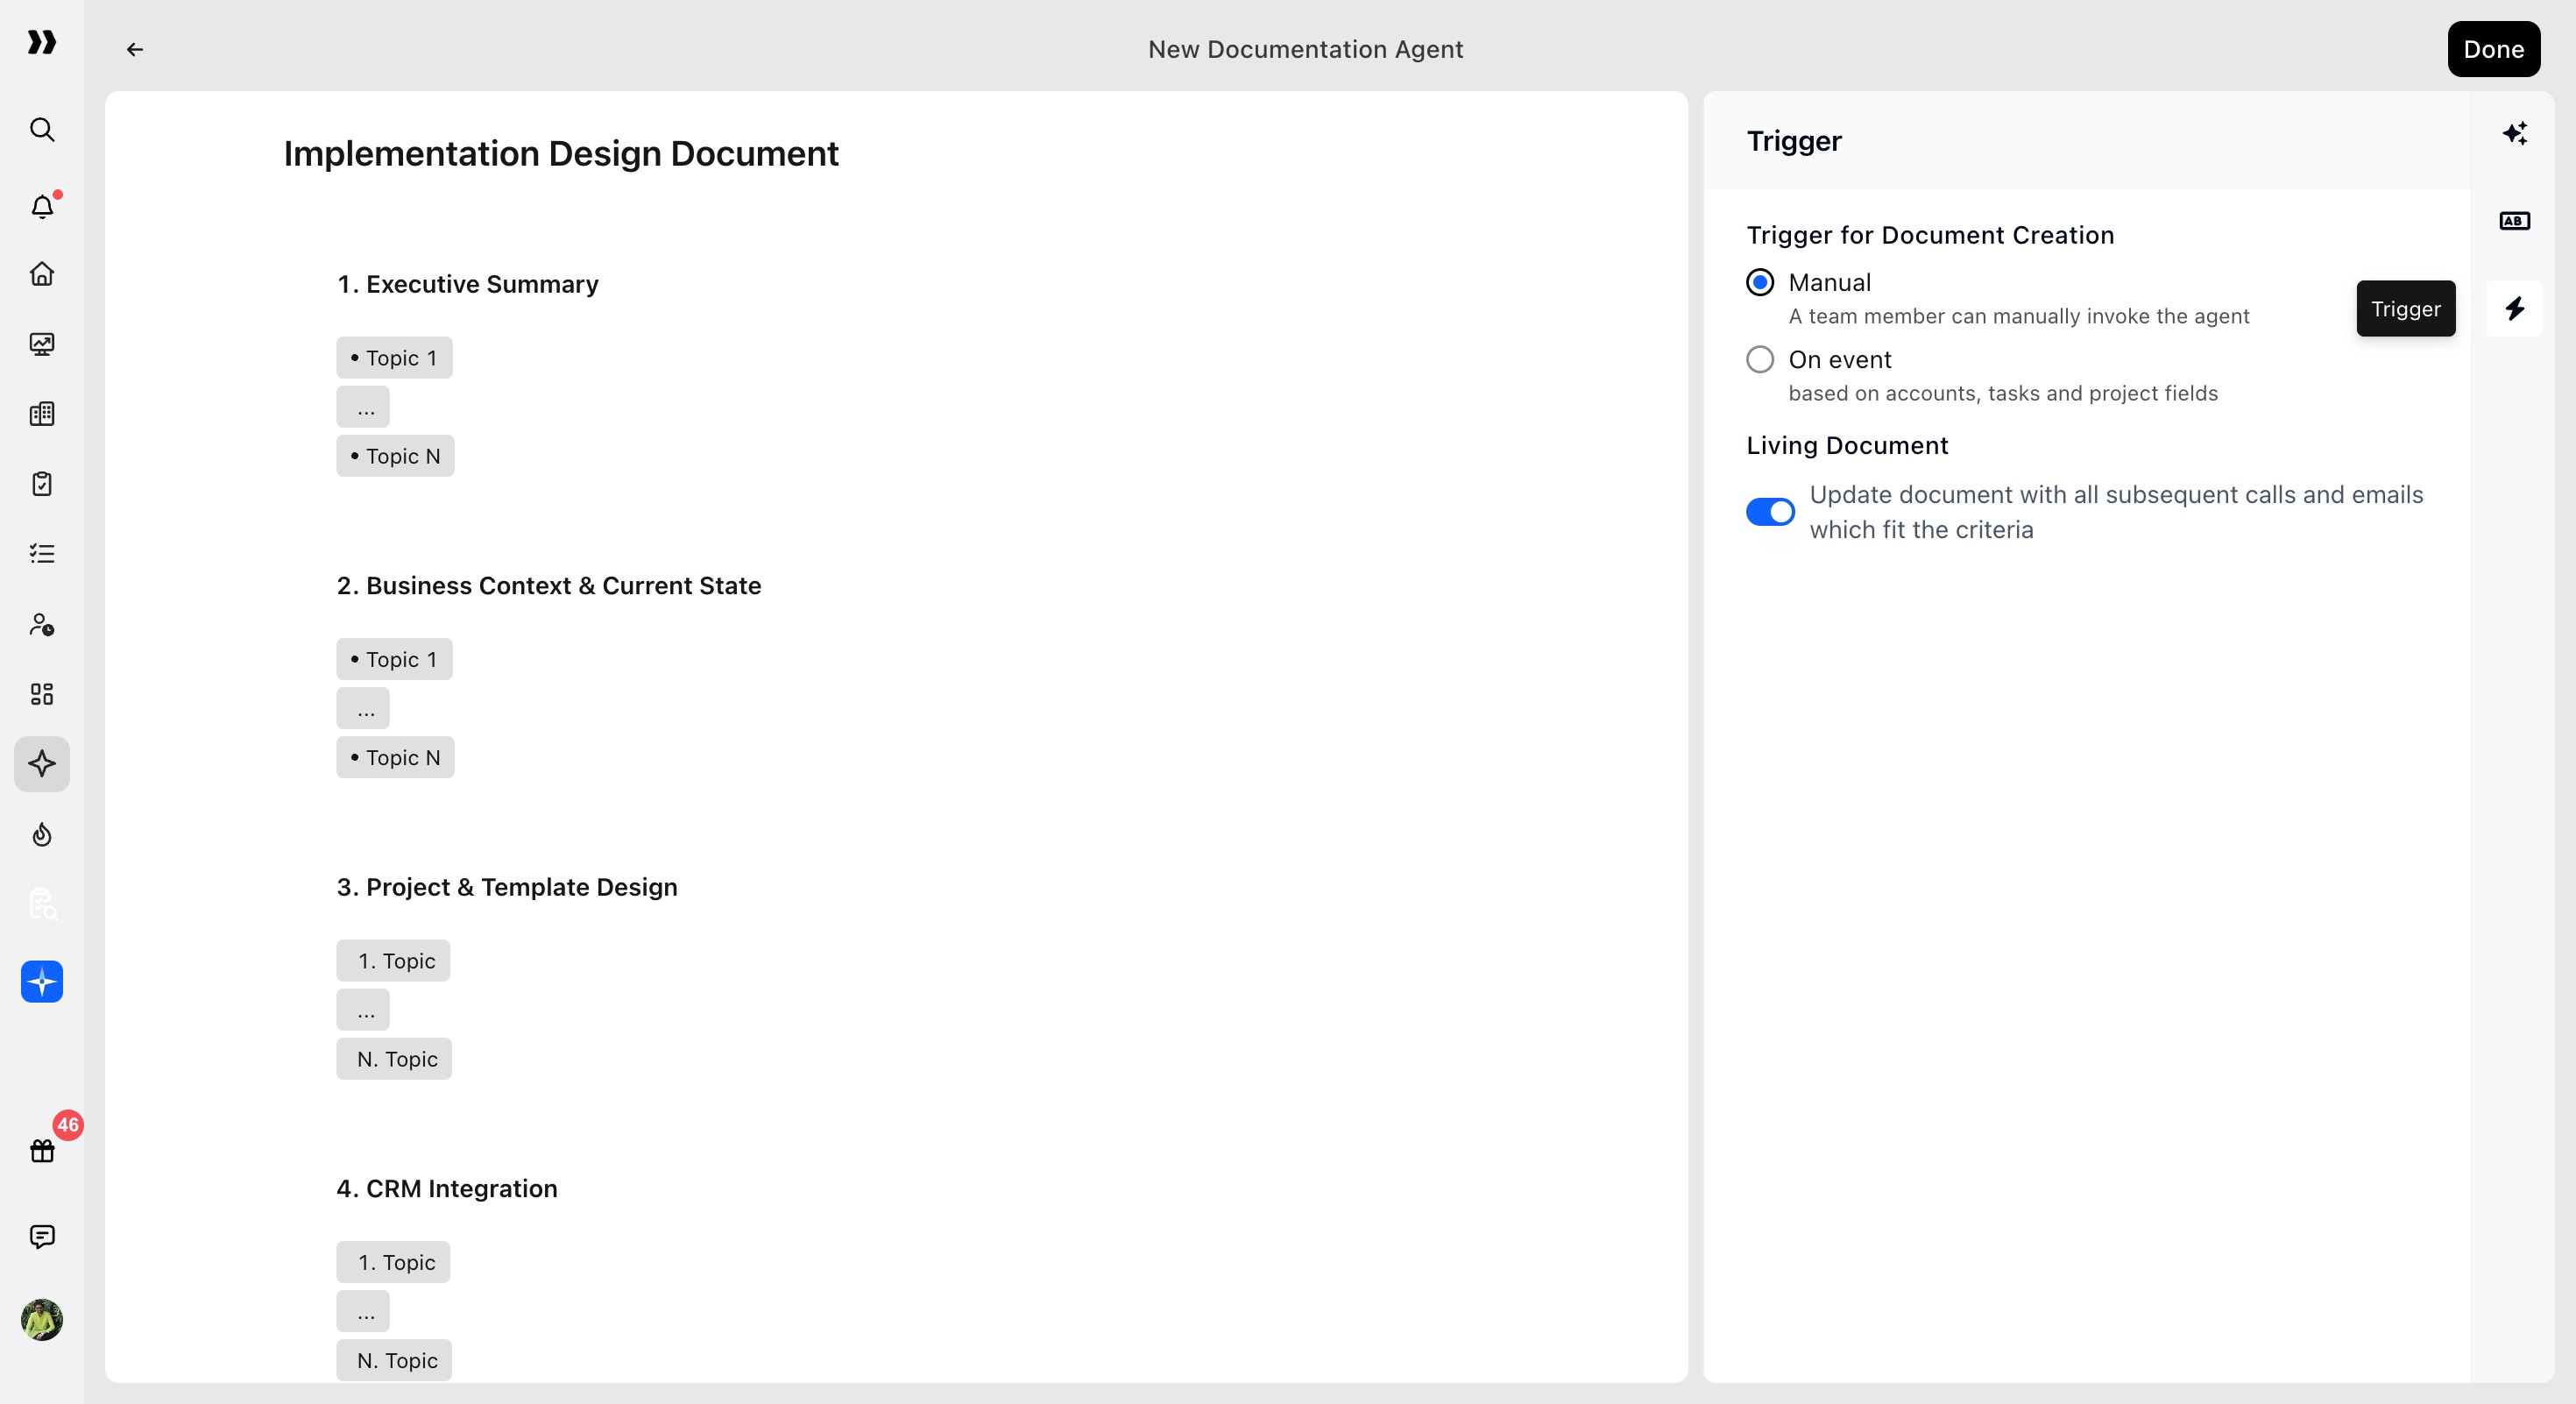
Trigger for Document Creation
Choose one of the following trigger options:
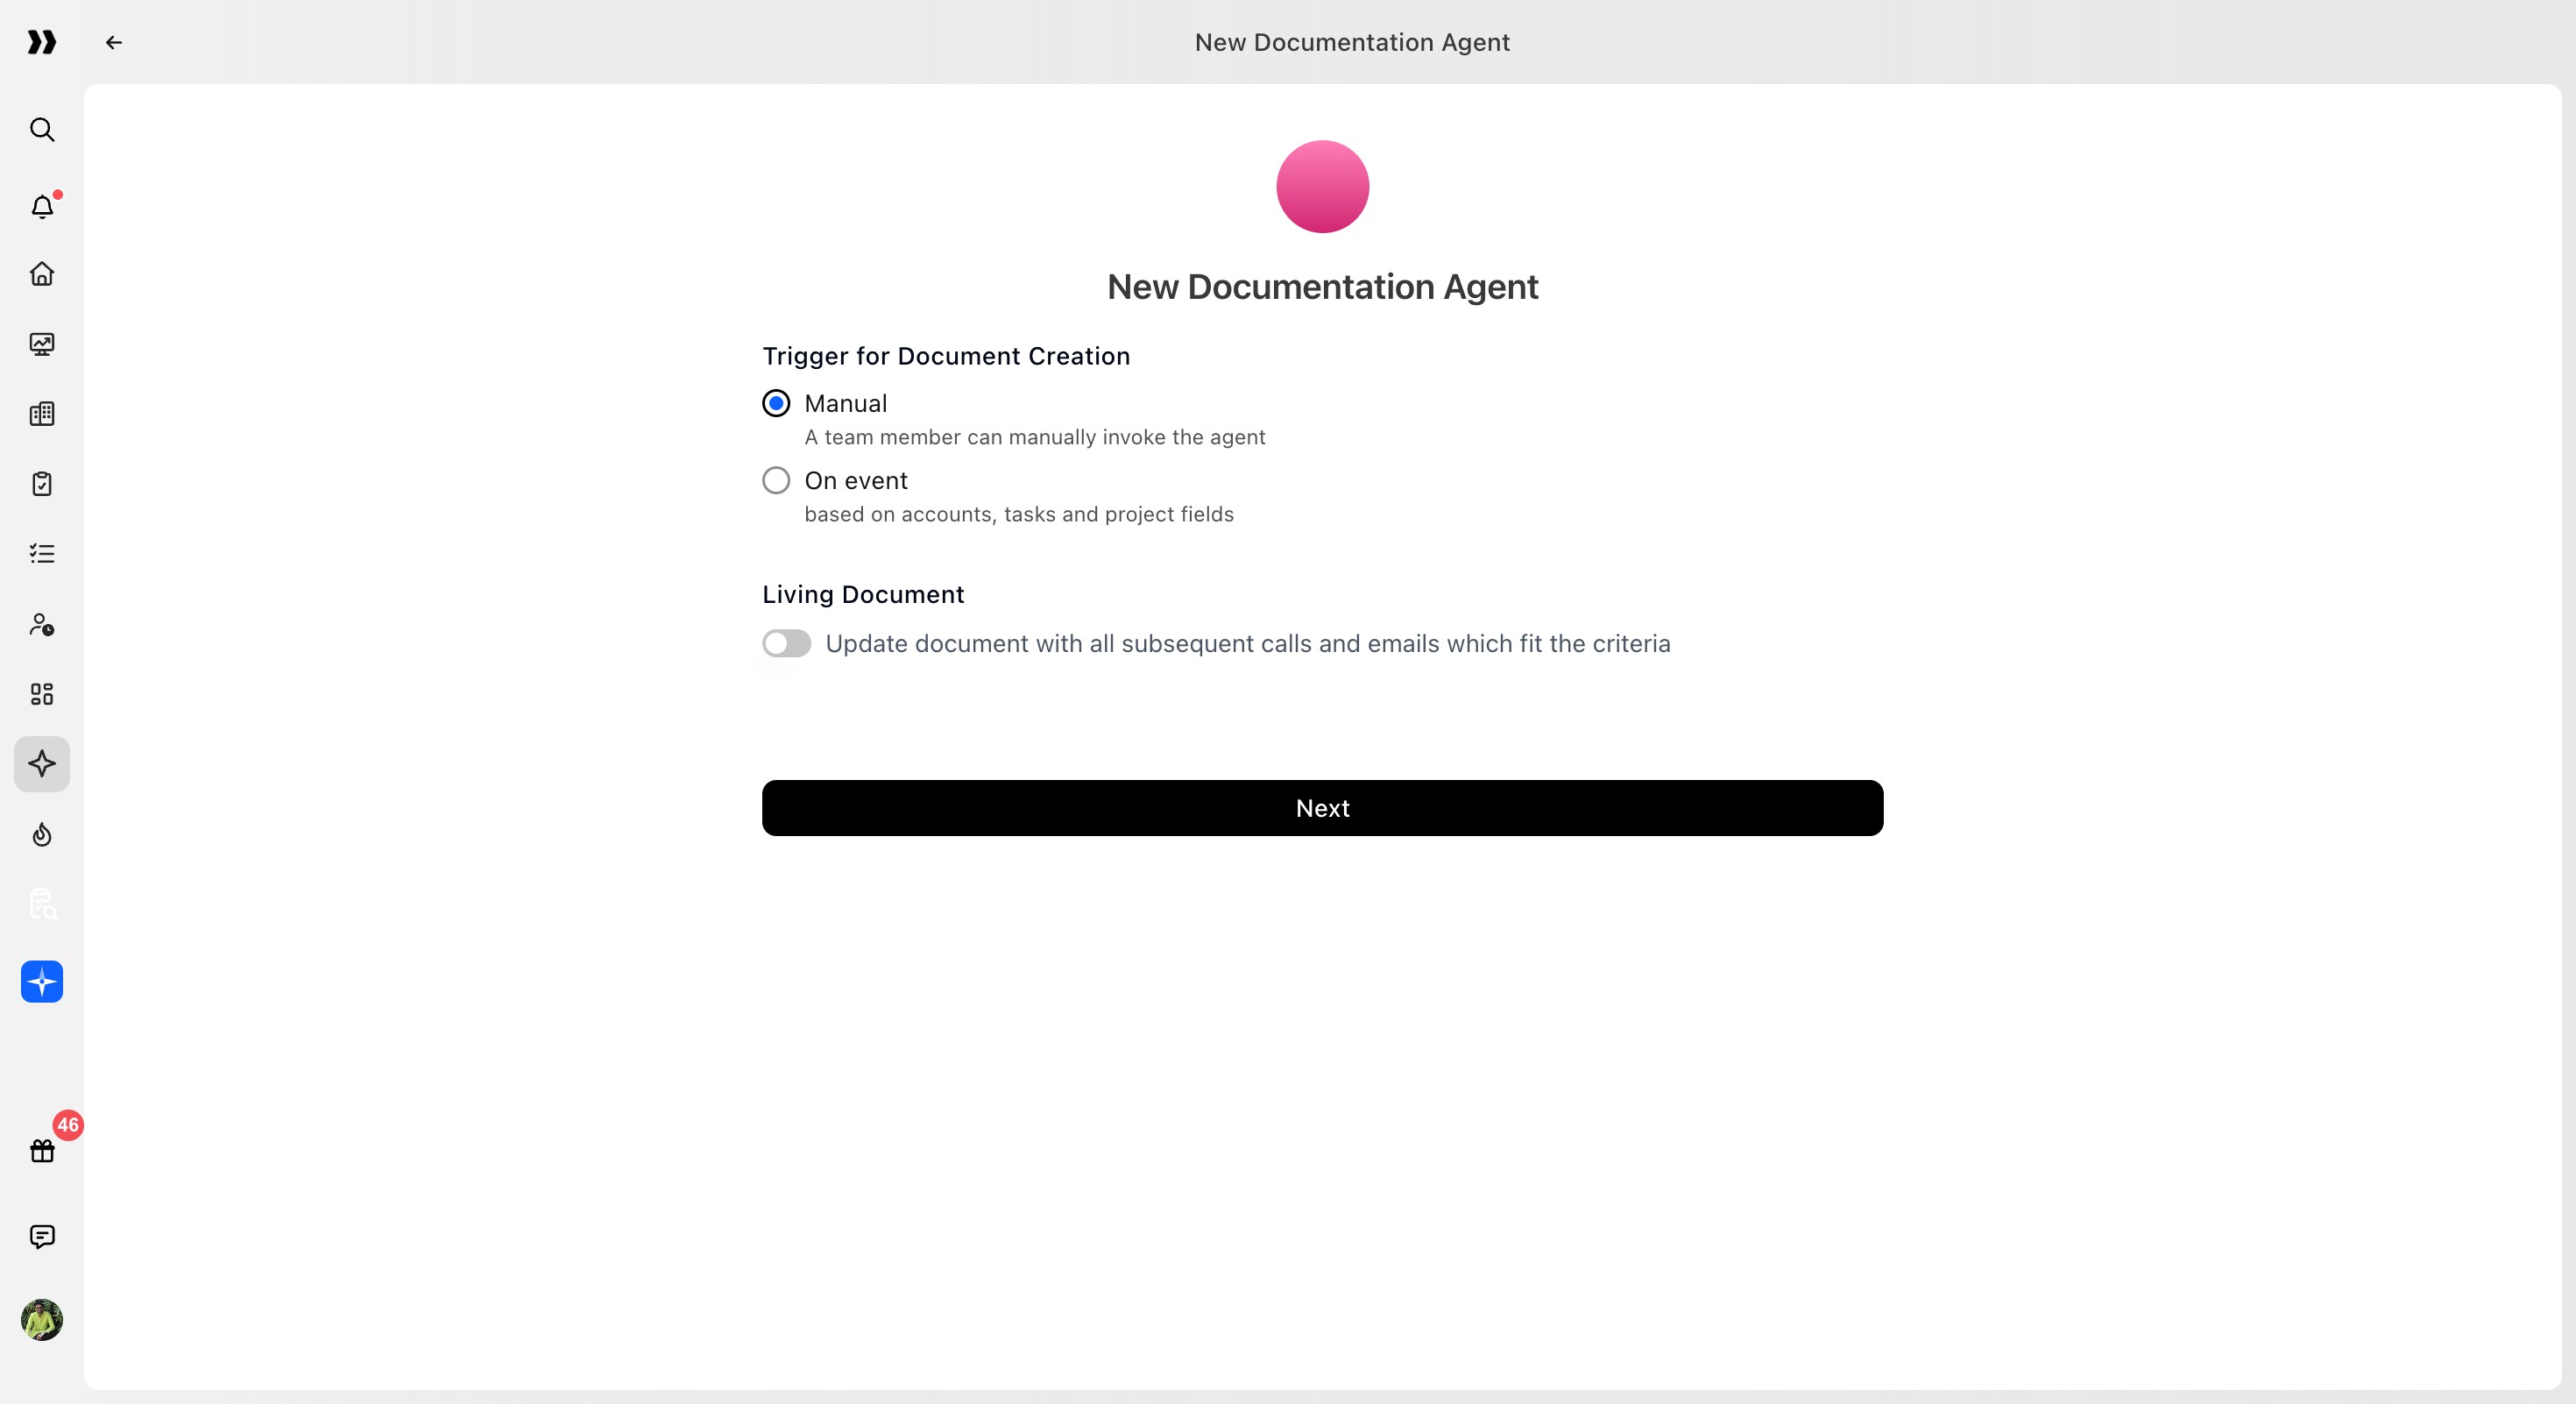
Manual trigger
Use Manual when users should decide when to generate the document.
This works well for handoff notes, meeting summaries, discovery documents, and documents that need human selection of sources before generation.
On-event trigger
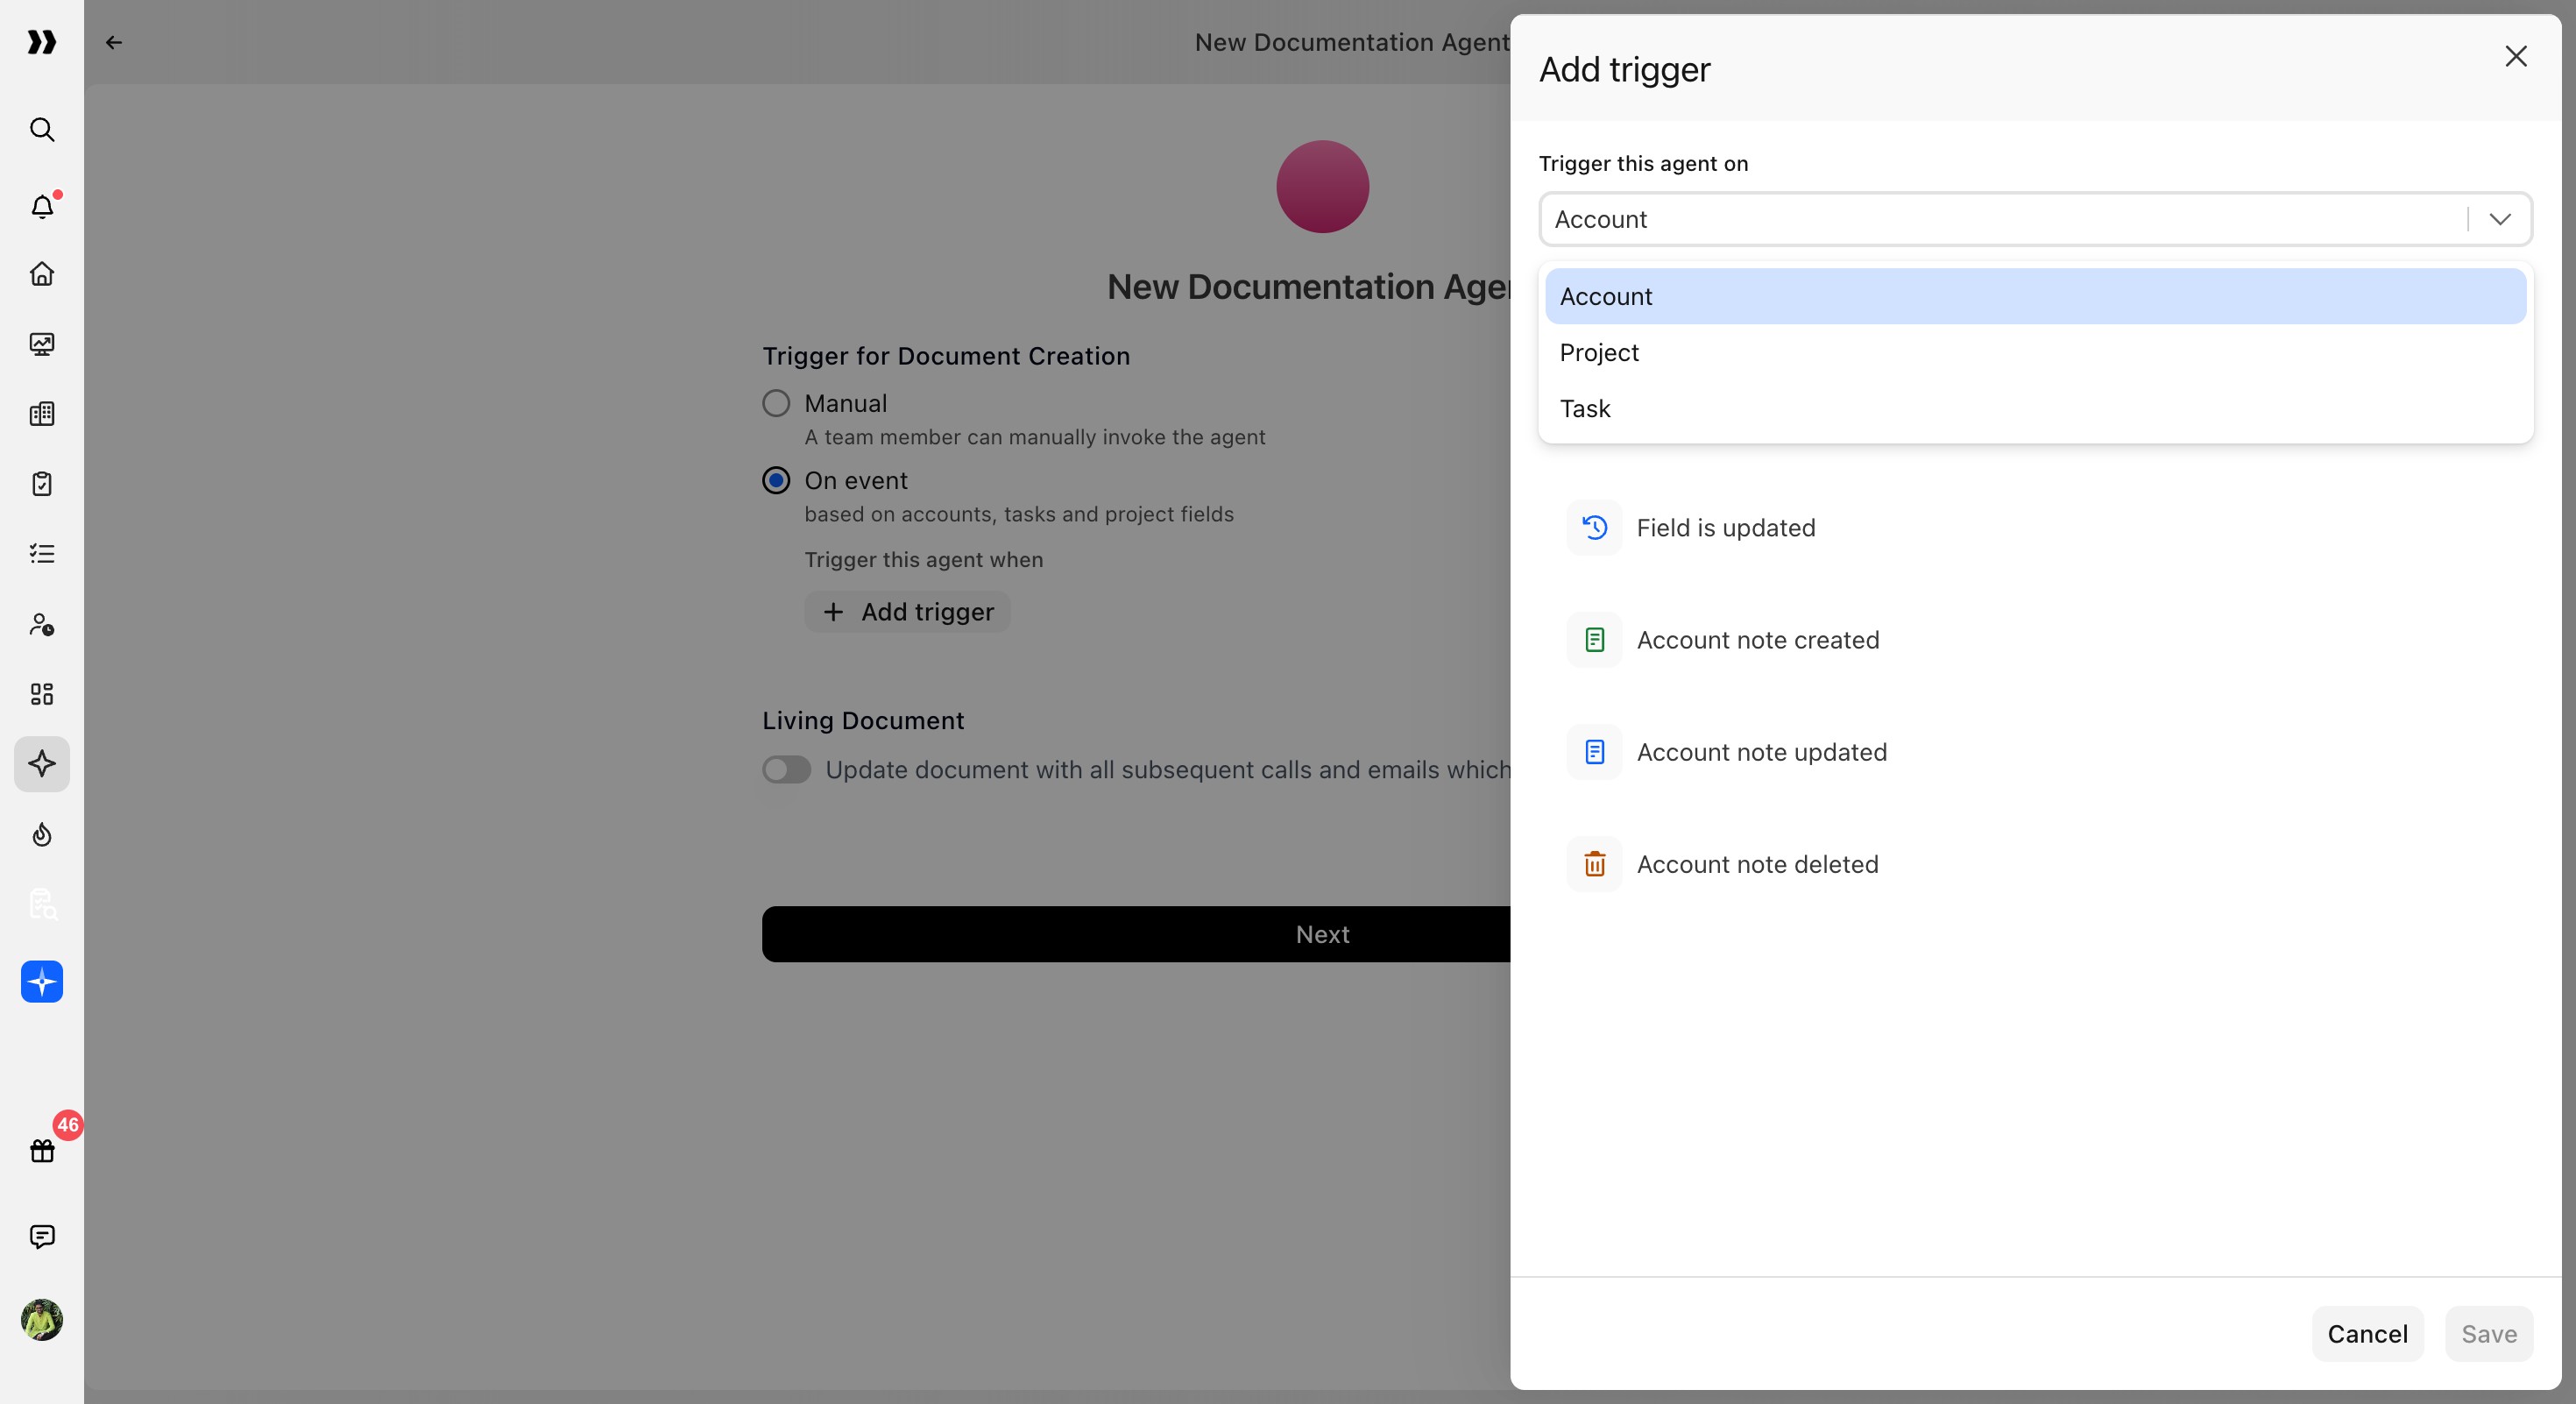
Use On event when the document should be generated automatically when configured account conditions are met.On event, then click Add trigger to define the event rules.
Note: On event triggers are disabled if "Allow the users to select specific calls and emails" option is selected
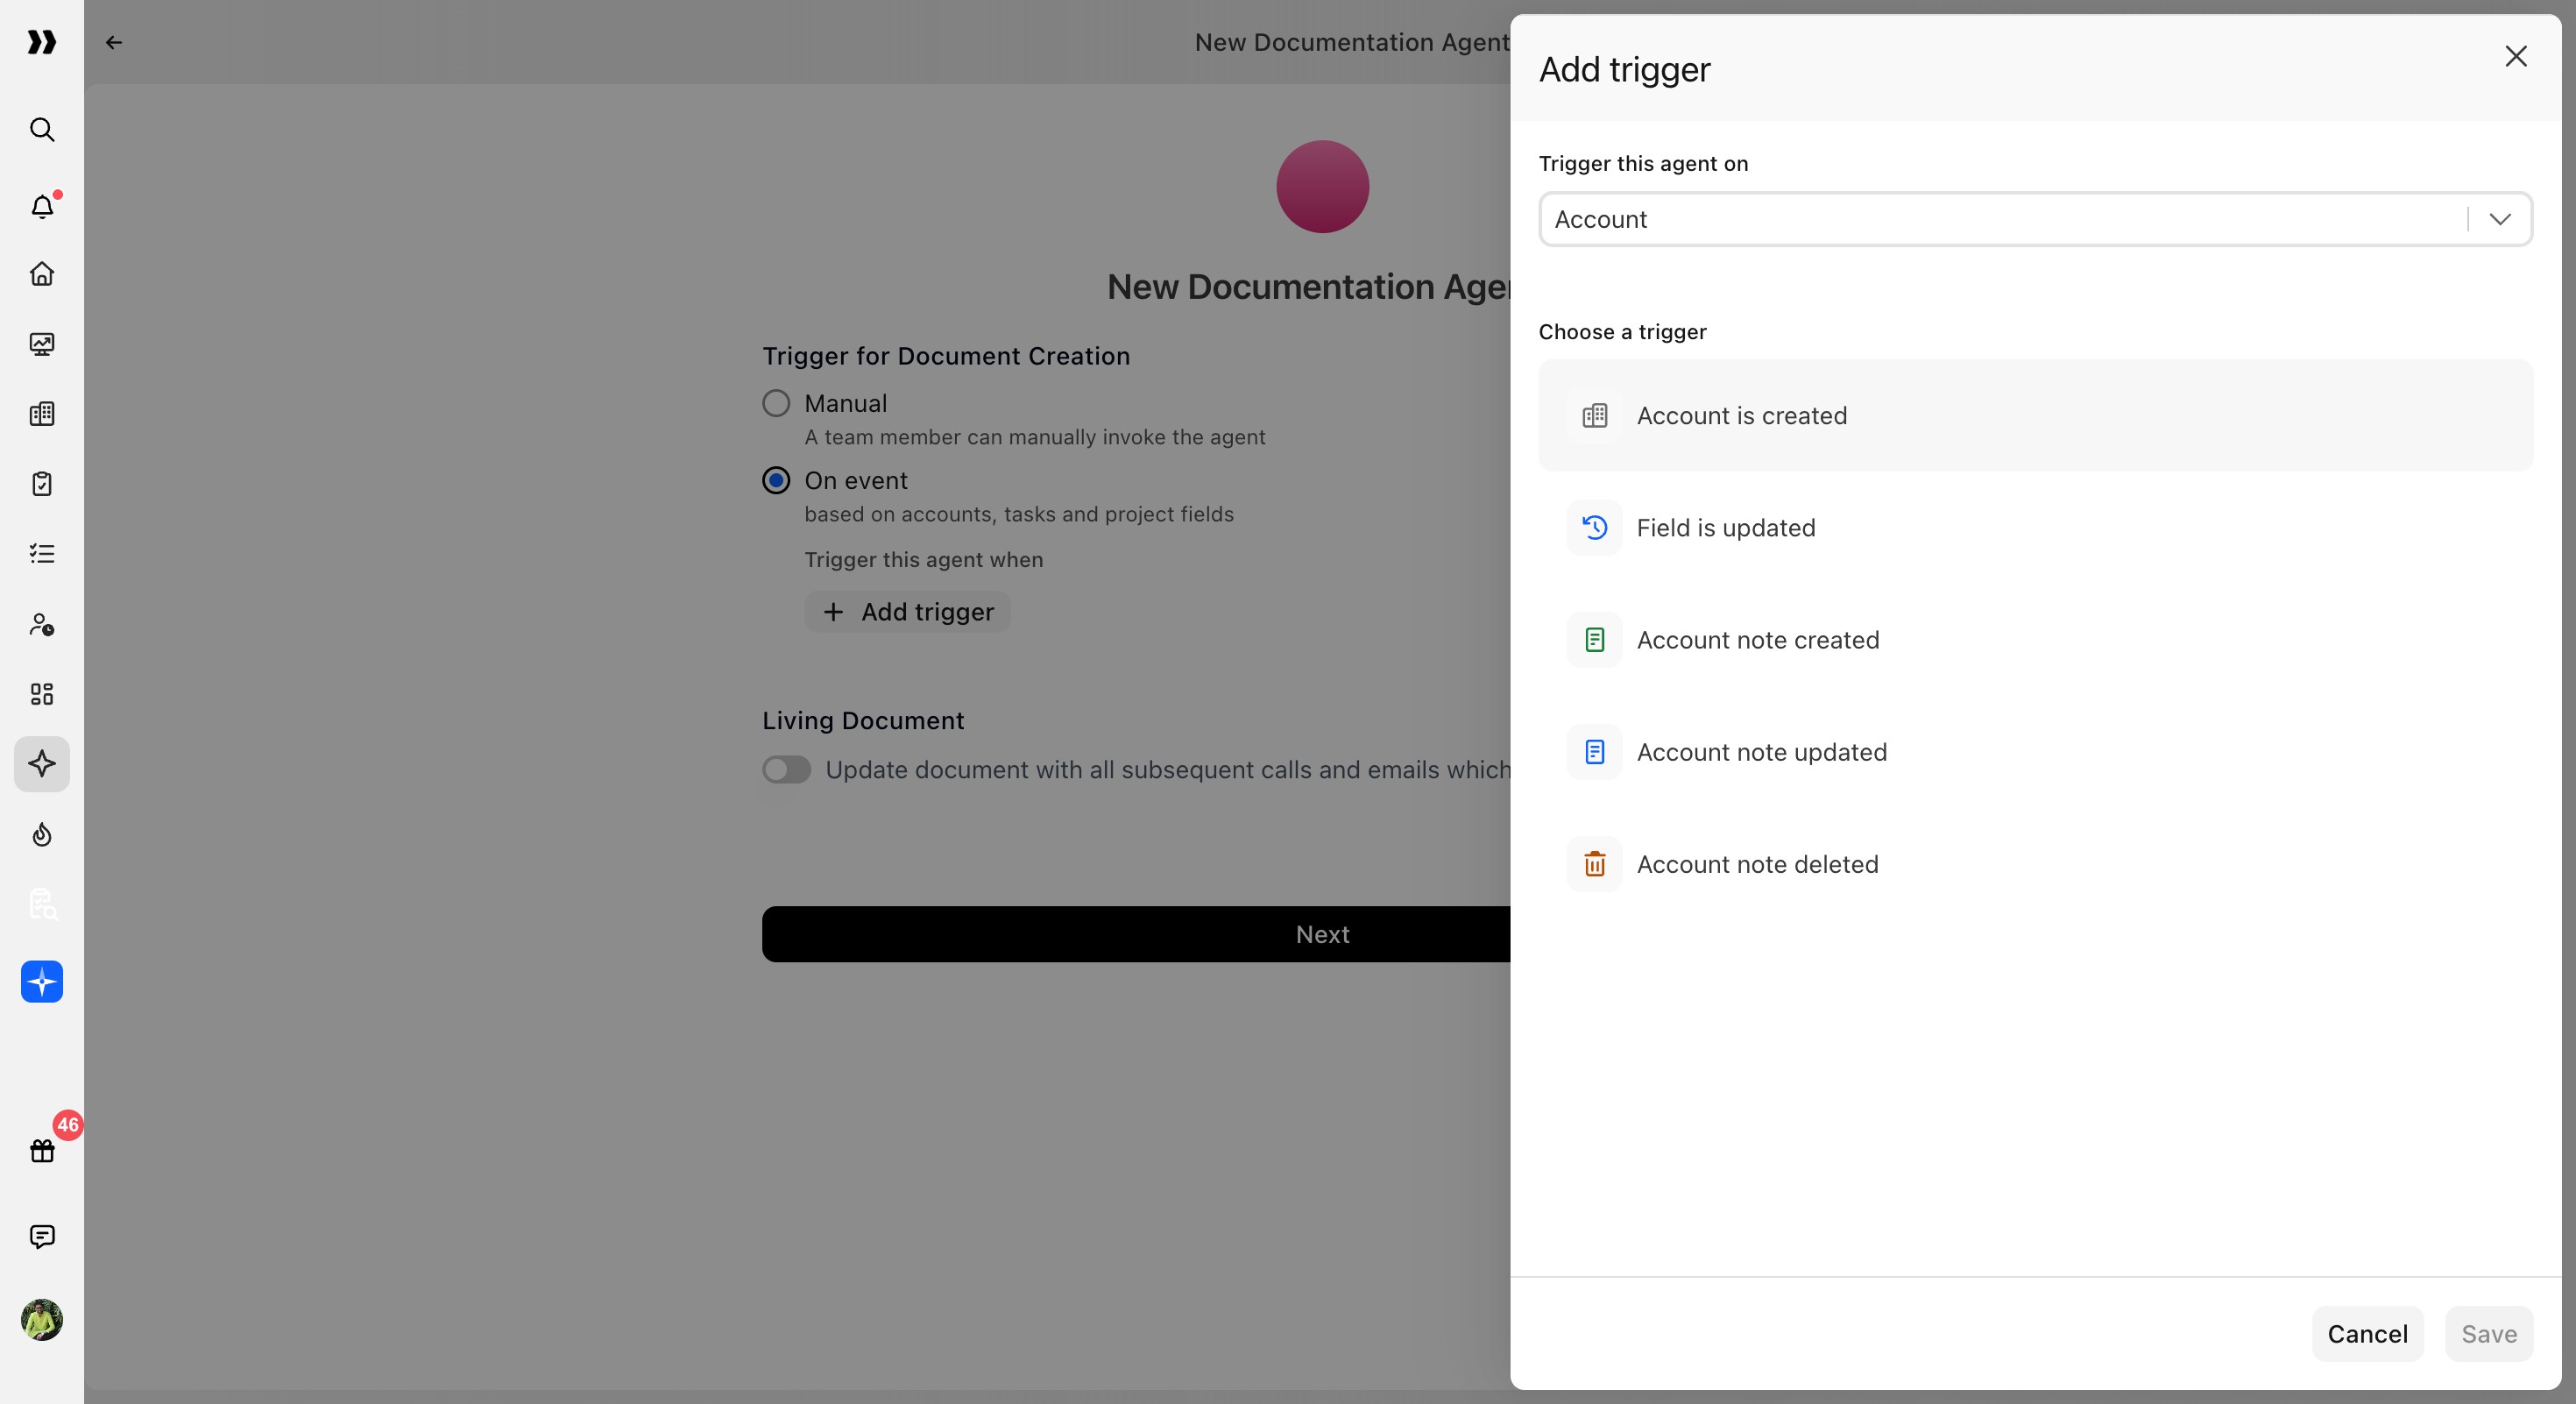
Example:
Account type is Enterprise
Configure Living Document Behavior
The Living document setting controls whether the generated document stays updated as new source material becomes available.
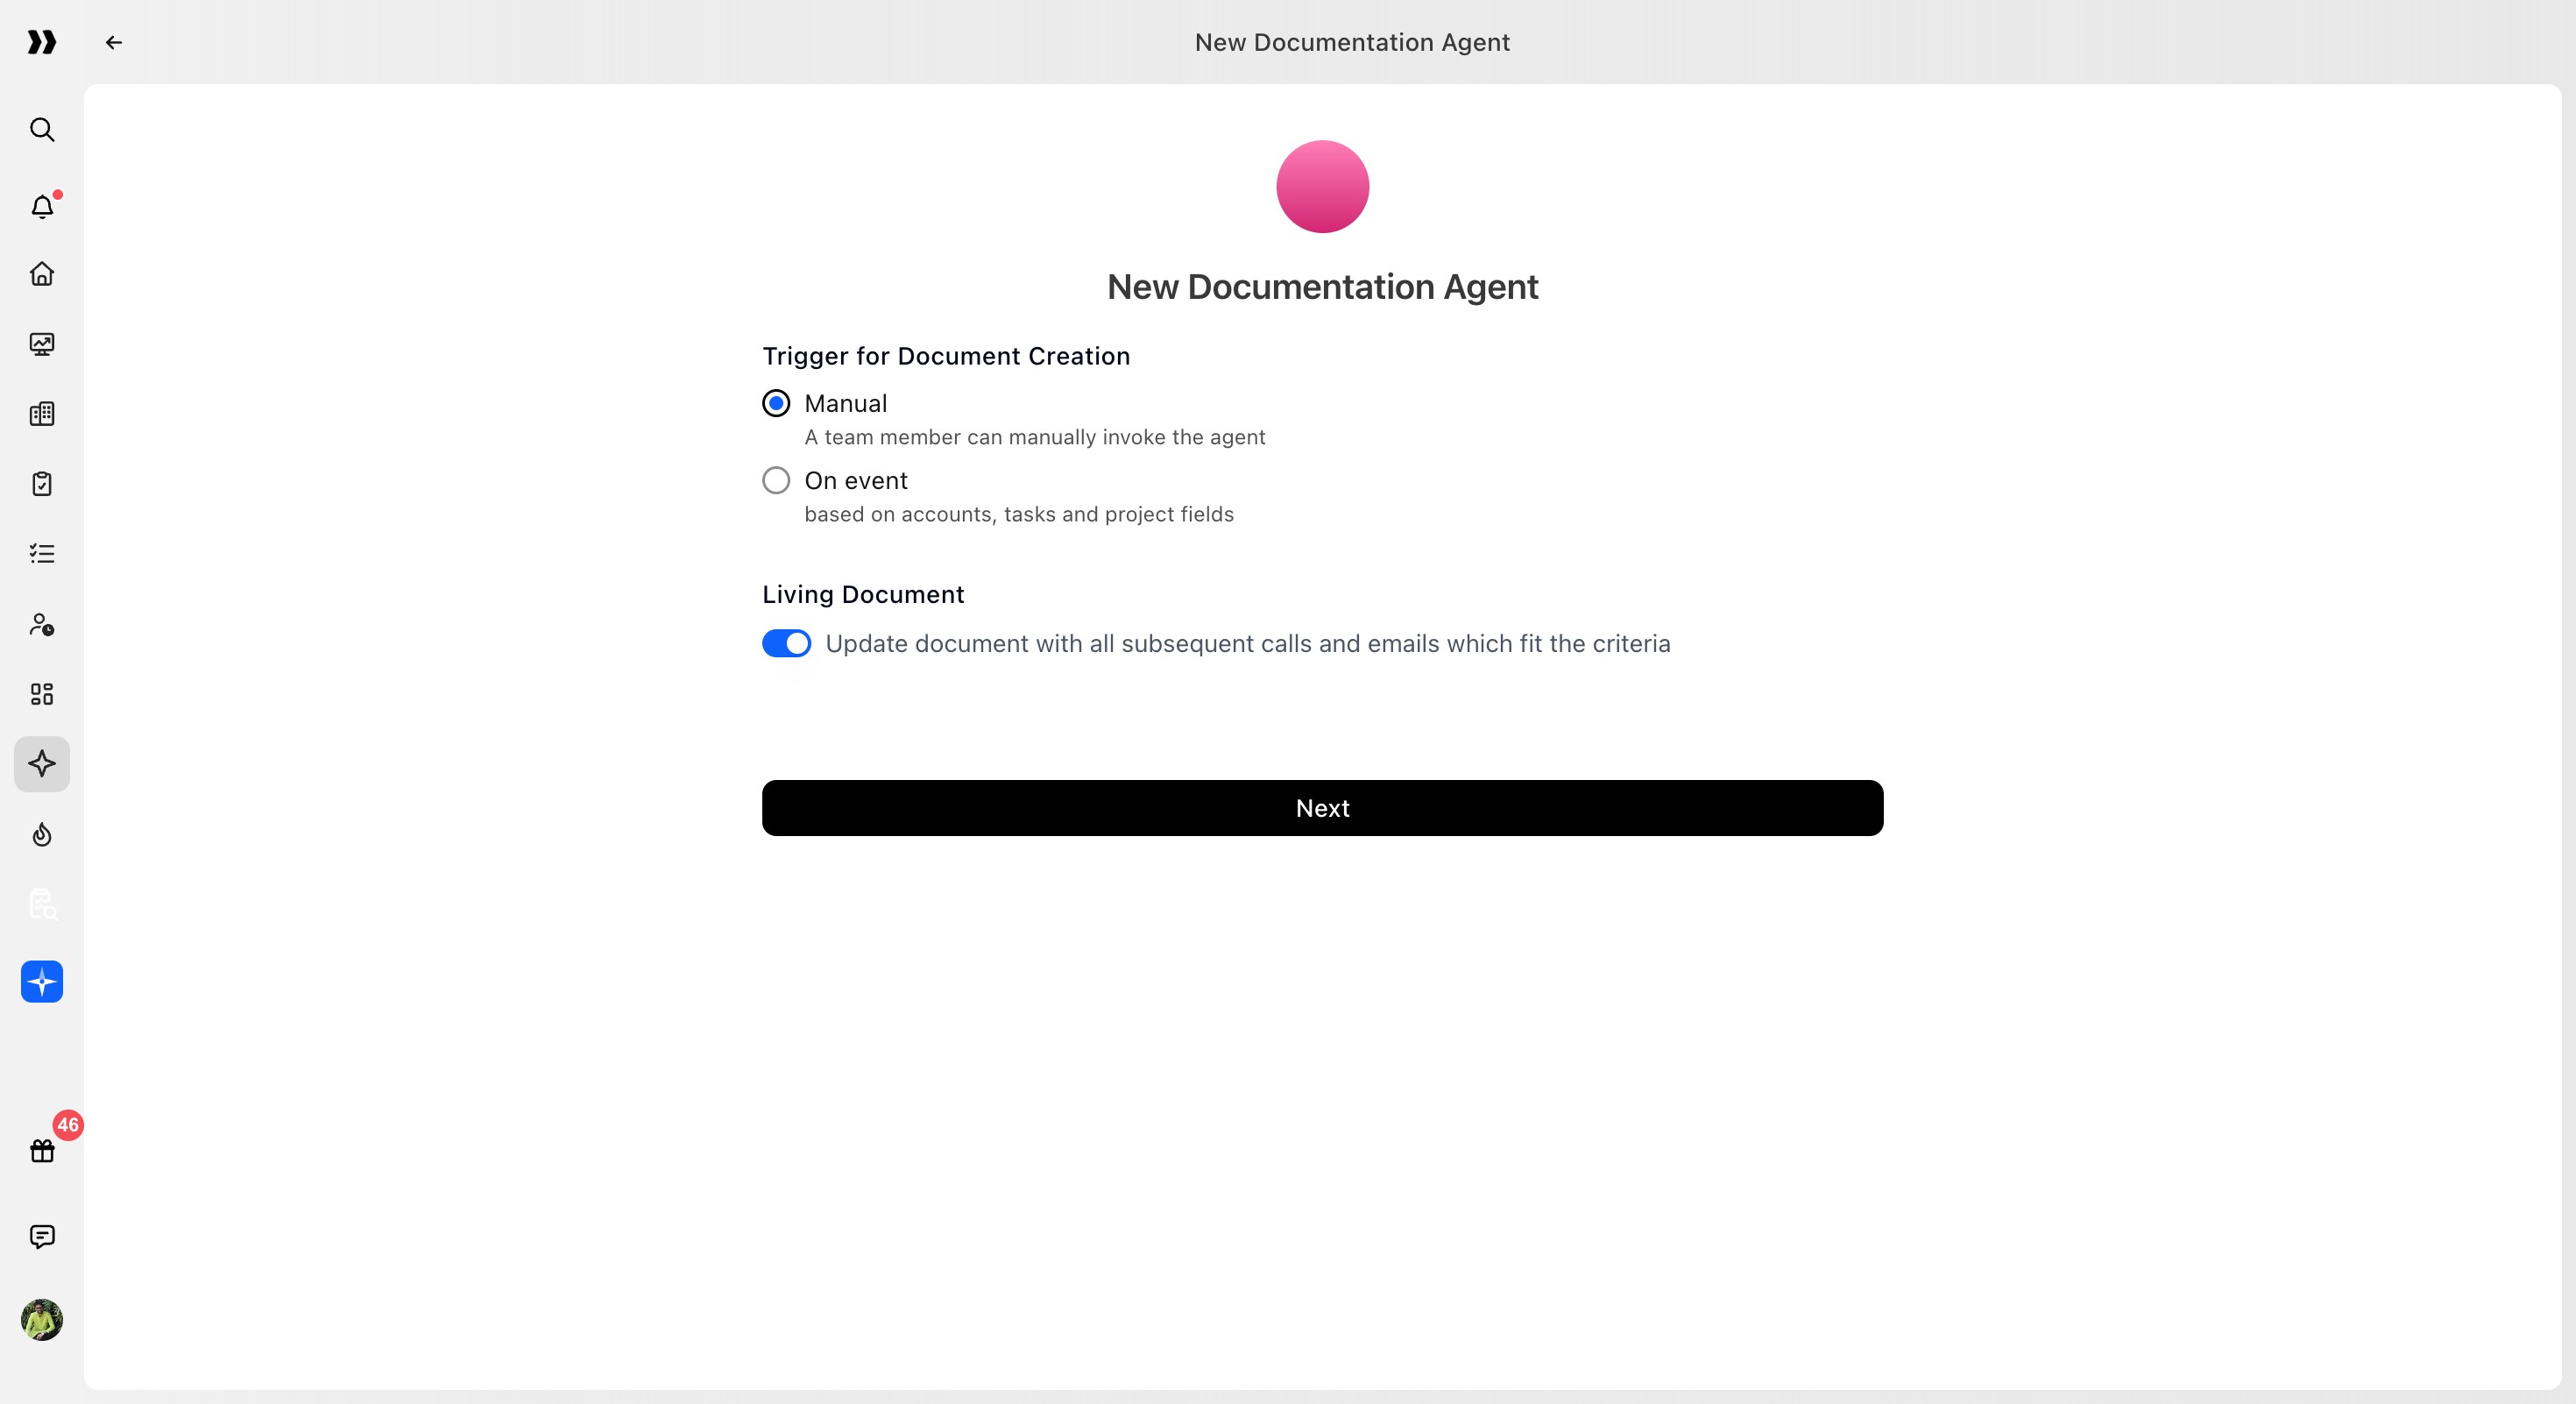
Enable Living document when the document should stay current as new meetings and emails come in.
Disable it when the document should represent a point-in-time snapshot.
After configuring the trigger and living document behavior, click Next.
View AI Context for Template Blocks
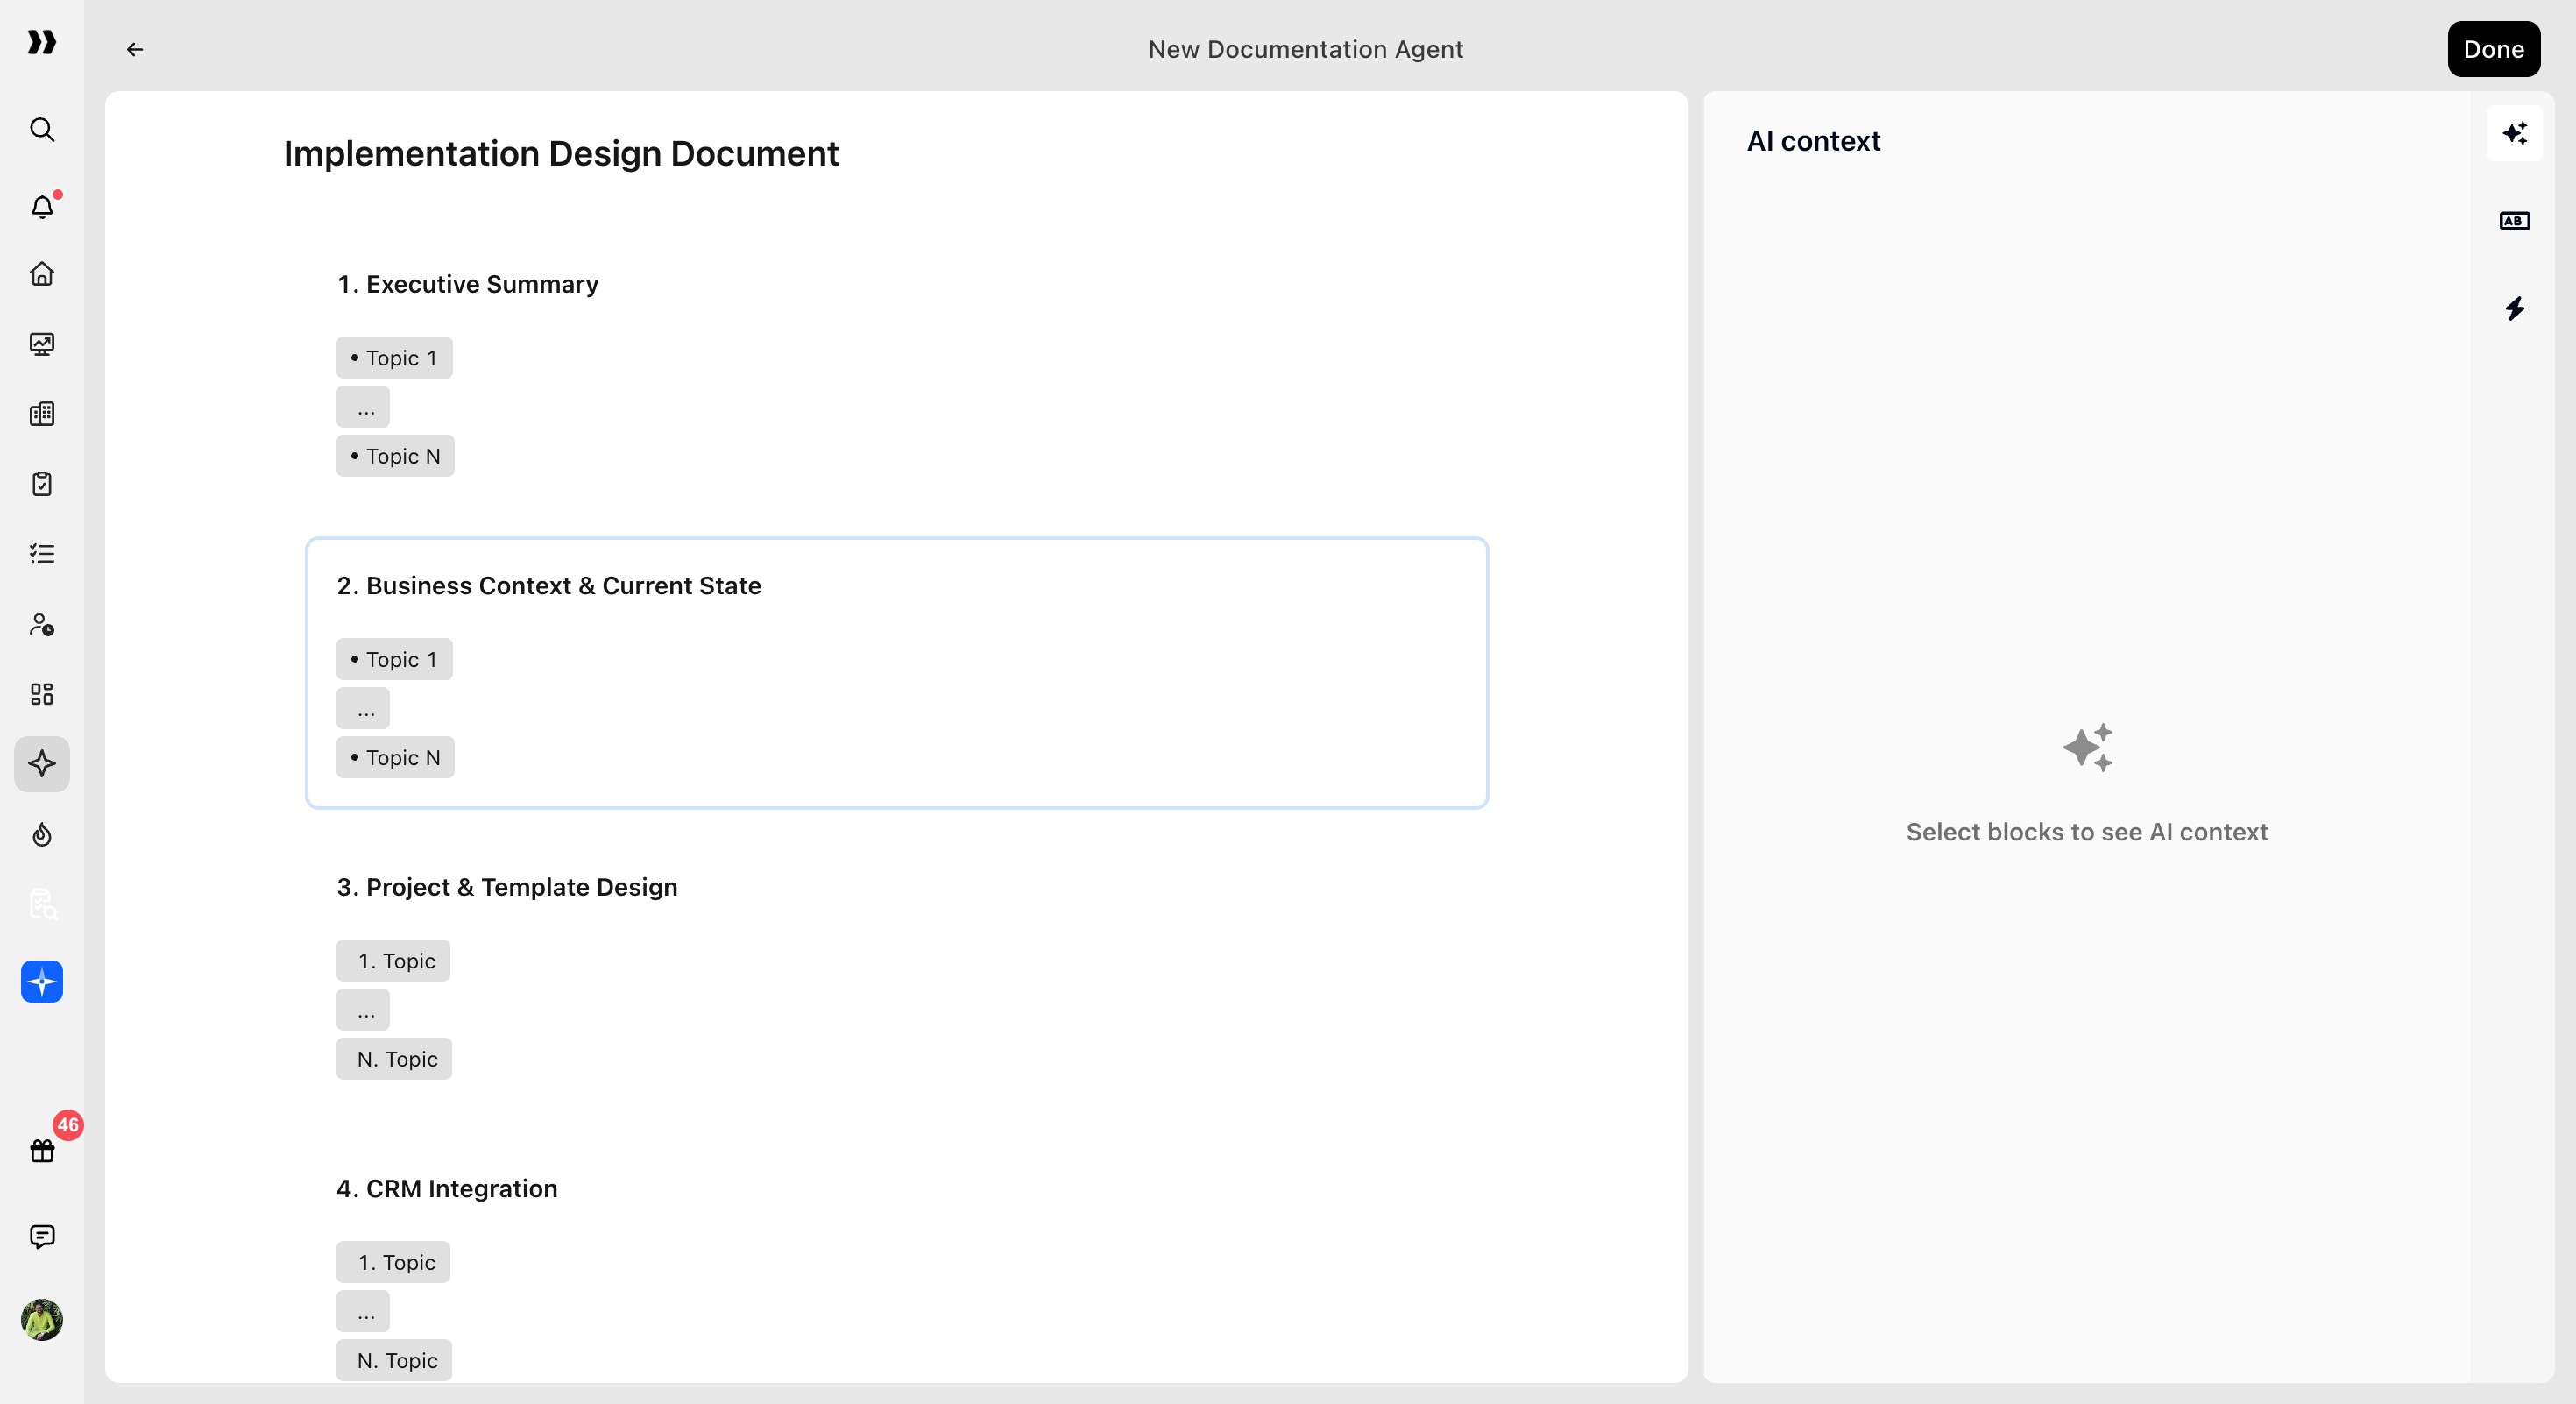
When reviewing the template inside the agent, you can inspect the AI context configured for each block.
This helps verify how the agent will interpret and generate content for each section of the document.
To view AI context:
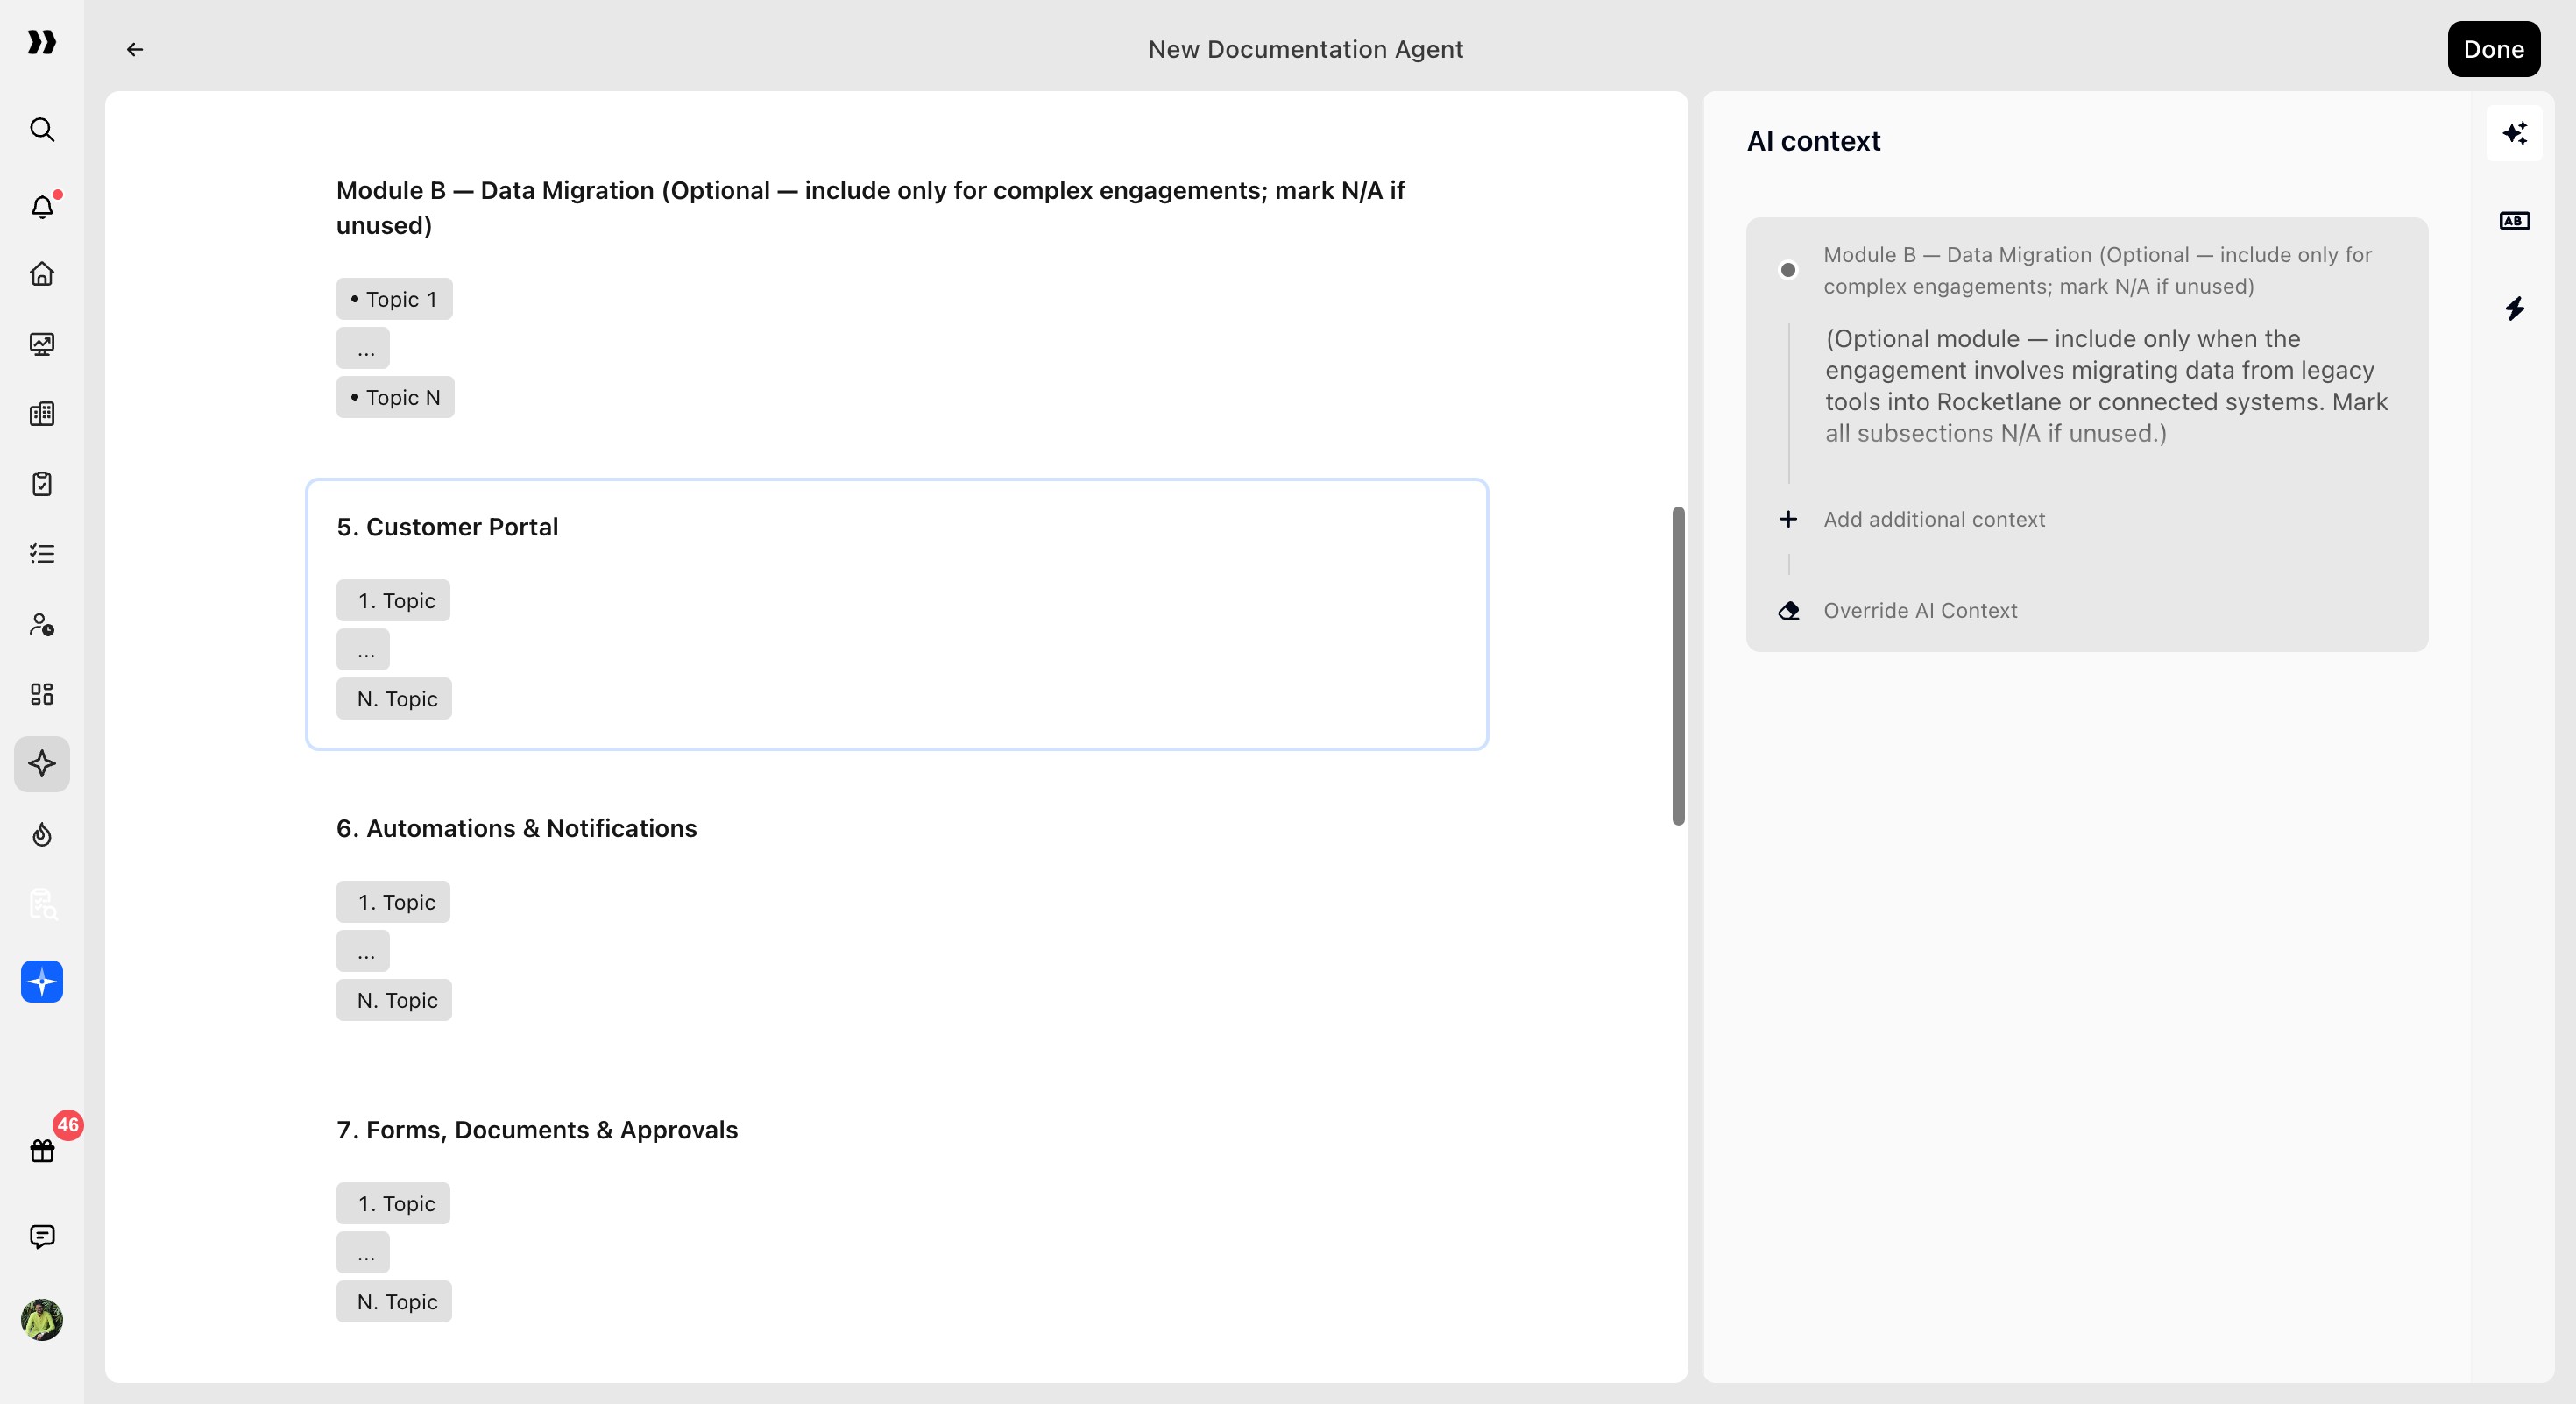
Select a block from the left panel.
The selected block is highlighted.
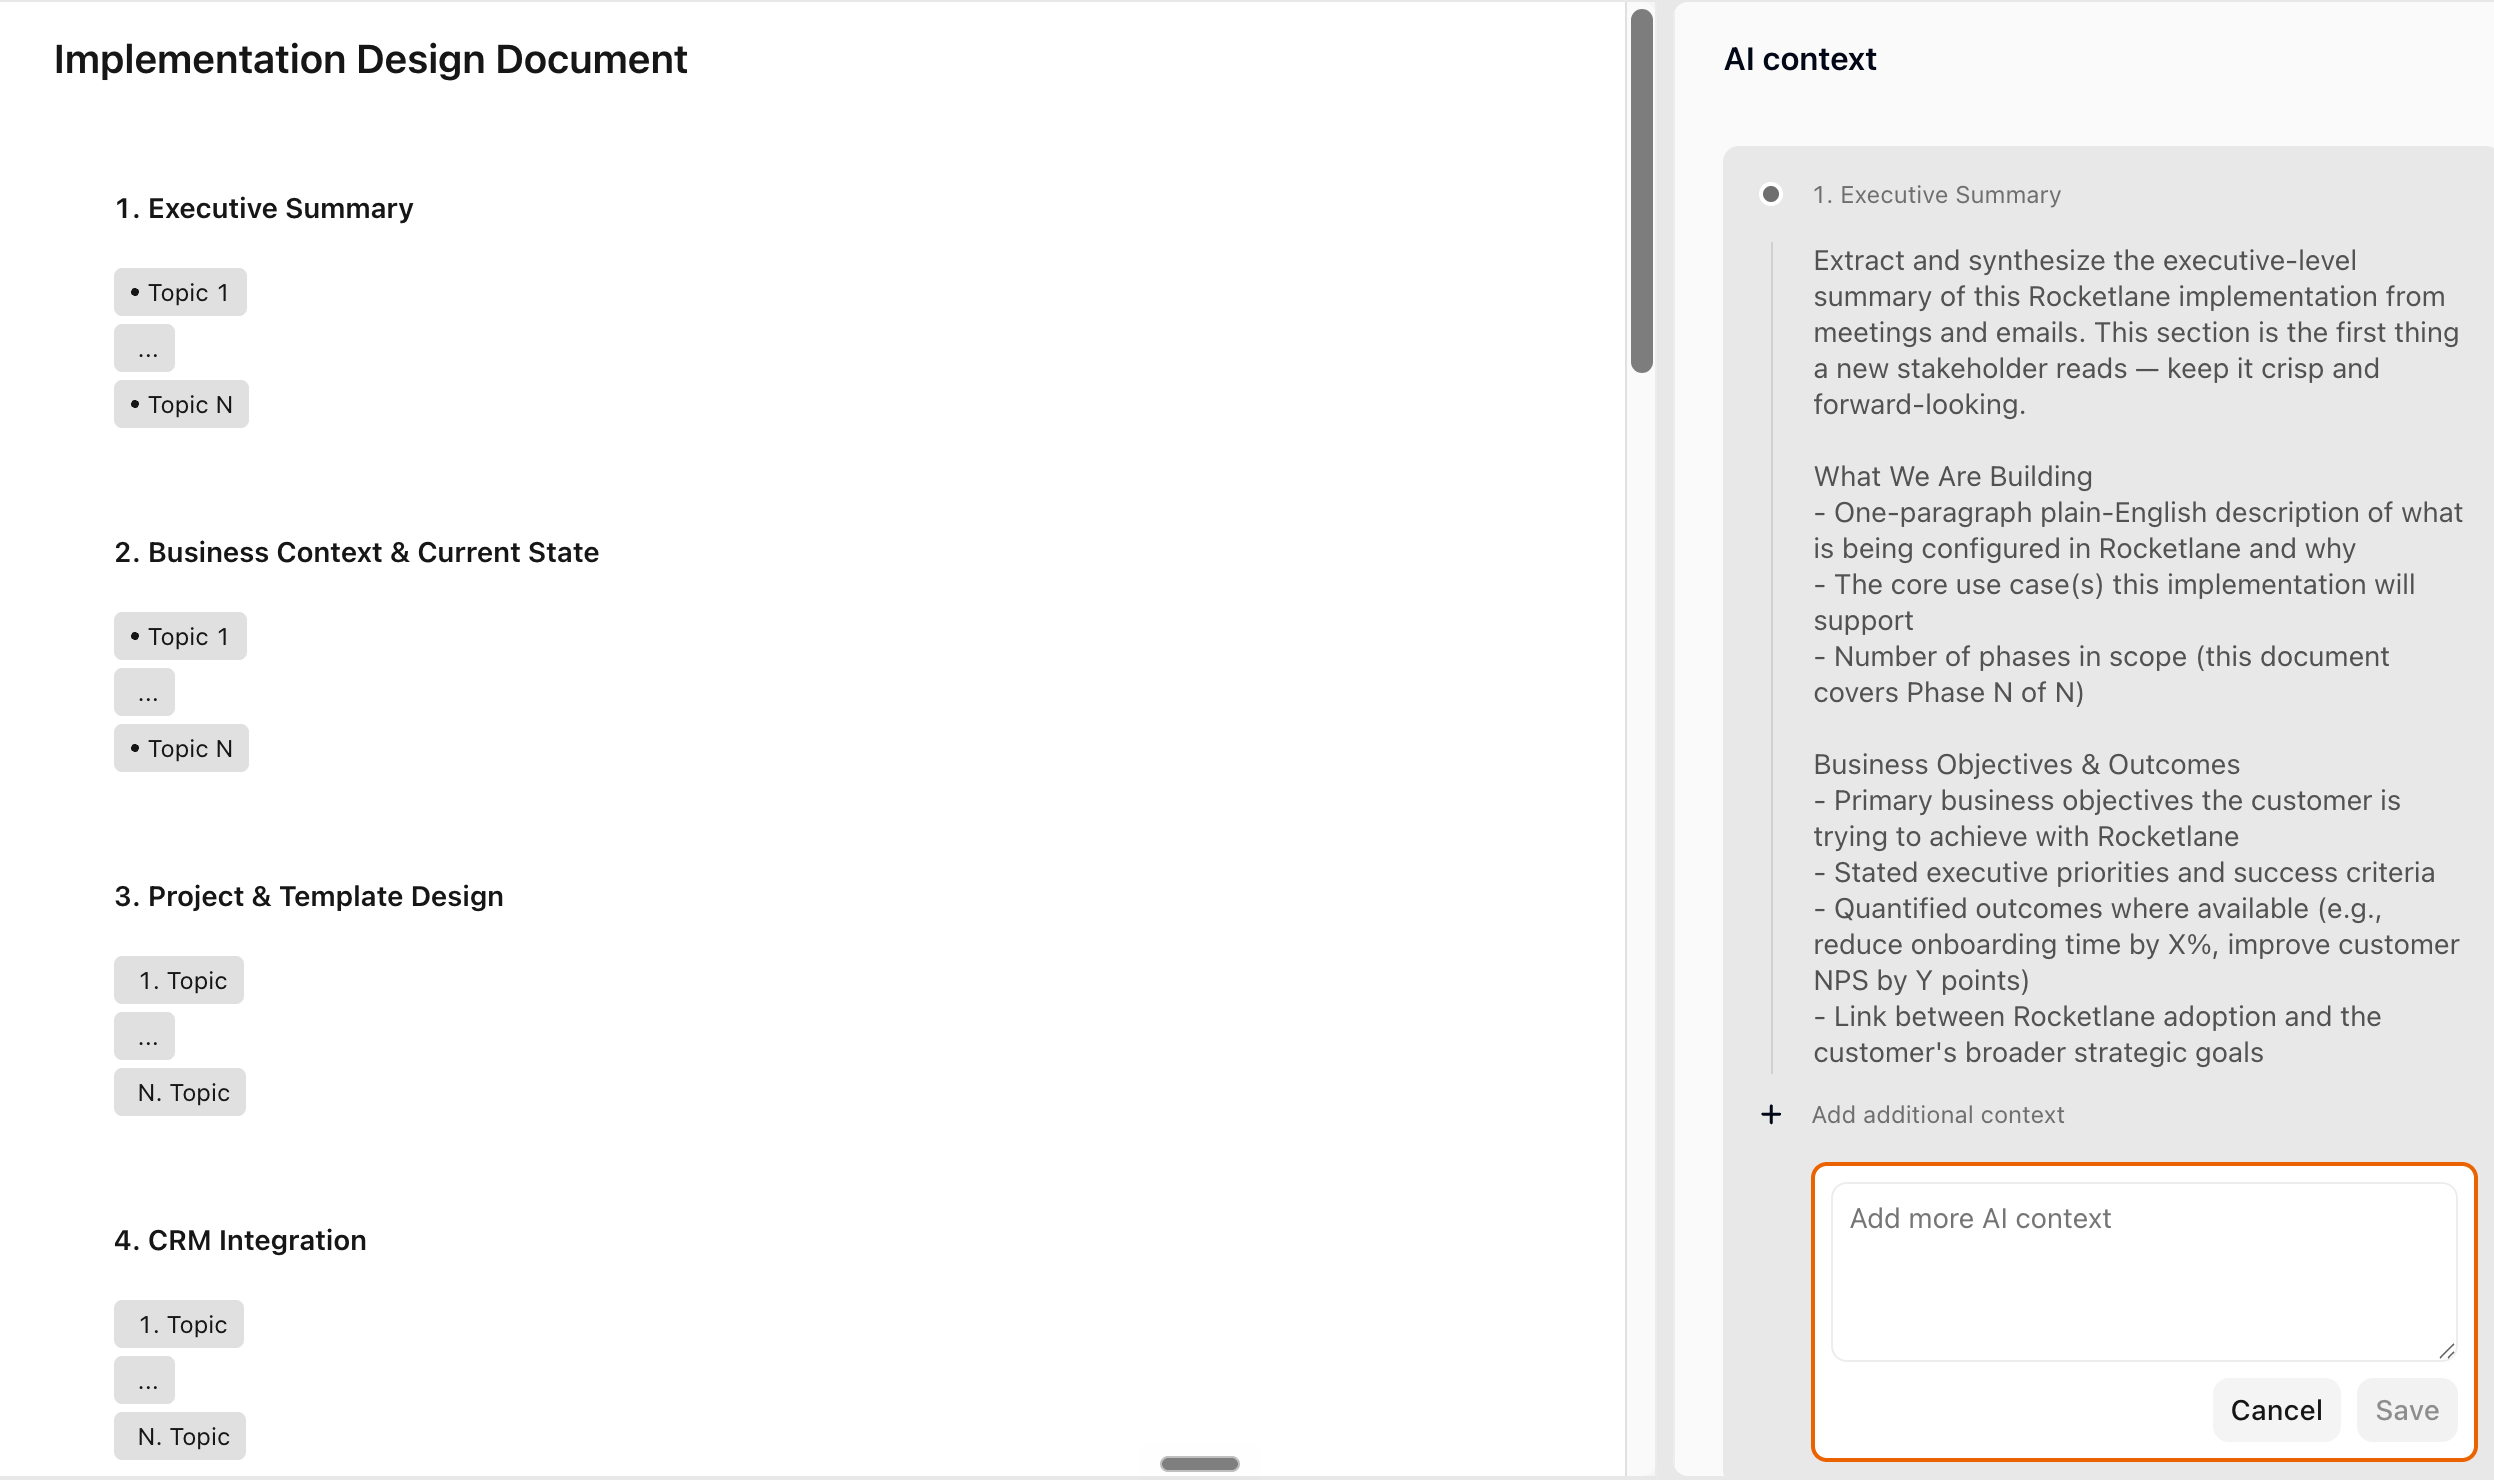
The right-hand AI context panel displays the block details.AI context panel displays the selected block’s prompts, which you can review and customize.
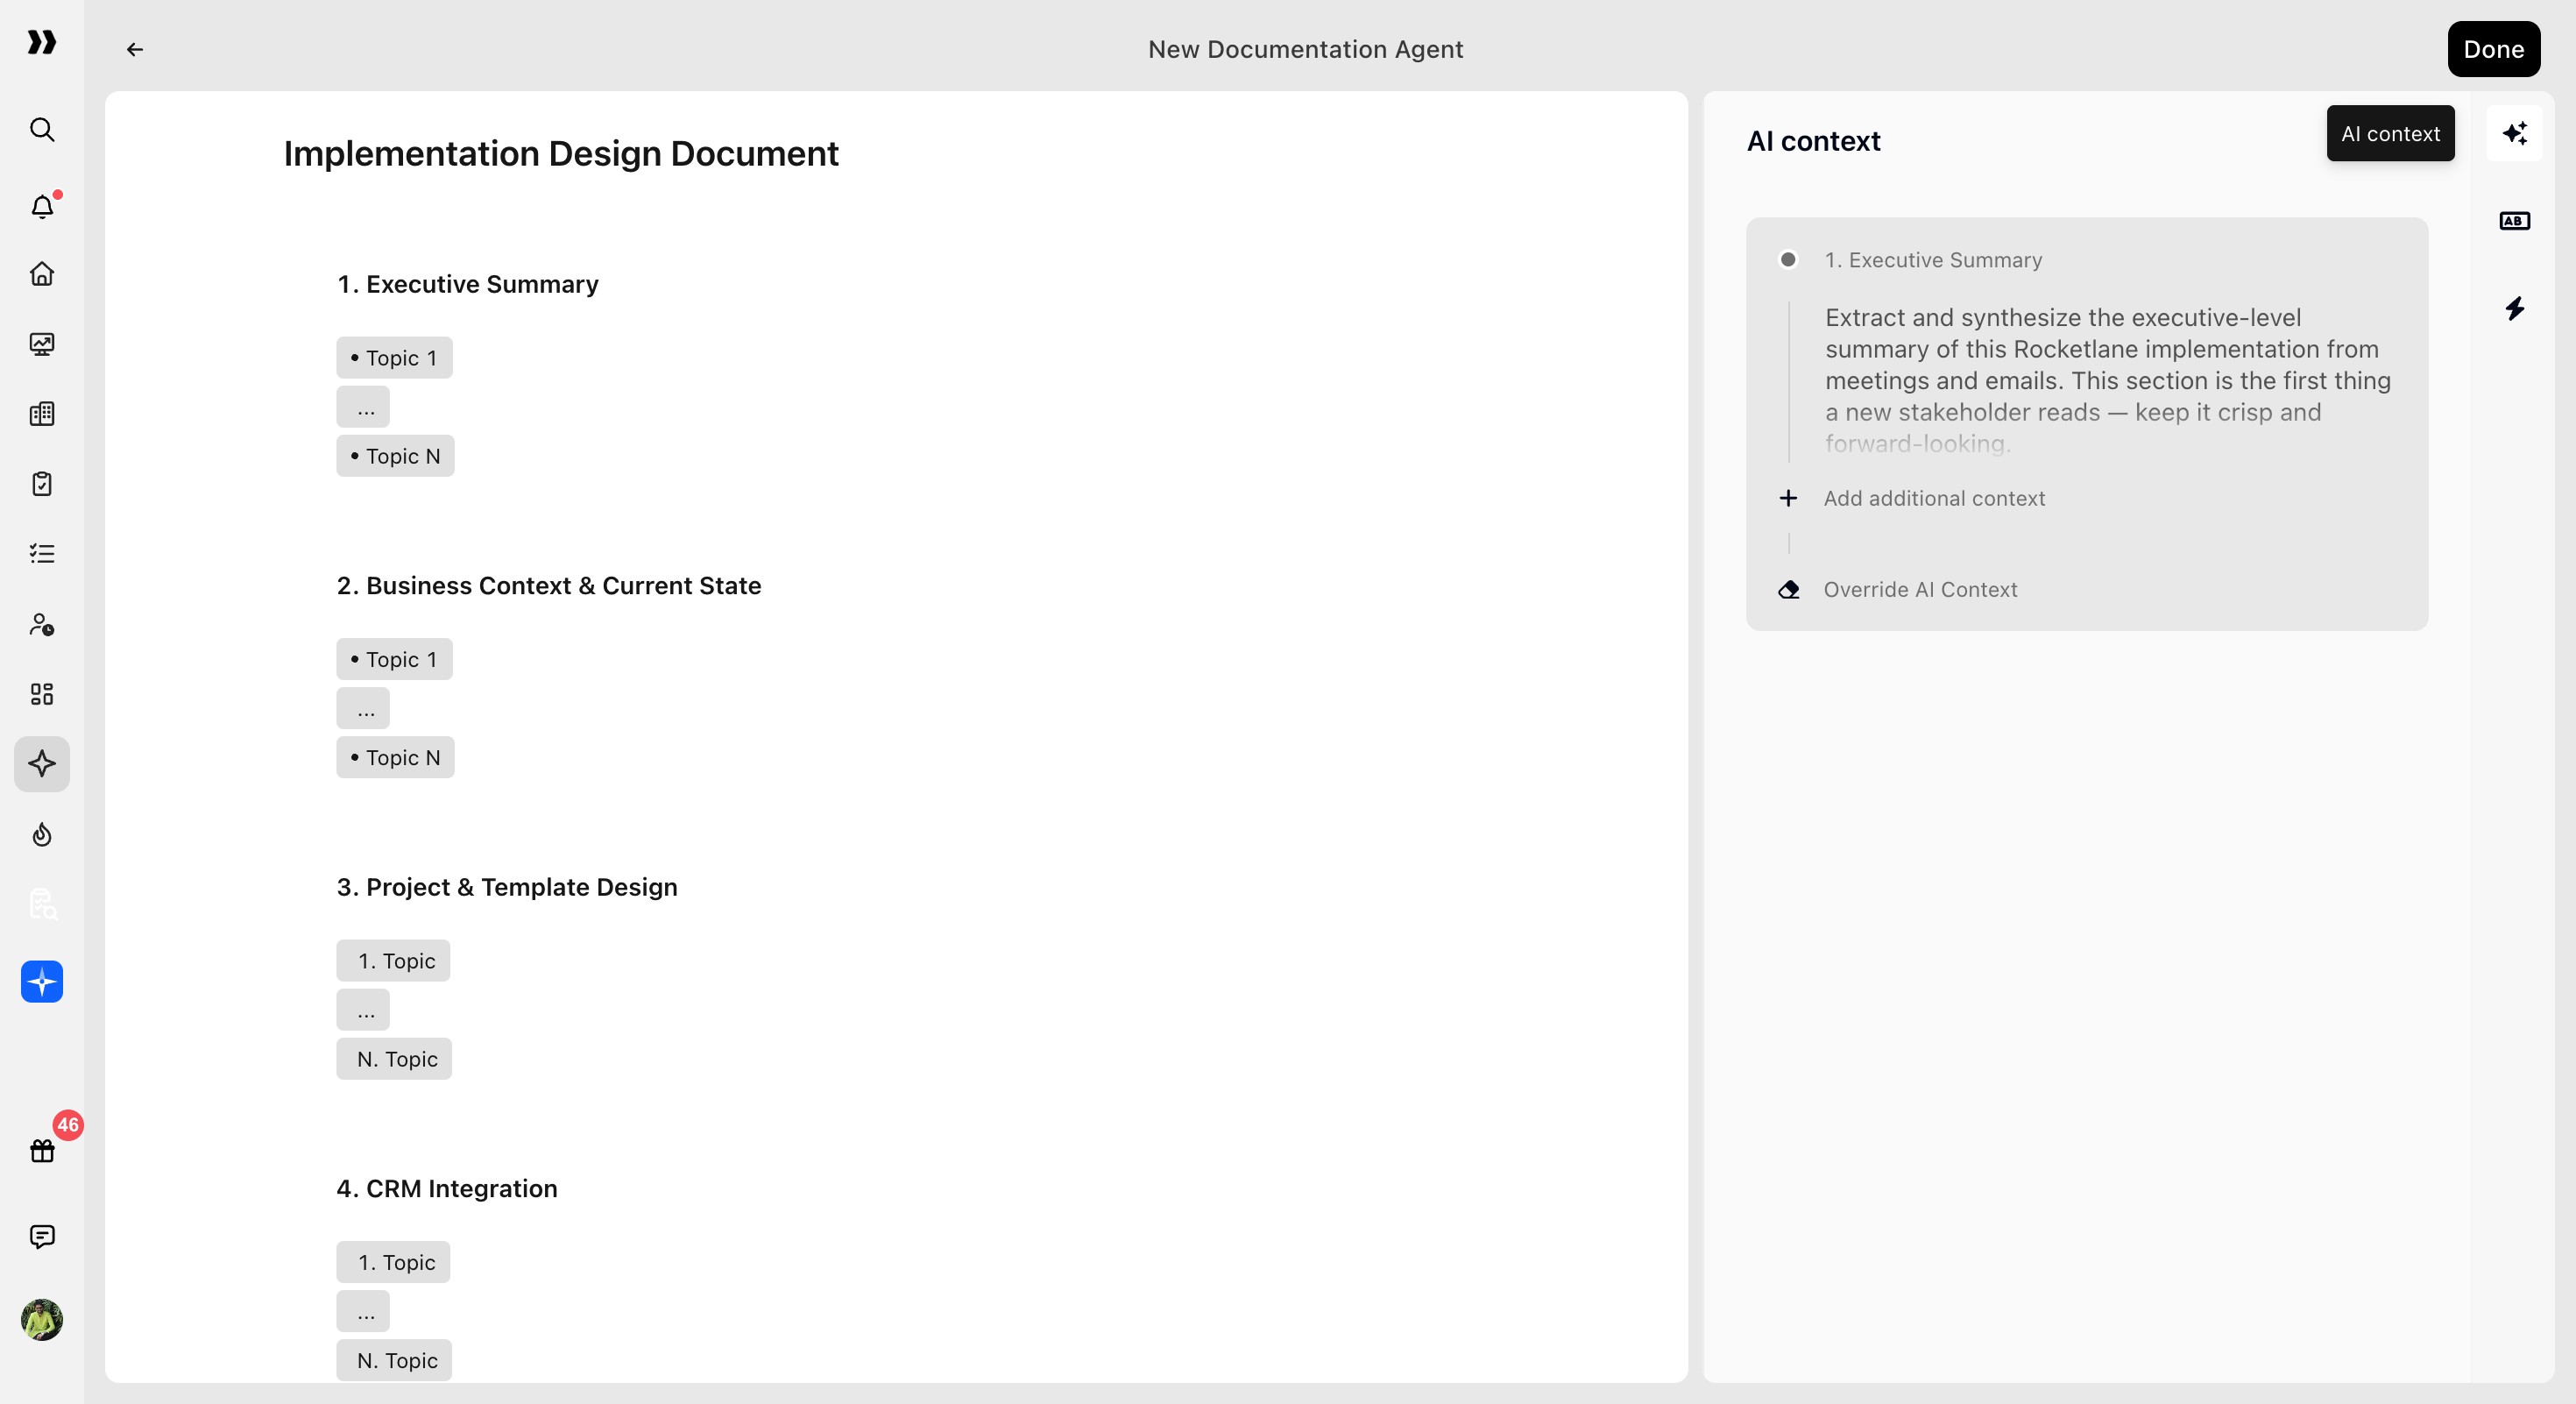
The panel shows:
Block name
Instruction configured in the template
Example instruction: Summarise the meeting
If no block is selected, the panel shows:
Select blocks to see AI context.
Override AI Context
Use Override AI Context to add supplementary instructions for this Documentation Agent without changing the underlying Nitro page template.
To override AI context:
Select a block from the left panel.
In the right-hand AI context panel, click Override AI Context.
Add the additional instruction in the Add more AI context field.
Click Save.
Click Cancel to discard the override.
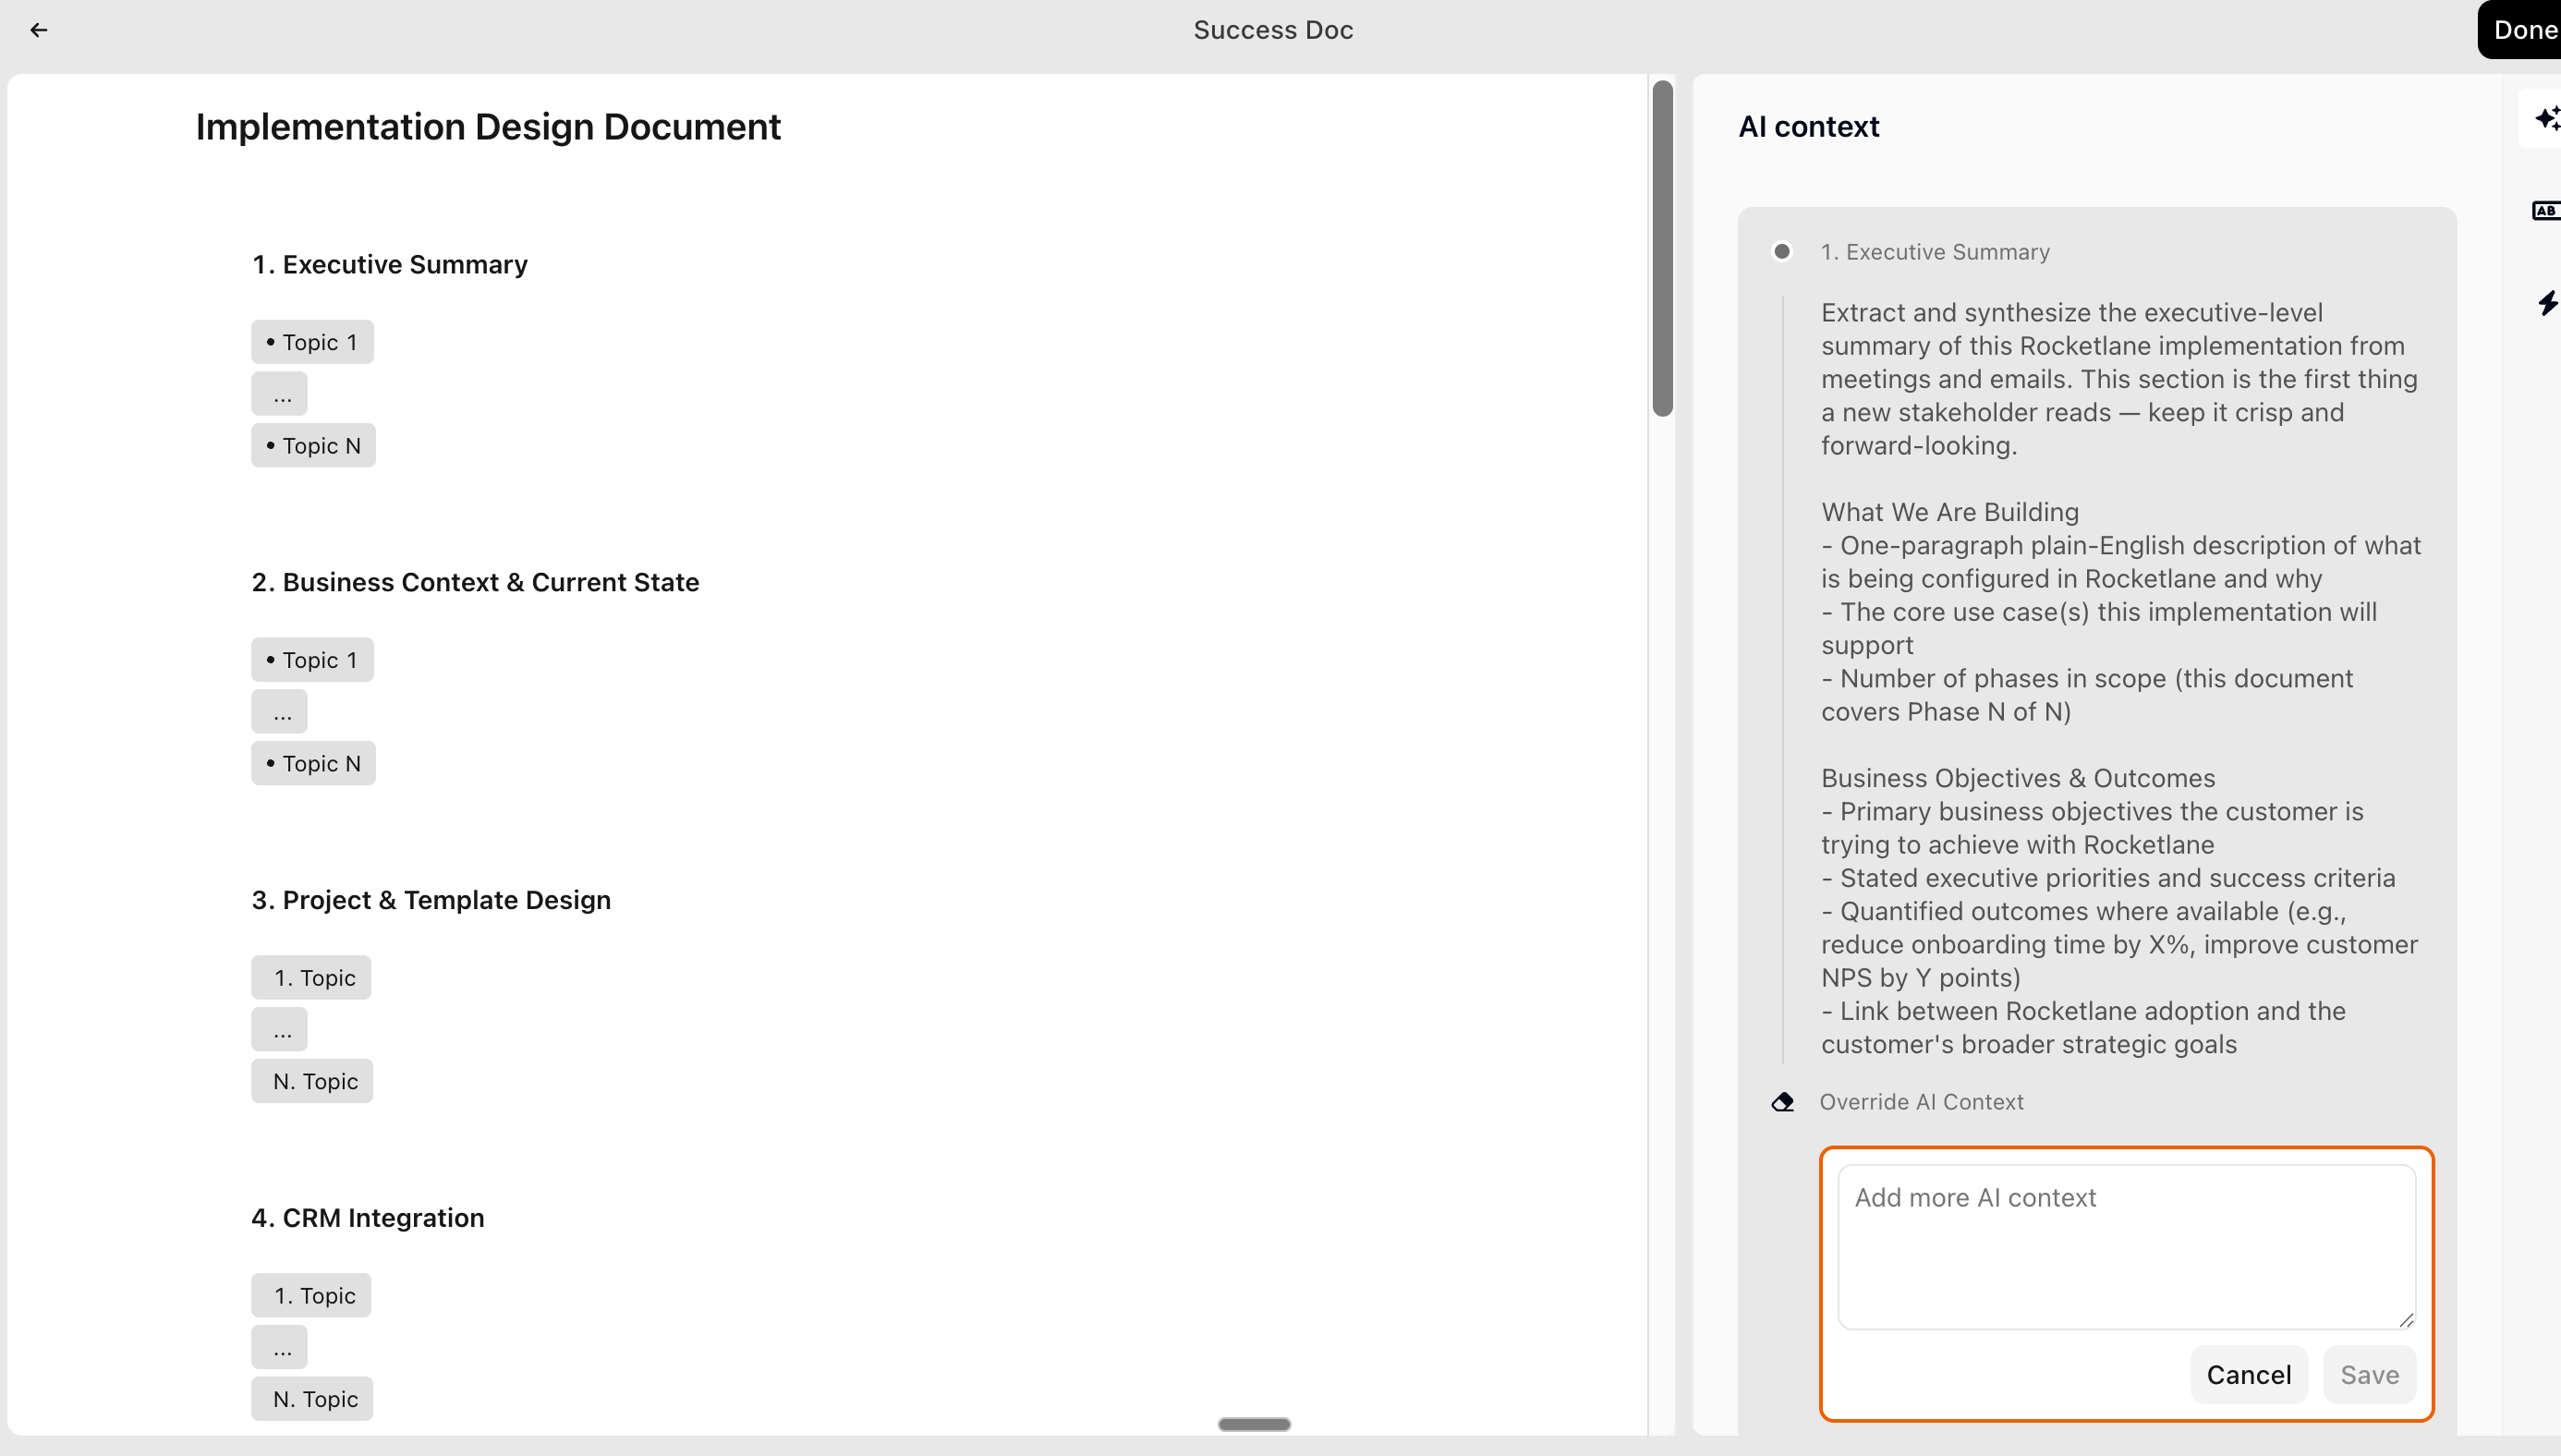
Add Additional Context
If no override exists for a block, click + Add additional context to add instructions specific to this agent.
This opens the same Add more AI context field.
Use this when a block needs extra guidance for this agent, but the template itself should remain unchanged.
Save the Documentation Agent
After reviewing the template, sources, trigger, and AI context:
Click Done from the top-right corner.
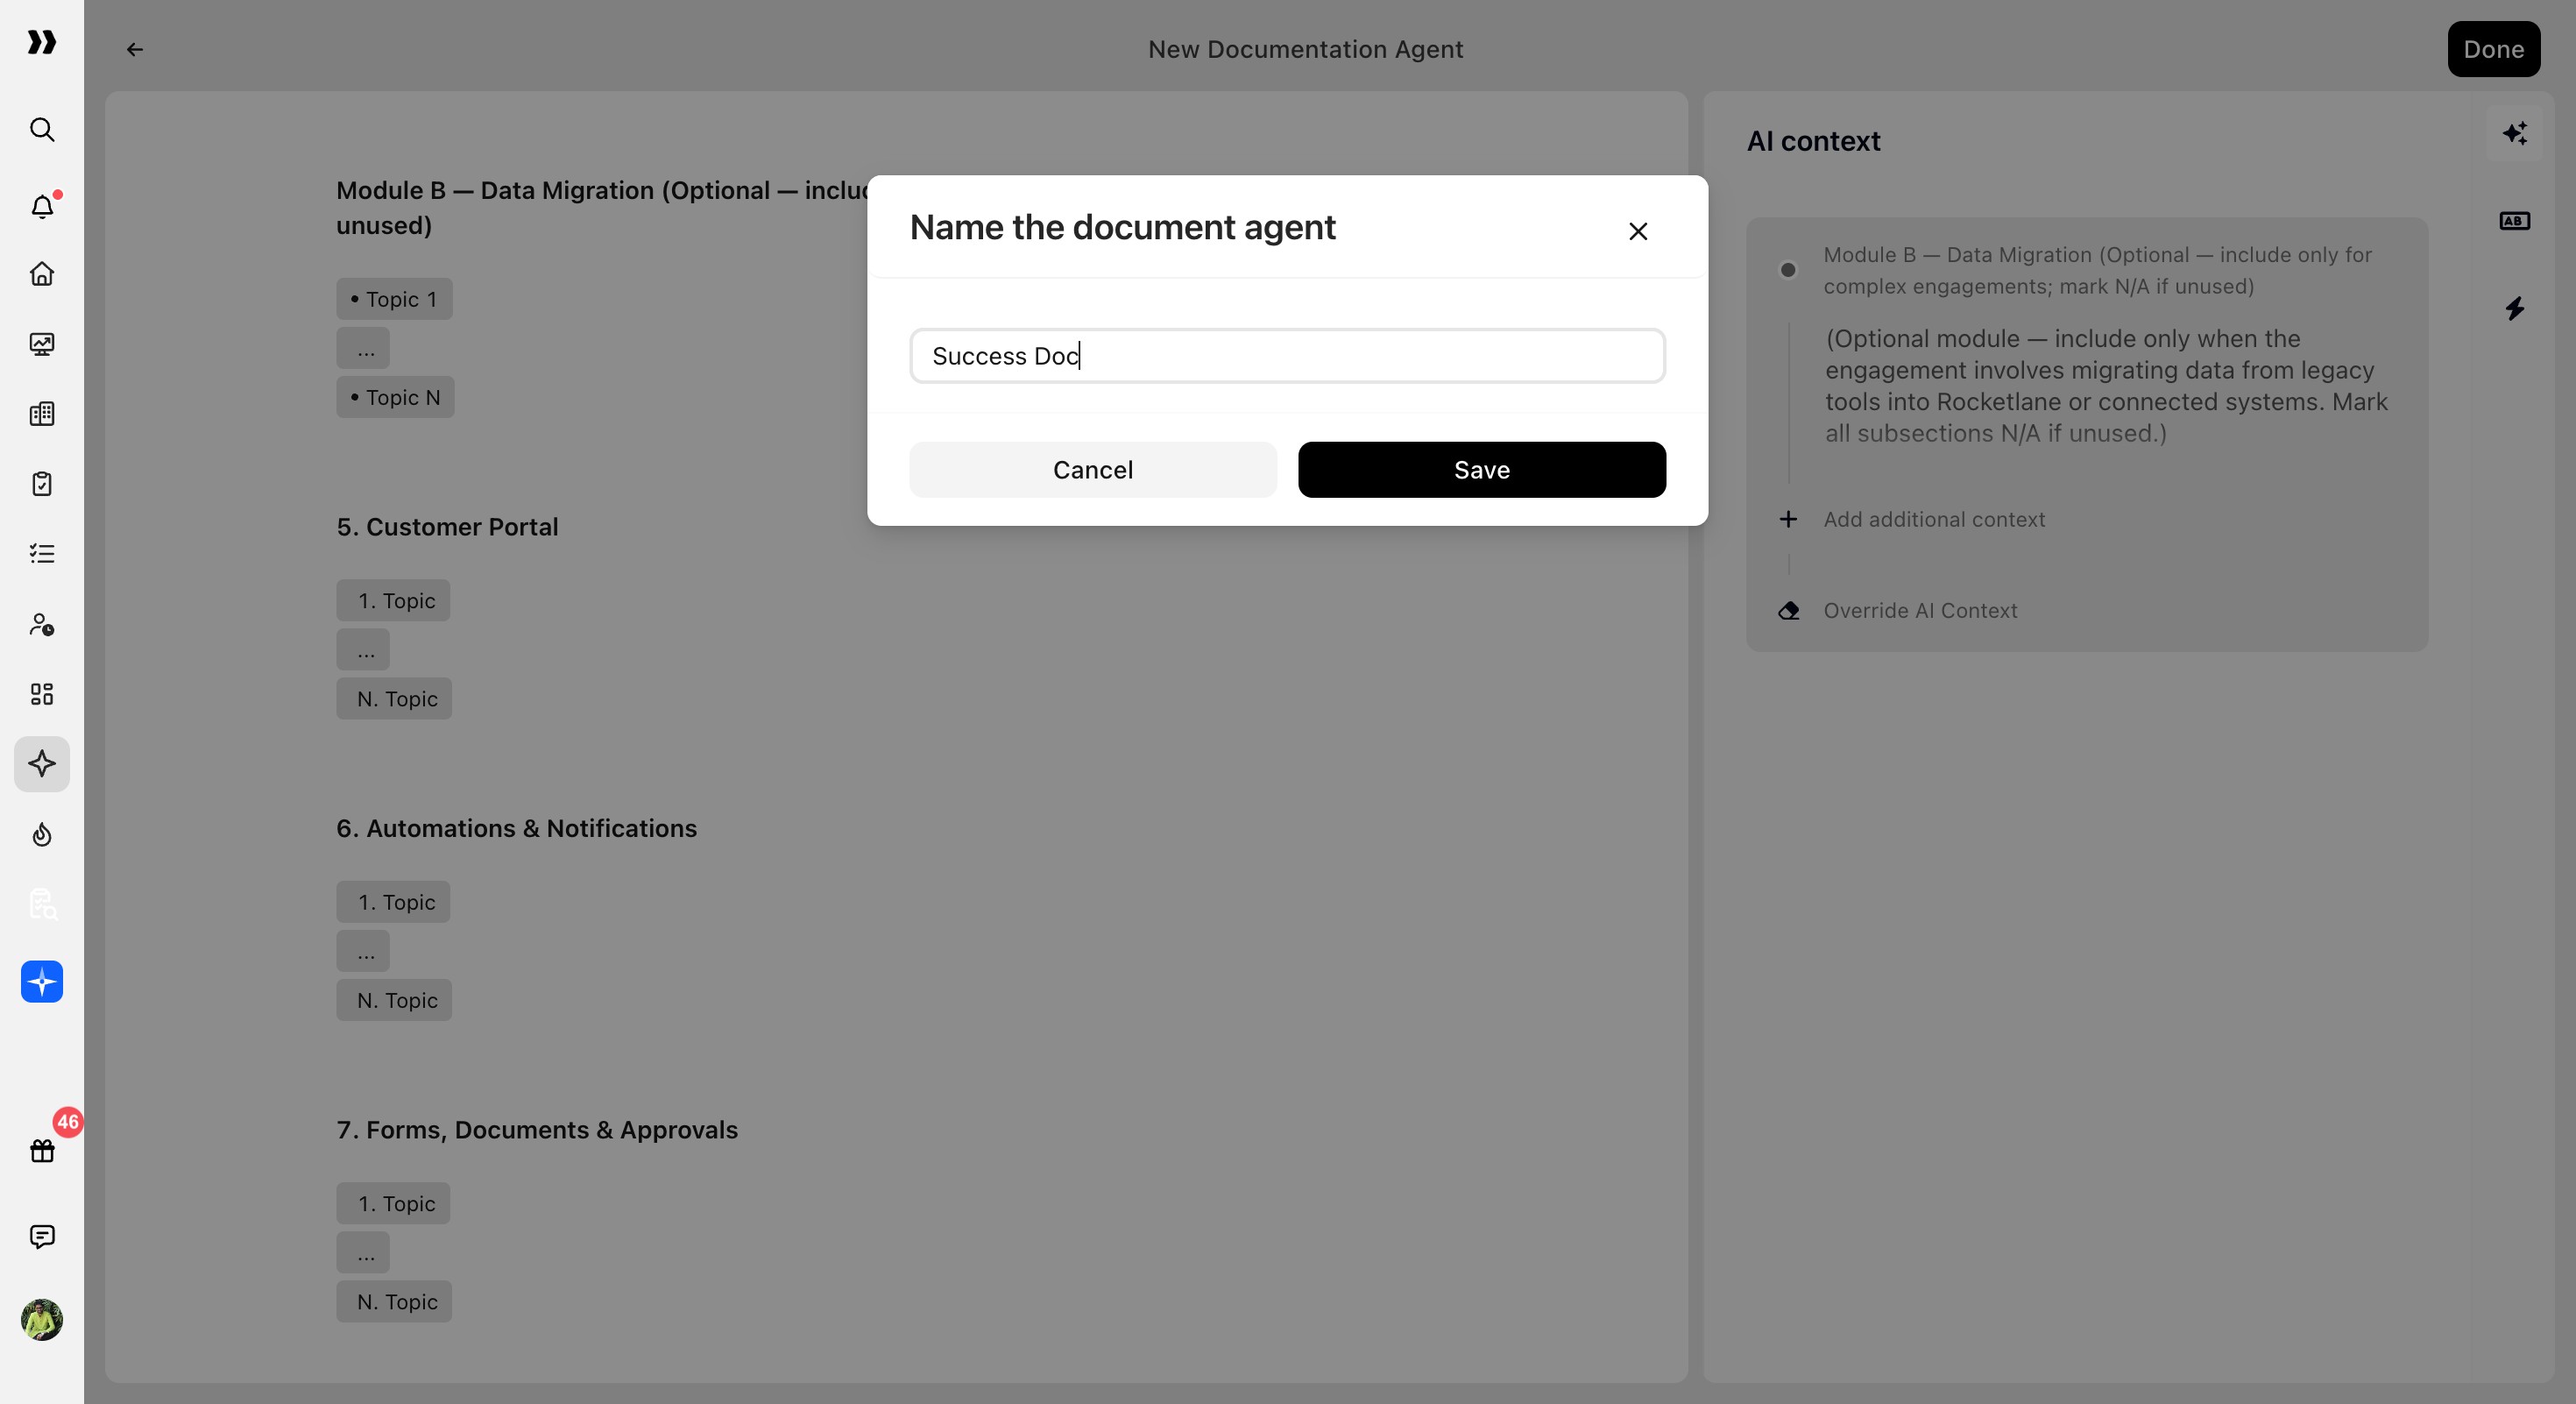
The Documentation Agent is saved and can be used based on the trigger configuration.
