The Rocketlane mobile app allows a user to create expenses and submit them as an expense report. Approval actions are not available on mobile. This article explains how a user can create an expense report, add expenses and submit the report for review.
What the User Can Do in the Mobile App
Using the mobile app, users can submit their expenses, from creating reports and adding expenses with attachments to submitting them for approval.
Approval or rejection of expenses must be completed in the web app.
Accessing Expense Reports in the Mobile App
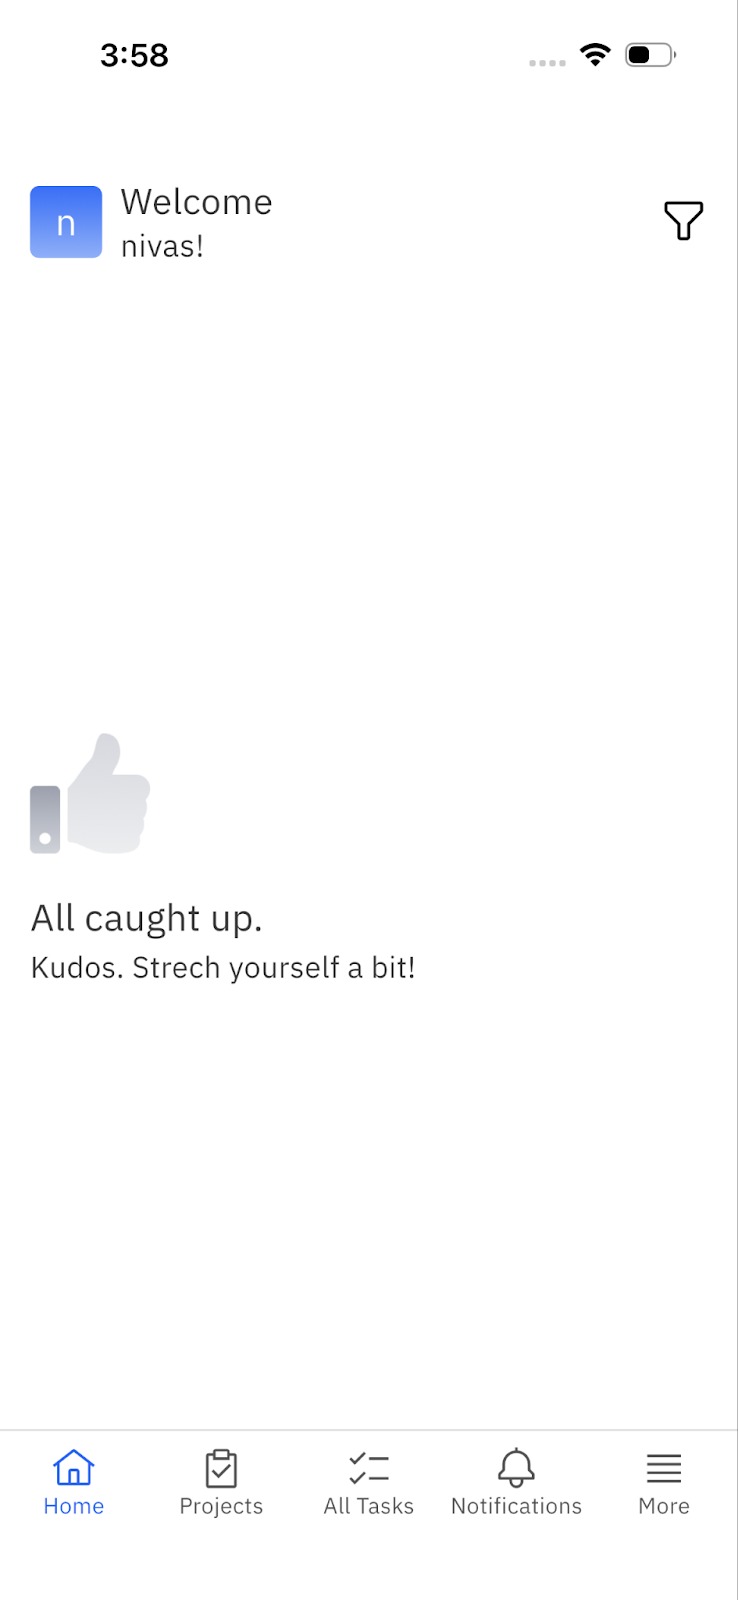
Open the Rocketlane mobile app.The Home page is displayed
In the bottom navigation bar, tap More on the far right.

From the menu, select Expense Reports.
The user will see a list of existing expense reports, or an empty list if none have been created.

Creating a New Expense Report
To create a new report, tap the Create New Expense Report. If reports already exist, tap the + icon in the top right.
Entering Report Details
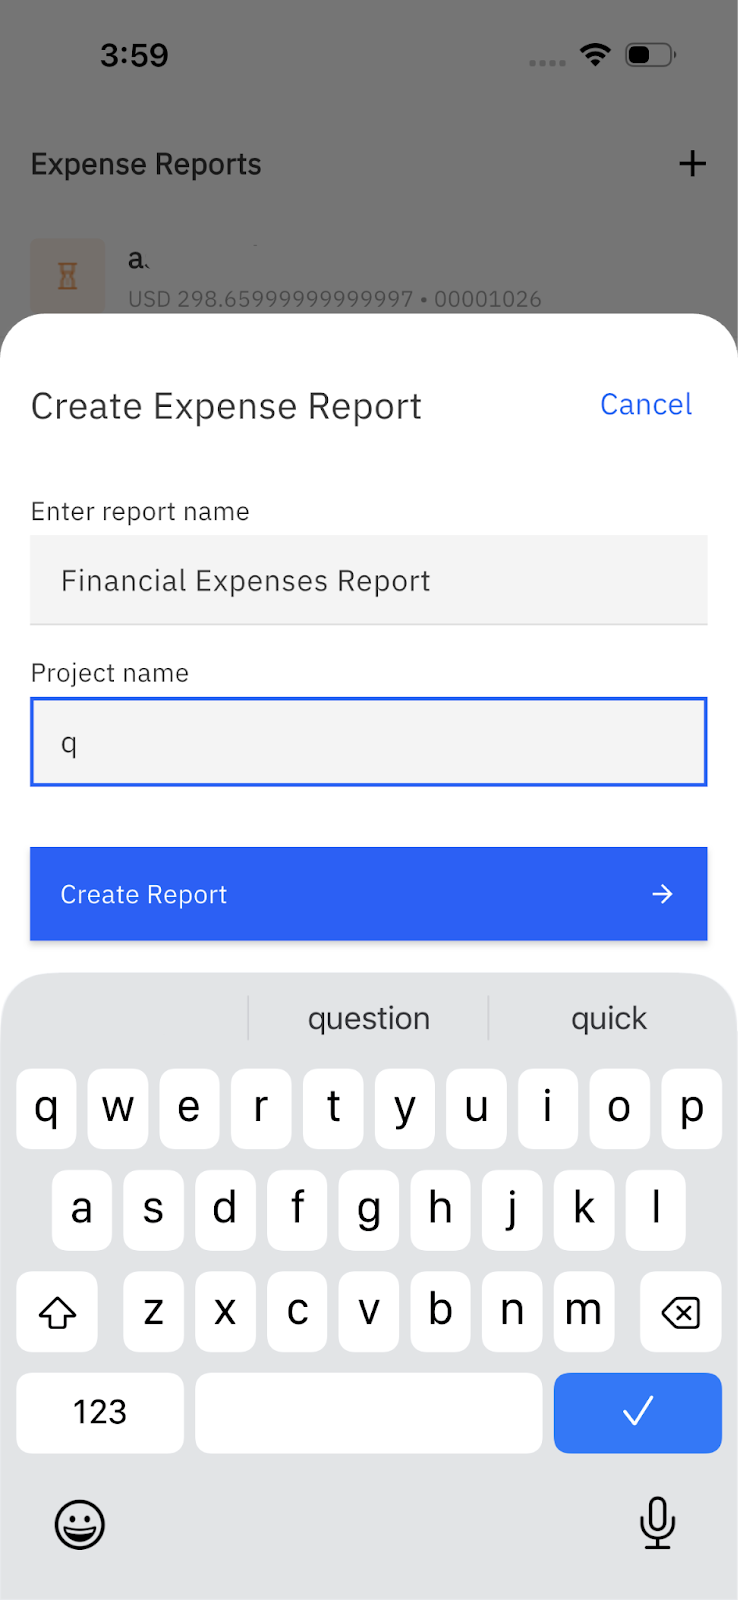
After clicking Create New Expense Report (or +), a new panel opens up
Enter a Report Name.
Select the Project the report belongs to.
Tap Create Report.
The new report appears in the Expense Reports list.
Adding Expenses to the Report
Tap on the report that was created.
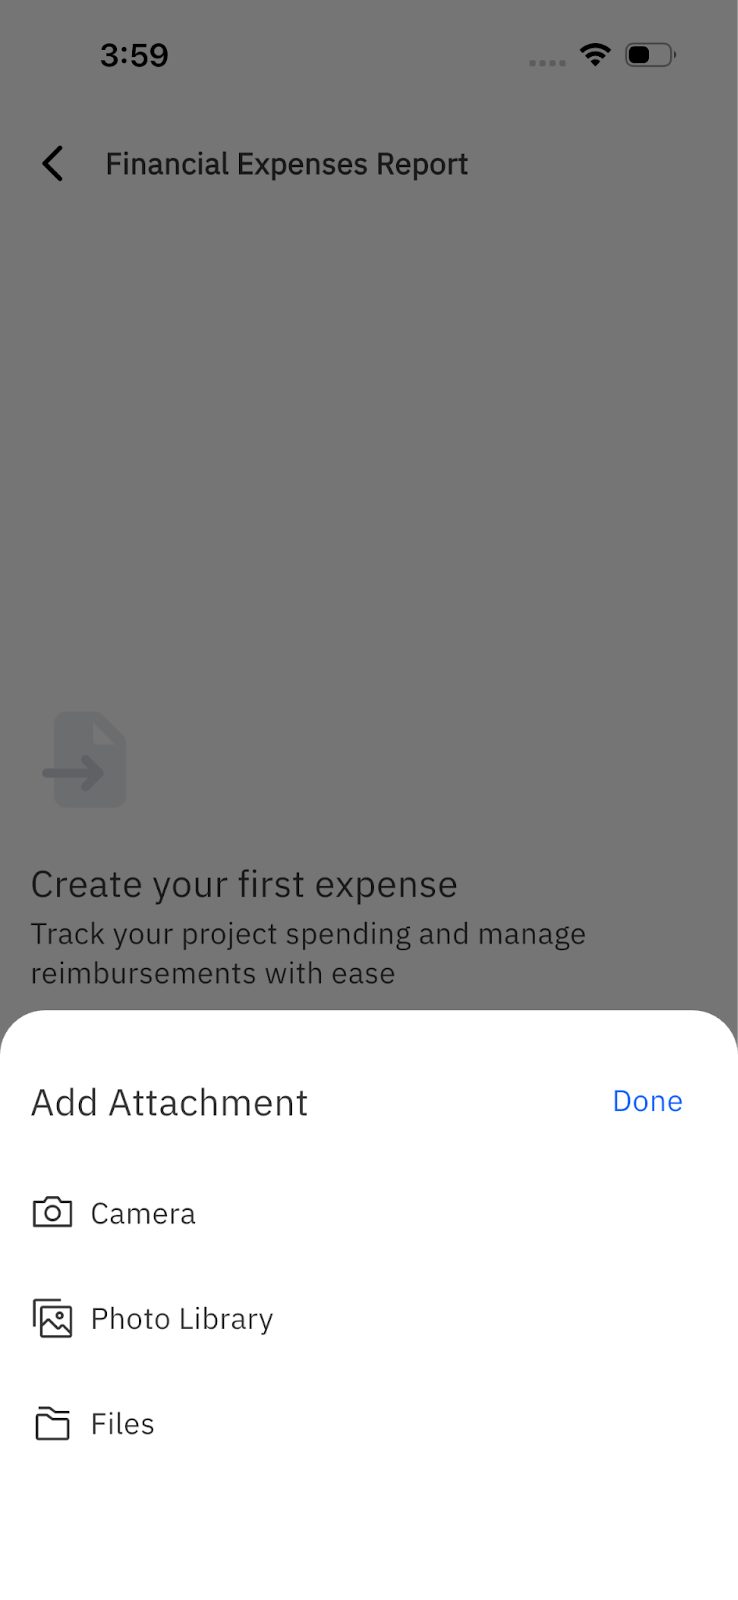
Select Create Expense.

The system then prompts the user to upload a required attachment, typically a receipt or invoice. AI is used to read the attachment and extract expense details.
Adding an Attachment
The user can upload an attachment by:
Taking a photo using Camera
Selecting an image from Photo Library
Uploading a file from Files (image or PDF)
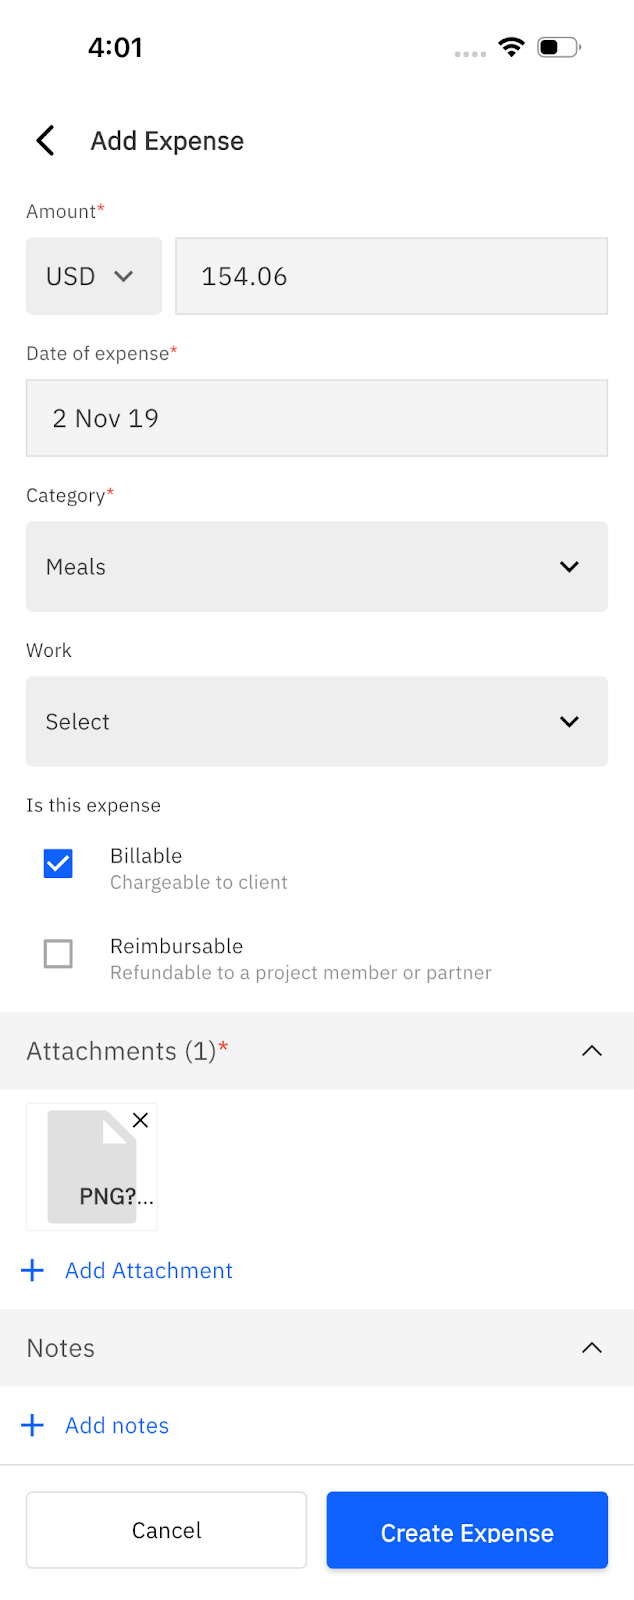
Once the file is uploaded, Rocketlane processes it and extracts details such as:
Expense amount
Expense date
These fields populate automatically. After extraction:
Fill out the necessary expense fields, including any custom fields configured in the Rocketlane workspace, and then tap Create Expense.
The user can see all fields they have access to based on the organisation's RBAC setting
Additional expenses can be added using the same steps.
Submitting the Expense Report
When all expenses are added:
Open the report.
Tap Submit.
The report is then routed to the appropriate approvers based on the expense approval workflow.

Withdrawing a Submitted Report
If changes are needed after submission but before approval or rejection:
Open the submitted report.
Tap Withdraw Submission on the bottom panel.
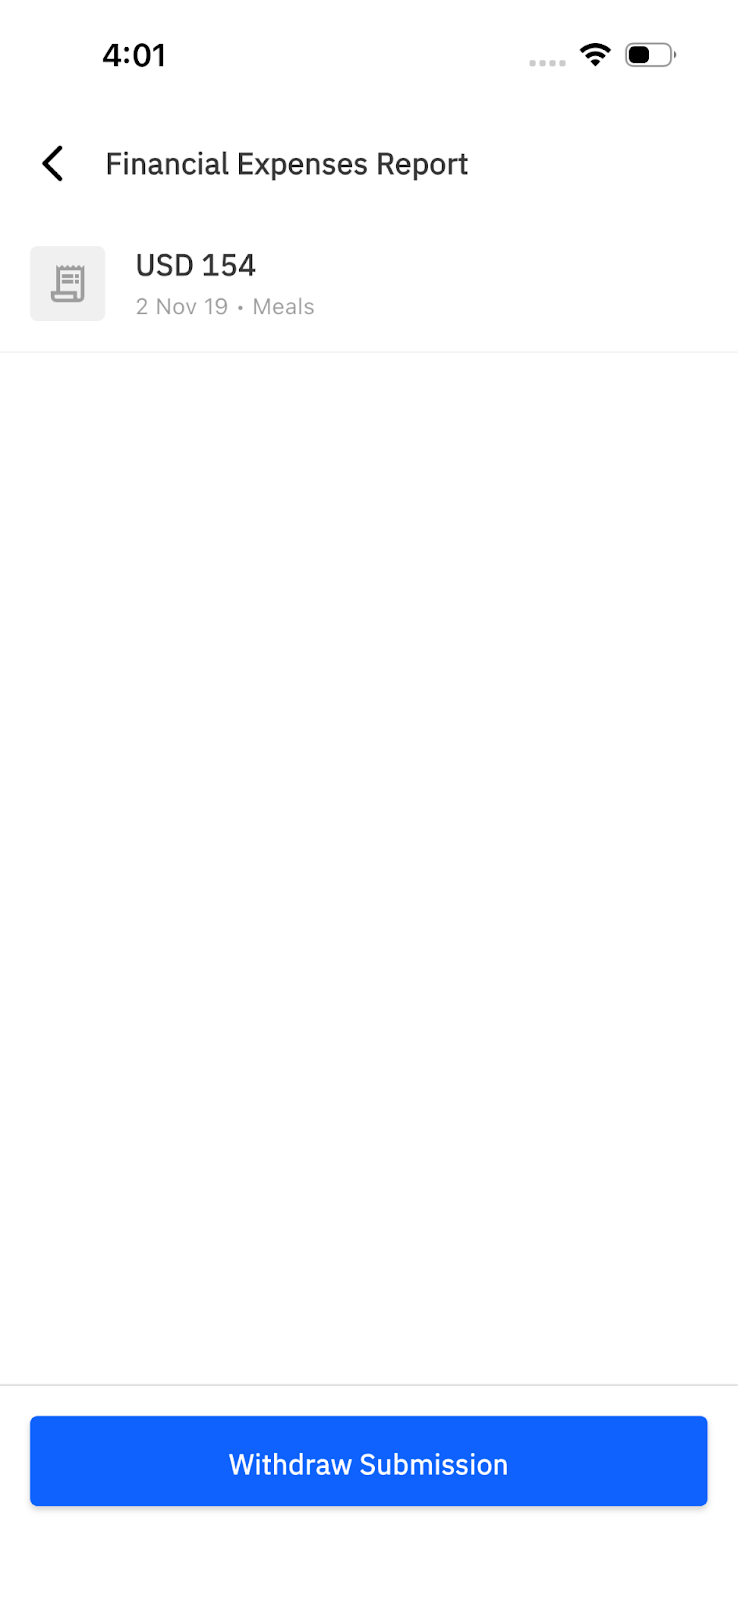
The user can then make updates and resubmit the report.
Notes:
The mobile app is designed for the convenience of employees to log expenses quickly. It is not a replacement for the desktop app.
The user can only see expenses for which they are the expense owner. Expenses submitted on behalf of someone else are not visible to the submitter in the mobile app.
The organization’s RBAC settings apply to expenses in the mobile app as well. The user will only see and act on fields and actions they are permitted to access.
The user can add expenses and submit expense reports from the mobile app.
Expense fields in the mobile app mirror the configuration on the desktop app. Any custom fields or layout defined in the workspace are reflected here.
For the most complete experience, including approvals and advanced finance workflows, it is recommended that the user use the desktop app.
If notifications aren't appearing in the app, please update to the latest version.